For hydro dipping shoes, it is best to use acrylic paint. Acrylic paint provides vibrant colors and adheres well to different materials, making it ideal for this technique.
Hydro dipping, also known as water transfer printing, is a popular method for customizing shoes. It involves immersing the shoe in water with a layer of paint on its surface, creating a unique and eye-catching design. To achieve the best results, it is recommended to use acrylic paint specifically formulated for hydro dipping.
Acrylic paint offers excellent coverage, vibrant colors, and good adhesion to various shoe materials, ensuring a long-lasting and professional finish. By using the right paint, you can transform your shoes into one-of-a-kind pieces of wearable art.
Credit: www.youtube.com
Contents
Introduction To Hydro Dipping Shoes
Hydro dipping, also known as water transfer printing or immersion printing, is a unique method of applying printed designs to three-dimensional objects. This technique involves using water to transfer a pattern or design onto an item’s surface, creating a visually striking and durable finish. When it comes to customizing footwear, hydro dipping offers an innovative way to transform ordinary shoes into vibrant, one-of-a-kind creations.
What Is Hydro Dipping?
Hydro dipping is a process that utilizes water to apply intricate patterns or designs to various objects, including shoes. The item to be decorated is first coated with a base color, and then a specialized film with the desired pattern is carefully placed on the water’s surface. The film dissolves and leaves the ink floating on the water. The shoe is then carefully dipped into the water, allowing the ink to adhere to its surface. This method creates a seamless and vibrant finish that can be personalized to suit individual preferences.
Why Choose Hydro Dipping For Shoes?
Hydro dipping offers several advantages when it comes to customizing shoes. The process allows for intricate and detailed designs to be applied to footwear, resulting in a visually stunning and unique appearance. Additionally, hydro dipping provides a durable and long-lasting finish, making it ideal for shoes that are subjected to regular wear and tear. This method also offers endless possibilities for customization, allowing individuals to express their personal style and creativity through their footwear.
Types Of Paints For Hydro Dipping
When it comes to hydro dipping shoes, the type of paint you use plays a crucial role in achieving the desired results. With so many different types of paints available in the market, it can be confusing to choose the right one. In this post, we will discuss the different types of paints for hydro dipping shoes, their pros and cons, and which one is best suited for your needs.
Acrylic Paints
Acrylic paints are water-based and easy to work with. They come in a wide range of colors and finishes, making them a popular choice for hydro dipping shoes. They dry quickly and are suitable for both indoor and outdoor use. Another advantage of acrylic paints is that they are non-toxic and safe to use. However, they may not adhere well to certain surfaces and may require a primer before application.
Spray Paints
Spray paints are a convenient option for hydro dipping shoes as they are easy to apply and provide even coverage. They come in a variety of colors and finishes and dry quickly. However, spray paints may not provide the same level of control as other types of paints and may result in overspray if not used carefully. They may also contain harmful chemicals and require proper ventilation during application.
Oil-based Paints
Oil-based paints are known for their durability and resistance to wear and tear. They are suitable for use on a variety of surfaces, including leather and plastic. However, oil-based paints require a longer drying time and emit strong fumes during application, making them unsuitable for indoor use. They also require solvents for cleanup and may be more difficult to work with compared to other types of paints.
Choosing the right type of paint for hydro dipping shoes depends on your personal preferences, the surface you are working with, and the desired outcome. Consider the pros and cons of each type of paint and choose the one that best suits your needs.
Choosing The Right Paint
When it comes to hydro dipping shoes, choosing the right paint is crucial for achieving the best results. The paint you select will determine the durability, vibrancy, and adhesion of the design on the shoes. To ensure a successful hydro dipping project, consider the following factors when choosing the paint for your shoes.
Factors To Consider
- Adhesion: Look for paints specifically designed for use on the material of your shoes, such as leather, canvas, or synthetic materials, to ensure proper adhesion.
- Flexibility: Opt for paints that are flexible and can withstand the bending and movement of the shoes without cracking or peeling.
- Color Vibrancy: Choose paints that offer high color vibrancy and opacity to ensure the design pops and stands out on the shoes.
- Water Resistance: Consider paints that provide water resistance to protect the design from moisture and the elements.
Comparing Paint Types For Best Results
When comparing paint types for hydro dipping shoes, it’s essential to evaluate the characteristics of each option to determine the most suitable choice for your project. Here’s a comparison of common paint types used for hydro dipping:
| Paint Type | Advantages | Considerations |
|---|---|---|
| Airbrush Paints | Offers precise application and control over details | May require additional sealing for durability |
| Acrylic Paints | Provides a wide range of colors and finishes | May need multiple layers for optimal coverage |
| Leather Paints | Formulated specifically for leather materials | Limited color options compared to other paint types |
| Fabric Paints | Designed to adhere to fabric and flexible materials | May require heat setting for durability |
Preparation For Hydro Dipping
Welcome to the exciting world of hydro dipping shoes! Proper preparation is crucial for a successful hydro dipping project. In this section, we’ll cover the materials needed, how to prepare the shoes, and safety measures to ensure a smooth and safe hydro dipping process.
Materials Needed
Before you begin the preparation process, gather the following materials:
- Pair of shoes to be hydro dipped
- Soap and water for cleaning
- Painter’s tape to mask off areas
- Plastic gloves to protect your hands
- Respirator mask for safety
- Hydro dipping paint and activator
- Large container for water dipping
Preparing The Shoes
To prepare the shoes for hydro dipping, follow these steps:
- Clean the Shoes: Thoroughly clean the shoes with soap and water to remove any dirt, oils, or residues that may interfere with the adhesion of the hydro dipping paint.
- Mask Off Areas: Use painter’s tape to mask off any areas of the shoes that you do not want to be hydro dipped. This will help create clean and defined patterns.
- Priming (Optional): If the shoes are made of materials like plastic or metal, consider applying a primer to enhance the paint adhesion.
Safety Measures
When engaging in hydro dipping, it’s important to prioritize safety. Take the following safety measures:
- Wear plastic gloves to protect your skin from the hydro dipping paint and activator.
- Utilize a respirator mask to avoid inhaling fumes from the hydro dipping paint and activator.
- Work in a well-ventilated area to minimize exposure to fumes and ensure proper air circulation.
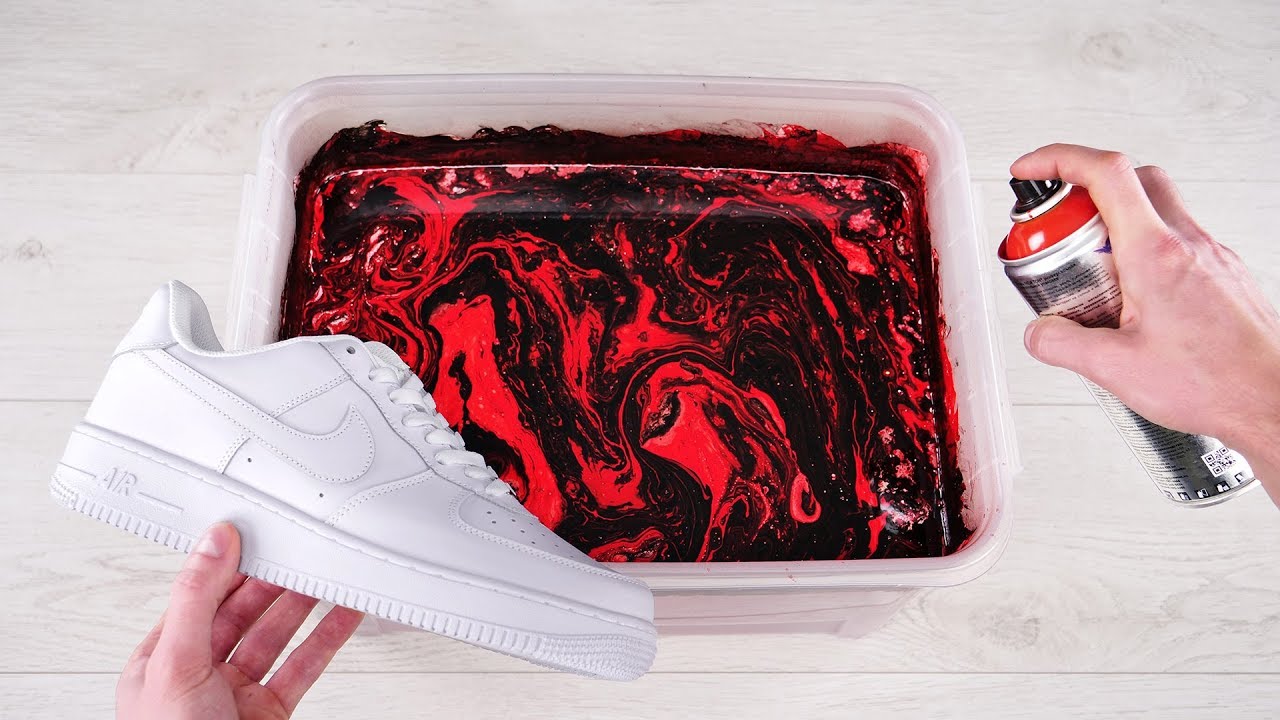
Step-by-step Guide To Hydro Dipping
For hydro dipping shoes, it’s best to use acrylic spray paint. Apply a base coat and let it dry, then spray your desired colors onto the surface of the water and dip your shoes. Once dry, finish with a clear coat for protection.
Hydro dipping shoes is a fun and creative way to give your old sneakers a new life. But before you start, it’s important to know what type of paint to use. In this guide, we’ll take you through the step-by-step process of hydro dipping shoes, including creating the design, the dipping process, and drying and sealing.Creating The Design
The first step in hydro dipping shoes is to create your design. You can use stencils or freehand your design using markers or paint. It’s important to use waterproof markers or paint that won’t bleed when submerged in water. Once you have your design, you’ll need to transfer it onto the shoes. You can use tape or a transfer paper to do this.Dipping Process
Once your design is in place, it’s time to start the dipping process. Fill a container with water and add your paint. It’s important to use a paint specifically designed for hydro dipping, as regular paint won’t adhere to the shoes. Slowly lower the shoes into the water, making sure to fully submerge them. Swirl the paint around the surface of the water to create a marbled effect. Once you’re happy with the design, carefully remove the shoes from the water.Drying And Sealing
After you’ve finished the dipping process, it’s time to let the shoes dry. This can take anywhere from a few hours to overnight, depending on the type of paint you’ve used. Once the shoes are fully dry, it’s important to seal them to protect the design. You can use a clear coat spray or a waterproof sealant. Make sure to follow the manufacturer’s instructions for best results. In conclusion, hydro dipping shoes is a fun and creative way to give your old sneakers a new life. By following this step-by-step guide, you can create a unique and personalized design that will make your shoes stand out from the crowd. Just remember to use the right type of paint, take your time with the dipping process, and seal the shoes properly to protect the design.Tips For Successful Hydro Dipping
When it comes to hydro dipping shoes, choosing the right type of paint is crucial for achieving stunning results. To ensure successful hydro dipping, here are some essential tips that you should keep in mind:
Achieving Even Patterns
To achieve even patterns on your hydro dipped shoes, it’s essential to use a high-quality paint specifically designed for hydro dipping. Look for paints that are thick and highly pigmented to ensure vibrant and consistent coverage. Additionally, using a hydrographic activator that is compatible with your chosen paint is crucial for achieving crisp and clear patterns. Before dipping, make sure to stir the paint thoroughly to ensure a smooth and uniform consistency.
Avoiding Common Mistakes
To avoid common mistakes during the hydro dipping process, it’s important to properly prepare the shoes by thoroughly cleaning and priming them. This helps the paint adhere better and results in a more durable finish. When dipping, ensure that the water temperature is optimal for the type of paint being used, as this can affect the adhesion and pattern transfer. Carefully submerge the shoes at a consistent speed and angle to prevent air bubbles and ensure an even application of the paint.
Post-dipping Care
After hydro dipping the shoes, it’s crucial to allow them to dry thoroughly before handling or applying a protective clear coat. This helps prevent smudging or smearing of the patterns. Once dry, apply a quality sealant or clear coat specifically formulated for the type of paint used to protect the design and enhance durability. Proper post-dipping care will ensure that your hydro dipped shoes maintain their vibrant appearance for a long time.
Advanced Techniques And Ideas
When it comes to hydro dipping shoes, there are advanced techniques and ideas that can take your custom designs to the next level. These methods allow for more intricate and eye-catching patterns, ensuring that your hydro dipped shoes stand out from the crowd.
Mixing Paints For Unique Effects
Mixing different colors of paint opens up a world of possibilities for creating truly unique and visually stunning designs. By blending complementary colors or experimenting with different ratios, you can achieve mesmerizing effects that add depth and dimension to your hydro dipped shoes. This advanced technique allows for a customized color palette that reflects your personal style and creativity.
Multiple Dips For Complexity
Conducting multiple dips in various colors can add complexity and richness to your hydro dipped shoes. This technique involves layering different patterns and colors, creating a mesmerizing visual depth. By carefully planning the order of dips and the placement of each design element, you can achieve a truly multifaceted and captivating look.
Incorporating Stencils
Integrating stencils into the hydro dipping process allows for precise and intricate designs. Whether you opt for geometric patterns, floral motifs, or intricate shapes, stencils provide a level of detail and precision that can elevate your hydro dipped shoes to a work of art. With the use of stencils, you can achieve sharp and defined outlines, adding a professional touch to your custom designs.

Credit: www.iammommylhey.com

Credit: www.wikihow.com
Frequently Asked Questions
What Type Of Paint Is Best For Hydro Dipping Shoes?
For hydro dipping shoes, it’s best to use acrylic spray paint as it adheres well to various materials and provides vibrant colors. Ensure to use a primer for better adhesion, and finish with a clear coat for protection and shine.
Can You Use Regular Spray Paint For Hydro Dipping Shoes?
Regular spray paint can be used for hydro dipping shoes, but it’s important to ensure that it is suitable for the material of the shoes. Additionally, using a primer and clear coat can enhance the adhesion and durability of the paint.
Is It Necessary To Apply A Clear Coat After Hydro Dipping Shoes?
Applying a clear coat after hydro dipping shoes is highly recommended. It not only provides a glossy finish but also protects the design from scratches and fading. This additional layer adds durability and longevity to the painted shoes.
How Long Does The Paint Need To Dry After Hydro Dipping Shoes?
After hydro dipping shoes, allow the paint to dry for at least 24 hours before handling or wearing them. Ensure they are placed in a well-ventilated area to facilitate the drying process and prevent any smudging or damage to the design.
Conclusion
After reading this post, you should have a clear idea of what paint to use for hydro dipping shoes. It is important to choose the right type of paint to ensure that the design stays intact and vibrant. Remember to properly prepare the shoes and use a quality base coat before applying the hydrographic film.
With the right materials and techniques, you can create unique and personalized shoes that will turn heads wherever you go. Happy hydro dipping!