Spray painting walls is a fast and efficient way to achieve a smooth, professional finish. Whether you’re painting interior or exterior walls, using a paint sprayer can save you time and effort compared to traditional painting methods.
This guide will walk you through the entire process, from preparation to the final coat, ensuring you get the best results.
Contents
- Why Use a Paint Sprayer for Walls
- Types of Paint Sprayers for Walls
- Choosing the Right Paint for Spray Painting Walls
- Tools and Materials Needed
- How to Spray Paint Walls Step-by-Step
- Tips for a Professional Finish
- Common Mistakes to Avoid
- Spray Painting Interior vs. Exterior Walls
- Cleaning and Maintaining Your Paint Sprayer
- Frequently Asked Questions (FAQs)
- Conclusion
Why Use a Paint Sprayer for Walls
Faster Application
Spray painting covers large surfaces quickly, making it ideal for big rooms or exterior walls.
Smoother Finish
A paint sprayer provides an even, streak-free finish without brush marks or roller textures.
Efficient Coverage
Sprayers can reach corners, edges, and textured surfaces more effectively than rollers or brushes.
Types of Paint Sprayers for Walls
Airless Paint Sprayers
- Best for: Large surfaces, exterior walls, and thick paints.
- Features: Uses high pressure to spray paint without air.
- Pros: Fast and suitable for heavy-duty projects.
- Cons: Overspray is common, so masking is essential.
HVLP (High-Volume, Low-Pressure) Sprayers
- Best for: Interior walls and detailed work.
- Features: Produces a fine spray with minimal overspray.
- Pros: Great for beginners and detailed areas.
- Cons: Slower than airless sprayers.
Compressed Air Sprayers
- Best for: Small projects or furniture.
- Features: Uses air pressure to atomize paint.
- Pros: Affordable and easy to use.
- Cons: Not ideal for large surfaces.
Choosing the Right Paint for Spray Painting Walls
Latex Paint
- Best for: Interior and exterior walls.
- Pros: Durable, quick-drying, and easy to clean.
- Tip: Thin latex paint with water if using HVLP sprayers.
Acrylic Paint
- Best for: Interior walls.
- Pros: Vibrant colors and flexible finish.
- Tip: Use a paint conditioner for a smoother finish.
Oil-Based Paint
- Best for: Exterior walls or high-traffic areas.
- Pros: Durable and water-resistant.
- Cons: Longer drying time and strong odor.
Tools and Materials Needed
- Paint sprayer (airless or HVLP)
- Paint (latex, acrylic, or oil-based)
- Painter’s tape
- Drop cloths or plastic sheeting
- Sandpaper or sanding block
- Paint filters (to prevent clogs)
- Respirator mask
- Safety goggles and gloves
- Paint thinner or water (for cleaning)
- Ladder (for high areas)
How to Spray Paint Walls Step-by-Step
Step 1: Prepare the Room
- Remove Furniture: Clear the room or cover furniture with plastic sheets.
- Cover Floors and Windows: Use drop cloths and painter’s tape to protect surfaces.
- Tape Off Areas: Secure edges of windows, doors, and trim with painter’s tape.
- Ventilate the Room: Open windows or use fans to ensure proper airflow.
Step 2: Clean and Repair the Walls
- Wash Walls: Use a damp sponge and mild detergent to remove dirt and grease.
- Fill Holes and Cracks: Use spackle or joint compound to repair imperfections.
- Sand the Surface: Smooth out rough patches and create an even texture.
Step 3: Prime the Walls
- Why Prime: Primer ensures better paint adhesion and a uniform finish.
- Apply with Sprayer: Use a thin, even coat of primer with your paint sprayer.
- Let It Dry: Allow the primer to dry completely before painting.
Step 4: Set Up the Paint Sprayer
- Thin the Paint: Follow the manufacturer’s instructions for paint thinning.
- Test the Sprayer: Practice on a piece of cardboard to adjust the spray pattern.
- Adjust the Nozzle: Set the nozzle for a horizontal or vertical spray pattern based on your painting direction.
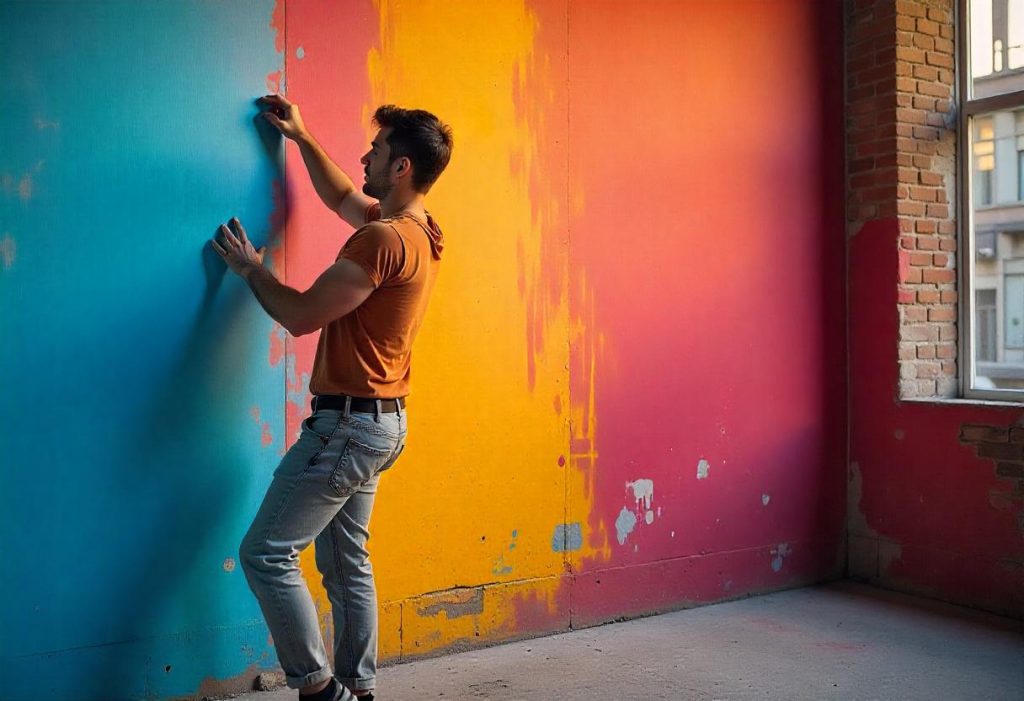
Step 5: Start Spray Painting
Technique for Spray Painting Walls
- Hold the Sprayer Correctly: Keep the nozzle 10-12 inches from the wall.
- Move Smoothly: Use steady, overlapping strokes (about 50% overlap).
- Keep a Consistent Distance: Maintain the same distance to avoid uneven coverage.
- Work in Sections: Divide large walls into sections and paint one at a time.
Step 6: Apply Multiple Coats
- Let Each Coat Dry: Follow the paint manufacturer’s recommended drying time.
- Light Coats Work Best: Several thin coats create a smoother finish than one thick coat.
Step 7: Clean Up Properly
- Clean the Sprayer: Flush the sprayer with water (for water-based paints) or paint thinner (for oil-based paints).
- Remove Tape Carefully: Peel off painter’s tape while the paint is slightly wet to avoid chipping.
- Dispose of Materials Properly: Follow local regulations for paint disposal.
Tips for a Professional Finish
- Avoid Overspray: Always tape off areas and use drop cloths.
- Maintain Consistent Speed: Don’t rush or linger on one spot.
- Use Proper Lighting: Good lighting helps spot missed areas or uneven coverage.
- Practice First: If you’re new to spray painting, practice on a small surface.
Common Mistakes to Avoid
- Holding the Sprayer Too Close: Can cause drips and uneven coverage.
- Using Too Much Paint at Once: Leads to runs and pooling.
- Skipping Primer: Reduces paint adhesion and finish quality.
- Neglecting Safety Gear: Always wear a mask, goggles, and gloves.
Spray Painting Interior vs. Exterior Walls
Interior Walls
- Use HVLP or Airless Sprayers: For better control and less overspray.
- Focus on Ventilation: Open windows and use fans to reduce fumes.
- Cover Everything: Protect floors, windows, and furniture thoroughly.
Exterior Walls
- Choose an Airless Sprayer: Ideal for large, textured surfaces.
- Check the Weather: Spray paint in mild, dry conditions.
- Use Exterior Paint: It’s more durable and weather-resistant.
Cleaning and Maintaining Your Paint Sprayer
- Clean After Each Use: Prevents clogs and extends the sprayer’s life.
- Use the Right Cleaning Agent: Water for latex paint, thinner for oil-based.
- Inspect Regularly: Check for damaged parts or clogged nozzles.
- Store Properly: Keep in a dry, cool place.
Frequently Asked Questions (FAQs)
Can You Spray Paint Walls Without Taping?
Taping is highly recommended to protect surfaces and create clean lines.
How Long Does Spray Paint Take to Dry on Walls?
Typically 1-2 hours for touch-dry, but wait 24 hours before heavy use.
Is It Cheaper to Spray or Roll Paint?
Spraying uses more paint but is faster. Rolling uses less paint but takes more time.
Can You Spray Paint Over Old Paint?
Yes, but ensure the surface is clean and primed for best results.
Conclusion
Spray painting walls is a quick and efficient way to achieve a smooth, professional finish. With the right preparation, tools, and techniques, you can transform your walls and elevate your space.
Whether you’re tackling an indoor room or an outdoor facade, following this guide will help you spray paint like a pro. So, gear up and start your next painting project with confidence!