Pearl painting, also known as pearlescent painting, is a technique used to create a unique, iridescent finish that catches and reflects light. This type of paint gives surfaces a shimmering, multi-tone appearance that changes depending on the angle and lighting. Pearl paint is often used on vehicles, furniture, crafts, and walls to achieve an eye-catching, elegant look.
In this comprehensive guide, we’ll cover the different ways to apply pearl paint, step-by-step instructions for various surfaces, and tips to ensure you achieve a professional-quality finish.
Contents
What Is Pearl Paint?
Pearl paint is a special kind of paint that contains pearlescent pigments, which reflect and refract light to create a soft, shimmering effect. Unlike metallic paints, which have a more glittery, shiny finish, pearl paints are subtler and can shift colors depending on the lighting and the angle at which you view them.
Types of Pearl Paint
Pearl paints come in different forms, which can be applied in various ways depending on your project:
- Pearl Base Coat: A paint that has pearlescent pigments mixed directly into the base.
- Pearl Top Coat: A clear or tinted topcoat with pearl pigments that adds the pearl effect after the base color is applied.
- Pearl Powder Additives: Powders that can be mixed into regular paints, allowing you to customize your pearl finish.
- Pearl Vinyl Wraps: An alternative to paint that allows you to apply a pearl finish via a self-adhesive wrap.
Materials Needed for Pearl Painting
Basic Materials
Before you begin, you’ll need to gather some essential materials to ensure a smooth and successful pearl painting process:
- Pearl paint (base or topcoat): Choose the right type based on the desired effect.
- Primer: Prepares the surface for the pearl coat.
- Base coat: A solid color base, typically a glossy or matte paint.
- Clear coat: Protects the pearl paint and adds durability.
- Pearl powder additives: Optional if you want to mix your own pearl colors.
- Sandpaper (400-600 grit): For prepping the surface.
- Microfiber cloths: To clean surfaces before and after painting.
- Spray gun or brushes: For applying the paint.
- Respirator mask and gloves: For safety when working with chemicals.
- Tack cloth: For removing dust before painting.
Step-by-Step Guide to Applying Pearl Paint
Let’s break down the process of pearl painting in easy-to-follow steps, depending on whether you’re painting a vehicle, furniture, or walls.
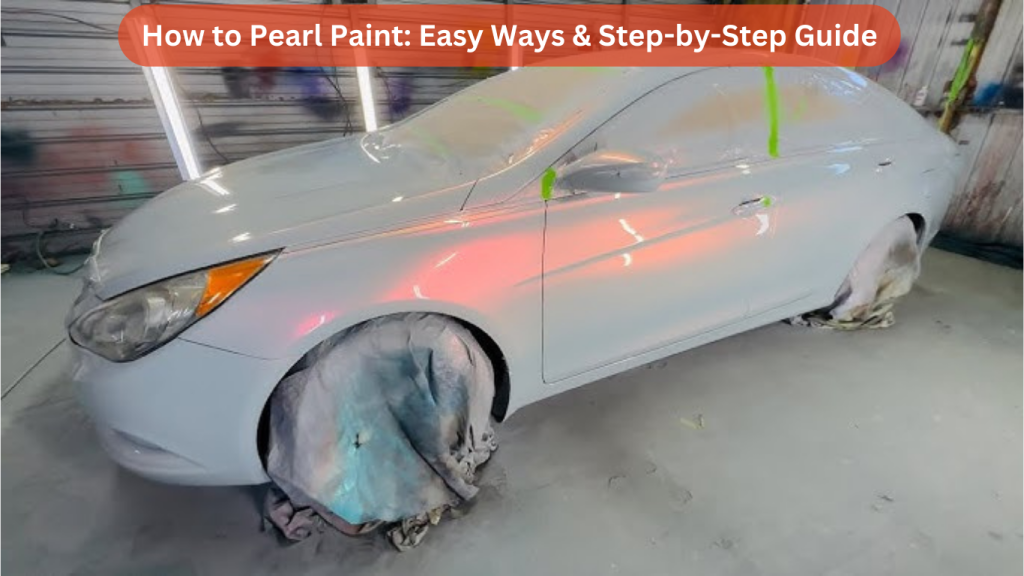
How to Pearl Paint a Vehicle
Pearl paints are often used on cars and motorcycles to achieve a custom, high-end finish. Here’s how to apply pearl paint on a vehicle:
Step 1: Prepare the Surface
- Wash the vehicle: Start by thoroughly cleaning the surface of the vehicle with soap and water to remove dirt and grease.
- Sand the surface: Use 400-600 grit sandpaper to sand the surface. This helps the primer and base coat adhere better.
- Apply primer: Once the surface is smooth and clean, apply a coat of primer. This step is crucial for proper adhesion of the base and pearl coat.
- Sand the primer: After the primer has dried, lightly sand it to remove imperfections and create an even surface.
Step 2: Apply the Base Coat
- Choose a base color: The base coat will greatly affect the final pearl effect, so choose a color that complements the pearl finish. White, black, or other solid colors work best.
- Apply the base coat: Use a spray gun to apply two or three even coats of the base paint, allowing each coat to dry completely.
- Sand between coats: Lightly sand between each layer to ensure a smooth finish.
Step 3: Apply the Pearl Coat
- Prepare the pearl paint: If using a pearl powder additive, mix it thoroughly into a clear or tinted topcoat. If you’re using a pre-mixed pearl paint, shake it well before applying.
- Apply the pearl coat: Using a spray gun, apply several thin layers of pearl paint. The more layers you apply, the more intense the pearlescent effect will be.
- Allow it to dry: Let the pearl coat dry between applications. Check for uniformity to ensure even coverage.
Step 4: Apply a Clear Coat
- Apply the clear coat: Once the pearl coat has dried, apply two or three layers of clear coat. This not only protects the pearl paint but also enhances its shine.
- Buff the surface: After the clear coat has dried completely, use a polishing compound to buff the surface to a high shine.
How to Pearl Paint Furniture
Pearl paint can also be used to give furniture a sophisticated, luxurious look. Follow these steps to achieve a beautiful pearlescent finish on wood, metal, or plastic furniture:
Step 1: Prepare the Furniture
- Clean the surface: Wipe down the furniture to remove any dust, dirt, or grease.
- Sand the surface: Use 400-600 grit sandpaper to sand the furniture. Make sure the surface is smooth before moving forward.
- Apply primer: Apply a primer that is compatible with the furniture material (wood, metal, or plastic).
- Let the primer dry: Allow the primer to dry fully before sanding it lightly for an even surface.
Step 2: Apply the Base Coat
- Choose a base color: For furniture, lighter colors like white or soft gray are popular choices for a pearl finish.
- Paint the base coat: Apply two coats of your chosen base color, allowing each coat to dry thoroughly.
- Sand between coats: Lightly sand between layers for a smooth finish.
Step 3: Apply the Pearl Coat
- Mix or choose the pearl paint: Either mix pearl powder into a clear coat or use a pre-mixed pearl paint.
- Apply the pearl coat: Use a brush, roller, or spray gun to apply an even layer of pearl paint to the furniture. Apply additional layers to achieve the desired effect.
- Allow it to dry: Let the paint dry completely before moving to the next step.
Step 4: Seal with a Clear Coat
- Apply a clear coat: Finish the project by applying a protective clear coat. This not only protects the pearl paint but also adds a nice sheen to the furniture.
- Buff if necessary: Buff the furniture for a polished look.
How to Pearl Paint Walls
Adding a pearl finish to walls is a great way to create a dramatic, elegant effect in a room. Here’s how to apply pearl paint to walls:
Step 1: Prepare the Walls
- Clean the walls: Use a damp cloth to wipe down the walls and remove any dust or debris.
- Sand the surface: Lightly sand the walls to create a smooth surface for the primer.
- Apply primer: Roll on a coat of primer suitable for walls. Allow it to dry fully.
Step 2: Apply the Base Coat
- Choose a base color: White, cream, or gray base coats work best for pearl walls. Choose a satin or semi-gloss finish for the base coat.
- Apply the base coat: Use a roller to apply two coats of base paint, allowing each to dry before applying the next.
- Smooth the surface: Sand lightly between coats to ensure a smooth and even finish.
Step 3: Apply the Pearl Coat
- Prepare the pearl paint: Mix pearl powder into a clear glaze or use a pre-made pearl wall paint.
- Apply the pearl glaze: Use a sponge or roller to apply the pearl glaze in even strokes. Work in small sections to avoid streaks.
- Build up layers: Apply additional layers of pearl paint as needed to achieve the desired effect.
Step 4: Final Touches
- Allow the walls to dry: Let the walls dry completely before touching or moving furniture against them.
- Buff the surface (optional): Buff the walls with a soft cloth for extra sheen.
Tips for Achieving the Best Pearl Paint Finish
Choose the Right Base Coat
The base coat color plays a significant role in the final appearance of the pearl paint. Lighter base coats tend to give a softer, more subtle effect, while darker base coats result in a more dramatic and intense pearl finish.
Apply Evenly
Pearl paints can be tricky to apply evenly. Using thin, even coats and a quality spray gun or brush will help avoid streaking or uneven coverage.
Layer Gradually
The pearlescent effect builds up with each layer. Start with a light coat, assess the effect, and add more layers until you reach the desired level of shimmer.
Protect Your Finish
Applying a clear coat is essential to protect the pearl paint and make it last longer, especially for high-traffic surfaces like cars or furniture.
FAQs
1. What surfaces can I pearl paint?
- You can pearl paint a variety of surfaces, including cars, furniture, walls, and even crafts like vases or picture frames.
2. Can I mix pearl powder into any paint?
- Pearl powders are typically mixed into clear coats or glazes, but some can be mixed into water-based or oil-based paints as well. Always follow the manufacturer’s instructions.
3. How long does pearl paint take to dry?
- Pearl paint generally dries within 24 hours, but the time may vary depending on the type of paint, temperature, and humidity.
4. Can I remove pearl paint once applied?
- Removing pearl paint can be difficult and may require sanding or stripping the surface, depending on the material and the number of layers applied.
Conclusion
Pearl painting is an excellent way to add a luxurious, iridescent finish to almost any surface. Whether you’re transforming your car, updating furniture, or adding a decorative touch to your walls, this guide provides the necessary steps to ensure a professional finish.
With the right tools, materials, and technique, you can master pearl painting and create stunning, shimmering surfaces that catch the eye and elevate your projects.