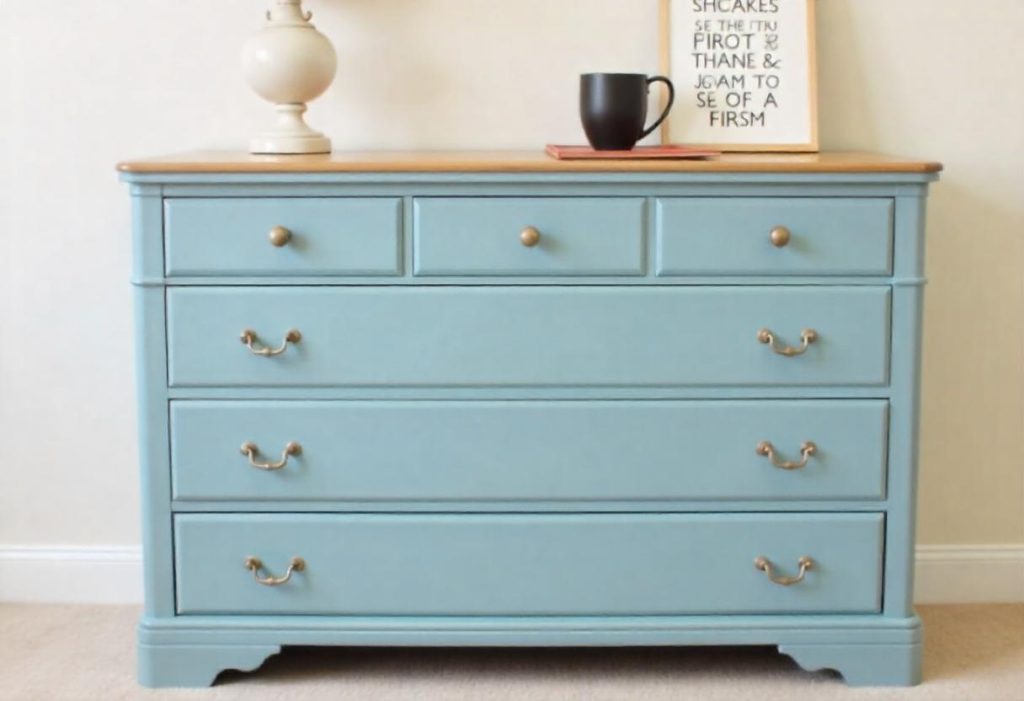
Painting furniture is a great way to refresh your home decor, breathe new life into old pieces, and showcase your creativity. Whether you’re a seasoned DIYer or a beginner, learning how to paint furniture can transform your space on a budget.

This guide will walk you through step-by-step methods, from preparation to finishing touches, ensuring your furniture looks professional and polished.
Contents
Why Paint Furniture?
Cost-Effective Makeover
Painting is much more affordable than buying new furniture, allowing you to customize pieces to match your style.
Creative Freedom
You can experiment with colors, finishes, and techniques, such as distressing or stenciling, to achieve a unique look.
Eco-Friendly
Repainting old furniture reduces waste and supports sustainability.
Tools and Materials
Essential Supplies
- Paint: Choose the type (latex, chalk, or milk paint) based on the desired finish.
- Primer: Helps the paint adhere better and prevents stains from bleeding through.
- Brushes and Rollers: Use high-quality brushes for detailed work and foam rollers for smooth surfaces.
- Sandpaper: Use various grits (80-220) for sanding and smoothing.
- Painter’s Tape: To protect areas you don’t want painted.
- Drop Cloth: To keep your workspace clean.
Optional Additions
- Topcoat: Protects the paint and adds durability.
- Degreaser or TSP Cleaner: For cleaning greasy or heavily soiled furniture.
- Putty Knife and Wood Filler: To fix any dents or holes.
Step-by-Step Guide to Painting Furniture
Step 1: Prepare Your Workspace
- Choose a well-ventilated area, such as a garage or outdoor space.
- Lay down a drop cloth to protect floors or surfaces.
Step 2: Clean the Furniture
- Wipe the furniture with a damp cloth to remove dust and dirt.
- For greasy or stained areas, use a degreaser or TSP cleaner.
- Let the furniture dry completely before moving to the next step.
Step 3: Sand the Surface
- Use coarse sandpaper (80-100 grit) to remove old paint or finish.
- Smooth the surface with finer sandpaper (220 grit).
- Wipe away sanding dust with a tack cloth or damp rag.
Step 4: Repair Any Imperfections
- Use wood filler to fill in cracks, holes, or dents.
- Let it dry, then sand the repaired areas until smooth.
Step 5: Apply Primer
- Apply a thin, even coat of primer to the furniture.
- Use a brush for detailed areas and a roller for flat surfaces.
- Let the primer dry according to the manufacturer’s instructions.
Step 6: Sand After Priming
- Lightly sand the primed surface with fine sandpaper (220 grit) to remove brush strokes or imperfections.
- Clean off the dust before painting.
Step 7: Paint the Furniture
Choosing the Right Paint
- Chalk Paint: Ideal for a matte, vintage look. No primer is needed for most surfaces.
- Milk Paint: Provides a natural, textured finish. Works well on wood.
- Latex Paint: Durable and widely available. Great for a smooth finish on modern pieces.
Painting Techniques
- Use a brush for corners, edges, and detailed areas.
- Apply paint with a foam roller on flat, large surfaces for a smooth finish.
- Paint in thin layers, allowing each coat to dry before applying the next.
- Most furniture pieces need 2-3 coats for full coverage.
Step 8: Add Special Effects (Optional)
Distressing
- Lightly sand the edges or corners of the furniture to achieve a worn, vintage look.
Stenciling
- Use stencils to add decorative patterns or designs. Secure the stencil with painter’s tape and apply paint using a sponge or stippling brush.
Color Blocking
- Use painter’s tape to create geometric patterns or contrasting color sections.
Step 9: Seal and Protect the Paint
Topcoat Options
- Polyurethane: Durable and water-resistant, great for high-use furniture.
- Furniture Wax: Adds a soft sheen and enhances chalk or milk paint finishes.
- Polycrylic: Dries clear and works well with light-colored paints.
Application
- Apply the topcoat with a clean brush or foam applicator.
- Let it dry completely before using the furniture.
Tips for Success
Test Paint Colors
- Paint a small, inconspicuous area first to see how the color looks when dry.
Avoid Common Mistakes
- Don’t skip sanding; it helps the paint adhere better.
- Avoid thick paint layers, as they can result in drips and uneven coverage.
Maintain Your Painted Furniture
- Clean the surface with a damp cloth. Avoid harsh cleaners that may damage the finish.
Inspiration for Painted Furniture
Color Ideas
- Neutral tones like white, gray, and beige for a classic look.
- Bold colors like teal, navy, or mustard yellow for a statement piece.
- Pastel shades for a soft, whimsical feel.
Popular Techniques
- Two-tone painting: Paint the base and top in different colors.
- Ombré effect: Gradually blend colors from light to dark.
Common Questions
Can I Paint Over Old Furniture Without Sanding?
Yes, if you use chalk paint or a bonding primer, you can skip sanding.
How Long Does Painted Furniture Take to Cure?
While paint may dry within hours, it can take 2-4 weeks to fully cure and harden.
What If My Paint Looks Streaky?
Ensure each layer dries completely before applying the next. Sand lightly between coats for a smoother finish.
Conclusion
Painting furniture is a rewarding DIY project that allows you to personalize your space while saving money. With the right tools, techniques, and a bit of patience, you can transform outdated pieces into stunning, custom furniture. Follow these easy steps, experiment with colors and finishes, and enjoy the satisfaction of your creative work.
