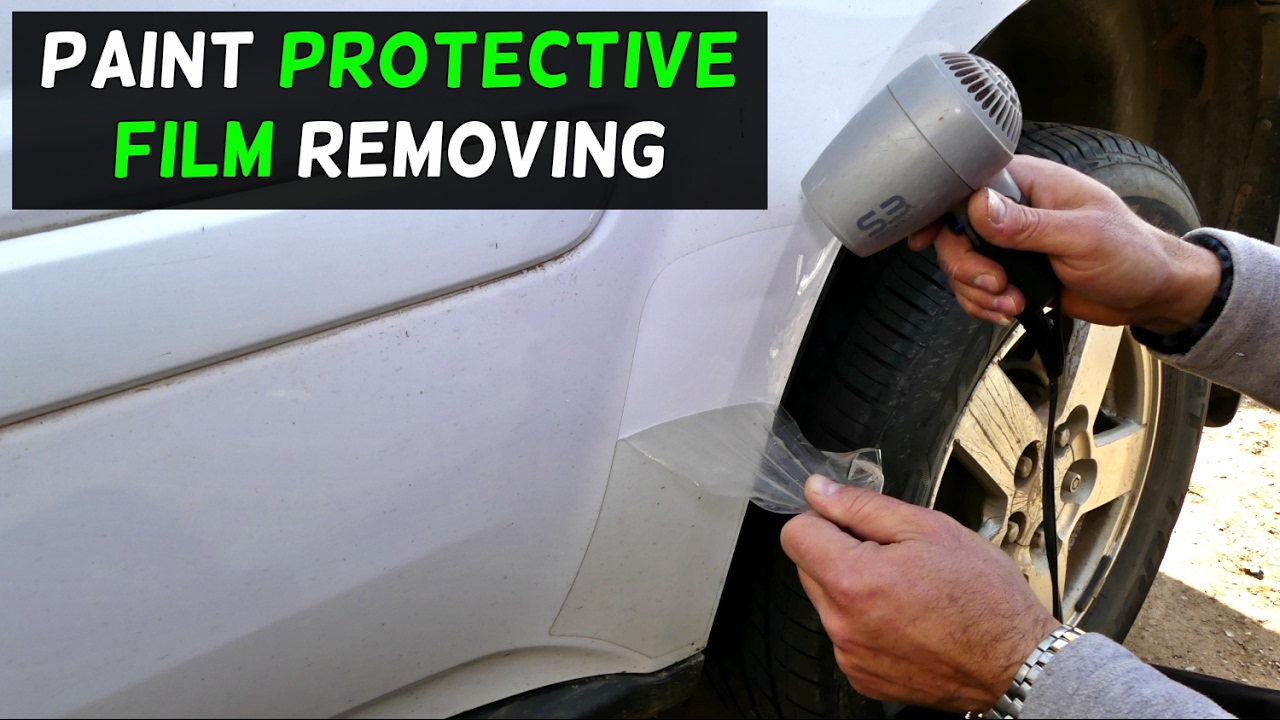
To remove paint protection film, use a heat gun or hair dryer to soften the film and then carefully peel it off with a plastic scraper. Removing the adhesive residue can be done using a mixture of warm water and dish soap or a specialized adhesive remover.
Paint protection film is an excellent investment for maintaining the exterior of your vehicle. It protects against scratches, stone chips, and other types of damage. However, there may come a time when you need to remove the film. This can be due to the film being damaged, outdated, or simply needing to be replaced.
Removing the film can be a daunting task, but with the right tools and techniques, it can be done with ease. We will discuss how to remove paint protection film from your vehicle without damaging the paint underneath.
Contents
- Introduction To Paint Protection Film
- Tools And Materials Needed
- Preparation Before Removal
- Heating The Film For Easier Removal
- Peeling Off The Film
- Dealing With Residue And Adhesive
- Finishing Touches
- Maintenance After Film Removal
- Pros And Cons Of Diy Removal
- Common Mistakes To Avoid
- Frequently Asked Questions
- Conclusion
Introduction To Paint Protection Film
Benefits Of Paint Protection Film
1. Protects the vehicle from scratches and chips.
2. Preserves the paint’s original shine and finish.
3. Offers UV protection to prevent paint fading.
4. Enhances the resale value of the vehicle.
Reasons For Removal
1. Wear and tear over time.
2. Damage caused by environmental factors.
3. Outdated or deteriorated film.
4. Desire to change the appearance of the vehicle.
Tools And Materials Needed
When it comes to removing paint protection film, having the right tools and materials is crucial for a successful and efficient process. In this section, we’ll discuss the essential tools and safety precautions you need to consider before embarking on this task.
List Of Essential Tools
Before starting the process of removing paint protection film, it’s essential to gather the necessary tools and materials to ensure a smooth and safe procedure. Here’s a list of the essential tools you will need:
- Heat gun or hair dryer
- Plastic razor blade or special adhesive removal tool
- Microfiber cloths
- Mild adhesive remover or isopropyl alcohol
- Plastic squeegee
- Clean water in a spray bottle
- Protective gloves
- Protective eyewear
Safety Precautions
When working with paint protection film, it’s important to prioritize safety. Here are some safety precautions to keep in mind:
- Ensure proper ventilation in the work area to avoid inhaling fumes from the adhesive remover.
- Wear protective gloves to shield your hands from potential cuts and chemical exposure.
- Use protective eyewear to protect your eyes from any debris or splashing during the removal process.
- Work in a well-lit area to have a clear view of the film and ensure precise removal.
Preparation Before Removal
Before you start removing the paint protection film, it is important to properly prepare the surface to ensure a smooth and successful removal process. Taking the time to clean the surface and assess the condition of the film will help you avoid any potential damage and achieve the best results. Here are the key steps to follow:
Cleaning The Surface
Begin by thoroughly cleaning the surface of the paint protection film. This will remove any dirt, grime, or debris that may have accumulated over time. Follow these steps to clean the surface effectively:
- Gently rinse the film with water to remove loose dirt and particles.
- Prepare a mixture of mild soap or automotive detergent with water.
- Using a soft sponge or microfiber cloth, apply the soapy solution to the film.
- Gently scrub the film in a circular motion, paying extra attention to any stubborn stains or spots.
- Rinse the film thoroughly with clean water to remove all traces of soap.
- Dry the surface using a clean, lint-free cloth or allow it to air dry completely.
Assessing The Condition Of The Film
After cleaning the surface, it’s important to assess the condition of the paint protection film. This will help you determine the best approach for removal and identify any potential challenges or issues. Here’s how to assess the condition of the film:
- Inspect the film for any signs of damage, such as scratches, peeling, or discoloration.
- Check if the film is lifting at the edges or if there are any air bubbles trapped underneath.
- Take note of the film’s age and how well it has held up over time.
- If the film is severely damaged or deteriorated, it may require professional removal.
- Consider the type of adhesive used to apply the film, as it can affect the removal process.
By thoroughly cleaning the surface and assessing the condition of the paint protection film, you are ensuring that the removal process goes smoothly and without causing any further damage. Taking these preparatory steps will set you up for success and help you achieve the best results.
Credit: www.youtube.com
Heating The Film For Easier Removal
Heating the film can make the process of removing paint protection film much easier. By gently warming the film with a heat gun or hairdryer, it becomes more pliable and can be peeled off without leaving residue or damaging the surface.
This technique is especially useful for older or stubborn film that may be difficult to remove otherwise.
Using A Heat Gun
If you’re wondering how to remove paint protection film effectively, using a heat gun is a popular method that can make the process much easier. Heating the film helps loosen its adhesive, allowing for smoother removal without damaging the underlying surface.
To use a heat gun, follow these simple steps:
- Start by setting the heat gun to a low or medium temperature. It’s important not to use high heat to avoid causing any damage to the paint or the film itself.
- Hold the heat gun about 6-8 inches away from the film, ensuring you maintain a constant and steady motion.
- Move the heat gun back and forth across the film, heating it evenly. Be careful not to concentrate the heat in one spot for too long, as it may cause the film to melt or warp.
- As the film heats up, you’ll notice it becoming more pliable and easier to lift. Use a plastic scraper or your fingers to gently peel off the film.
- If you encounter any stubborn areas, continue applying heat and carefully work the film off until it is completely removed.
Remember to wear protective gloves and goggles while using a heat gun to ensure your safety.
Alternative Heating Methods
If you don’t have a heat gun or prefer alternative methods, there are a few other ways to heat the paint protection film for easier removal:
- Using a hairdryer: Set your hairdryer to a medium heat setting and follow the same steps as using a heat gun. Keep the hairdryer at a safe distance and maintain constant motion.
- Using hot water: Boil a pot of water and carefully pour it over the film. Let the hot water sit for a few minutes to soften the adhesive. Then, use a plastic scraper or your fingers to peel off the film.
- Using a steamer: If you have a handheld steamer, you can use it to direct steam onto the film. The heat and moisture will help loosen the adhesive, making it easier to remove.
Remember to take precautions with any alternative heating method to avoid injury or damage to the surface.
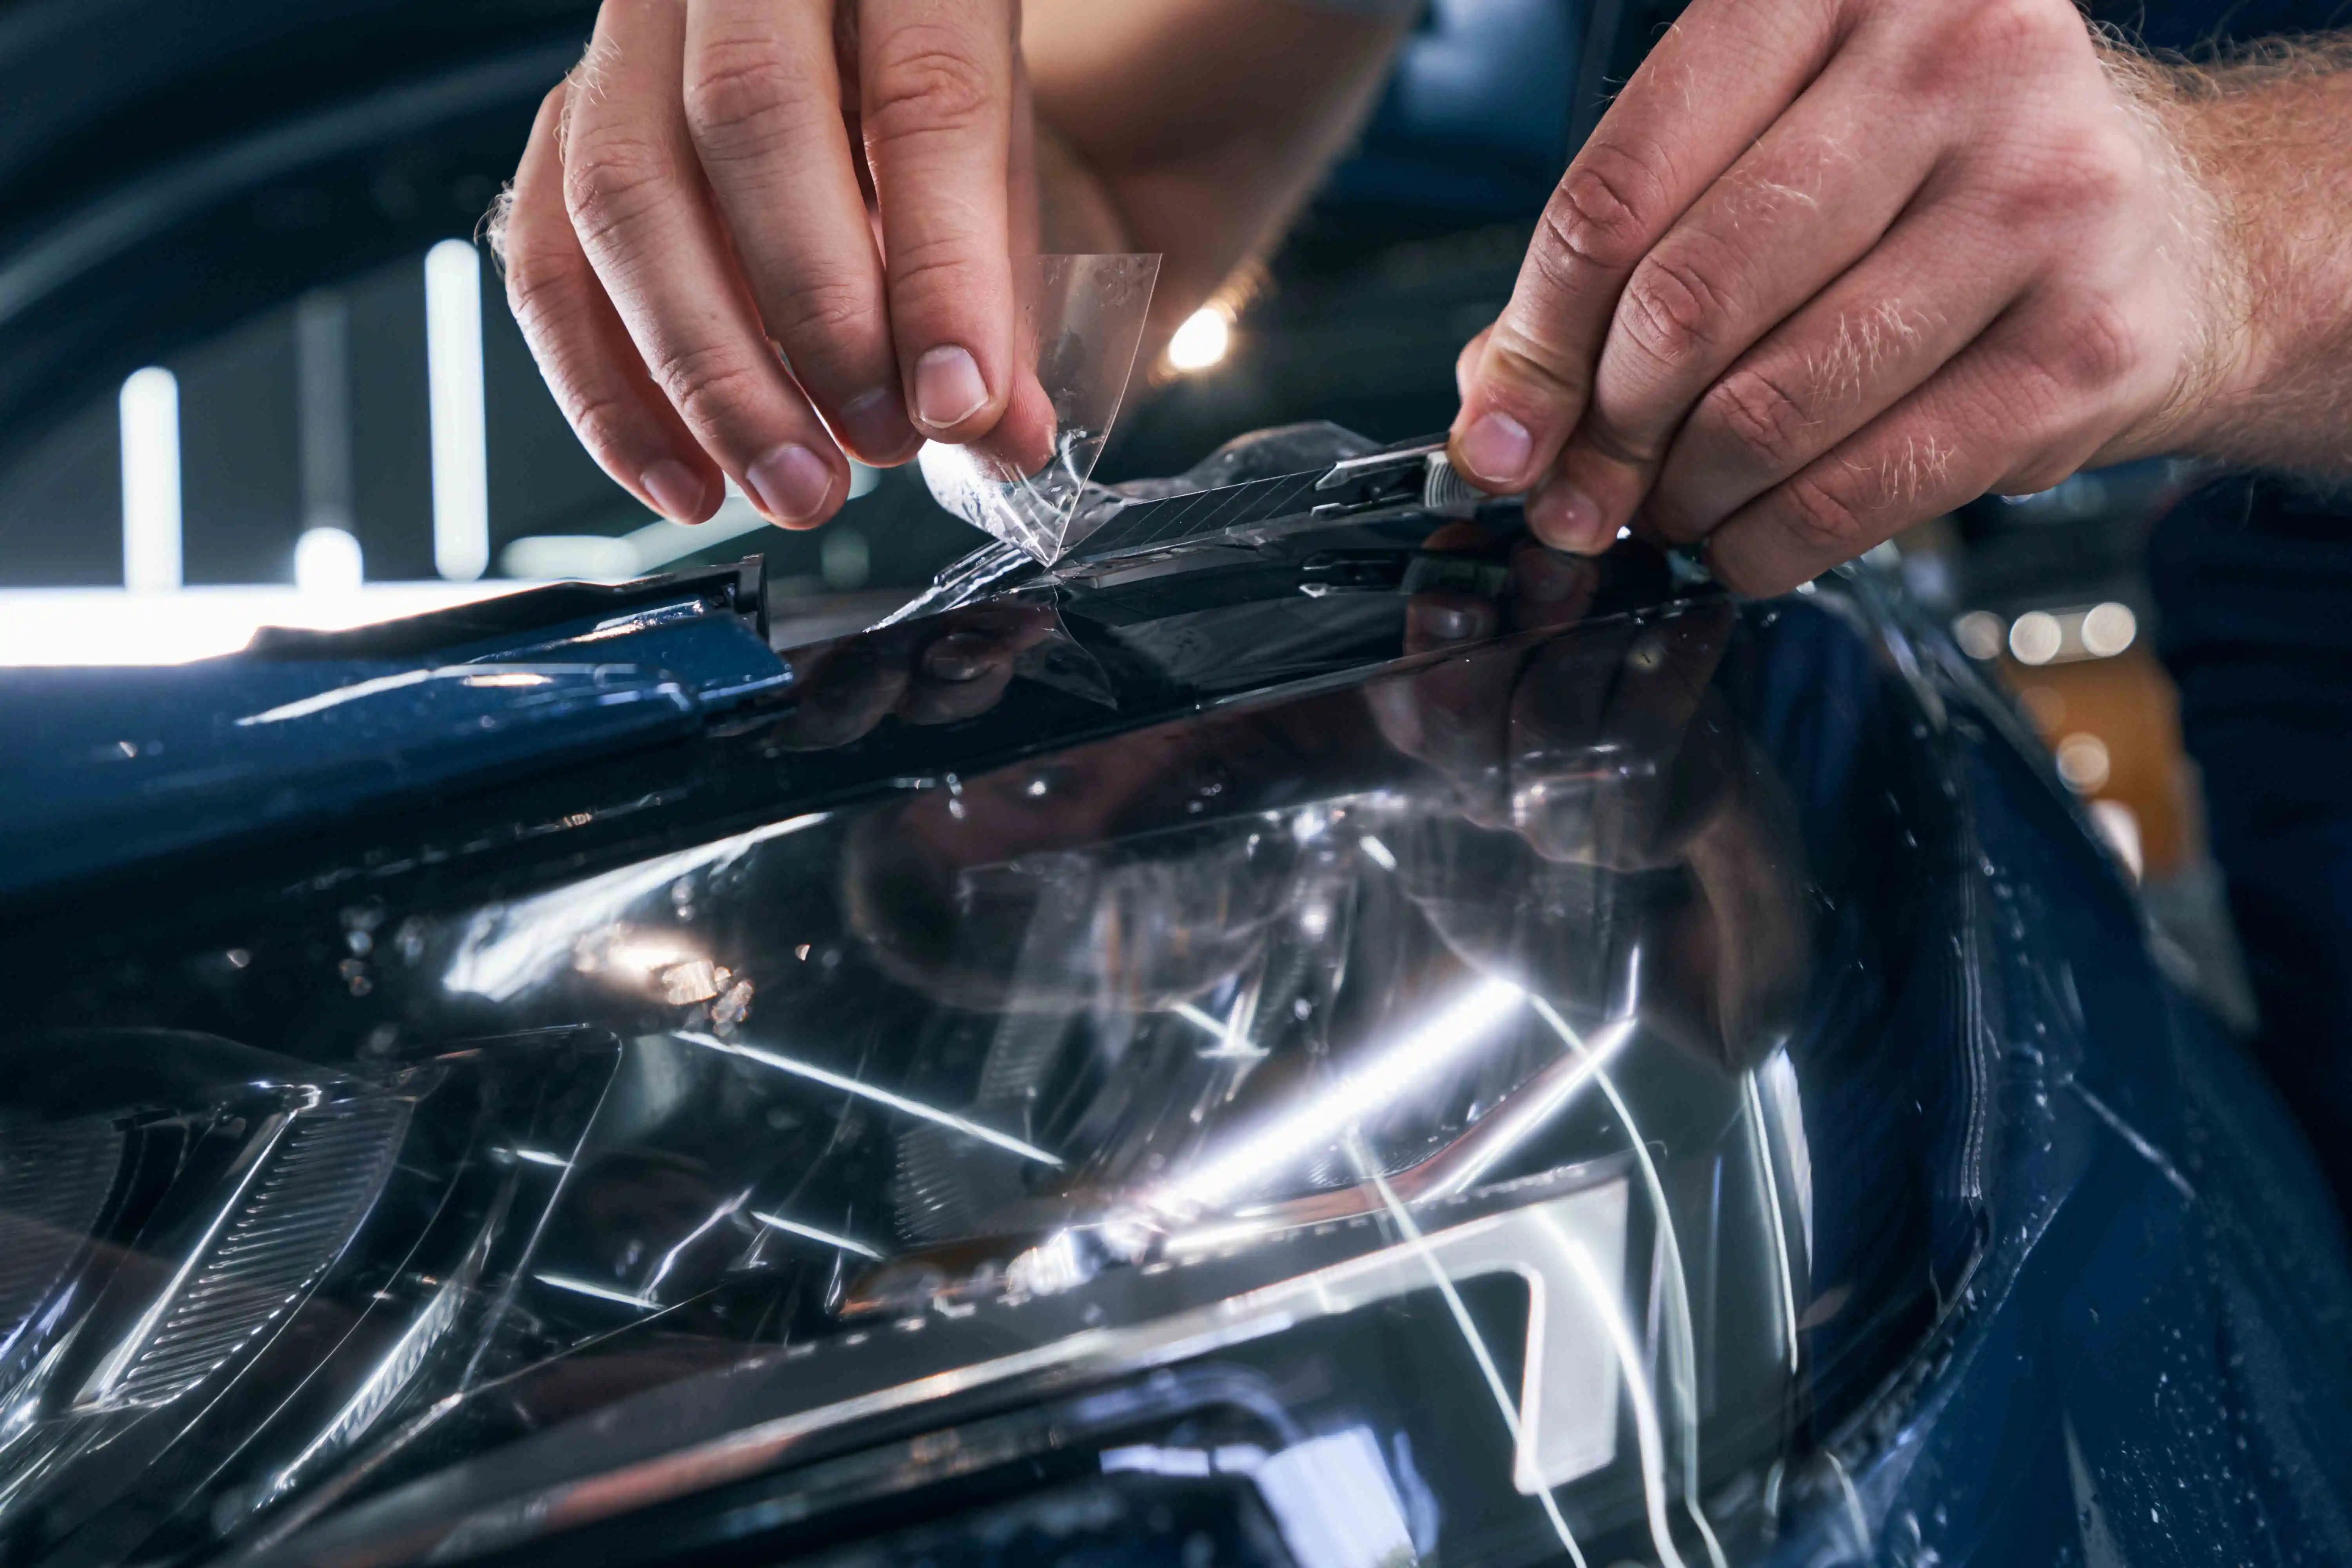
Peeling Off The Film
To remove paint protection film, start by peeling off the film from one corner using your fingernail or a plastic razor blade. Pull the film slowly and steadily, keeping it close to the surface to prevent tearing. Use a heat gun or hairdryer to warm the film and make it easier to remove without leaving residue.
Techniques For Peeling
Peeling off the paint protection film can be a tricky process, but with the right techniques, it can be done easily. Here are some tips for peeling off the film:- Start at a corner: Begin at one corner of the paint protection film and slowly peel it back at a 45-degree angle. This will help prevent the film from tearing or breaking.
- Use heat: Using a heat gun or a hairdryer can help soften the adhesive and make it easier to remove the film. Hold the heat source about 6 inches away from the film and move it back and forth over the area you want to remove.
- Use a plastic scraper: If the film is difficult to remove, use a plastic scraper to gently lift the film from the surface. Be careful not to scratch the surface underneath.
Troubleshooting Common Issues
Removing paint protection film can sometimes come with some challenges. Here are some common issues and how to troubleshoot them:| Issue | Troubleshooting |
|---|---|
| Film is not coming off easily | Use a heat gun or hairdryer to soften the adhesive. Use a plastic scraper to gently lift the film from the surface. |
| Film is tearing or breaking | Slow down and peel the film back at a 45-degree angle. Use a heat gun or hairdryer to soften the adhesive. Use a plastic scraper to lift the film from the surface. |
| Adhesive residue left on the surface | Use a solution of warm water and soap to remove the residue. Alternatively, use rubbing alcohol or adhesive remover. |
Credit: bravoprotectionmn.com
Dealing With Residue And Adhesive
Removing paint protection film can leave behind residue and adhesive that can be difficult to deal with. To remove it, use a heat gun or hair dryer to soften the adhesive, then carefully peel off the film. Any remaining residue can be removed with a residue remover or rubbing alcohol.
Dealing with Residue and Adhesive is one of the most challenging parts of removing paint protection film. Even after removing the film, the residue and adhesive left behind can be stubborn and difficult to remove. However, with the right tools and techniques, it is possible to get rid of them. In this section, we will discuss some effective methods for dealing with residue and adhesive that will help you achieve a clean and smooth surface.Choosing The Right Solvent
Choosing the right solvent is crucial for removing residue and adhesive effectively. Solvents like acetone, rubbing alcohol, and citrus-based cleaners are commonly used for this purpose. It is important to choose a solvent that is safe for the surface you are working on and does not damage it. Before using any solvent, make sure to test it on a small, inconspicuous area to ensure it does not cause any damage or discoloration.Application And Removal Tips
Here are some tips for applying and removing solvent:- Apply the solvent to the residue or adhesive using a soft cloth or sponge.
- Let the solvent sit for a few minutes to penetrate the residue or adhesive.
- Gently rub the residue or adhesive with the cloth or sponge, using a circular motion.
- Repeat the process until all the residue or adhesive is removed.
- Wipe the surface clean with a damp cloth to remove any remaining residue or solvent.
Finishing Touches
Removing paint protection film requires careful attention to detail to prevent damage to the underlying surface. Begin by heating the edges of the film with a heat gun or hair dryer, then use a plastic scraper to gradually peel it off.
Clean any adhesive residue with a mild solution of soap and water.
Polishing The Surface
After removing the paint protection film, it’s important to give the surface a thorough polish. This step will help restore the shine and eliminate any swirl marks or minor imperfections that may have occurred during the removal process.
When polishing the surface, it’s recommended to use a high-quality automotive polish and a soft microfiber cloth. Apply a small amount of polish onto the cloth and work it into the surface using circular motions. Be sure to cover the entire area where the paint protection film was previously applied.
Continue polishing until the surface is smooth and glossy. This will not only enhance the appearance of your vehicle but also ensure that the new paint protection film adheres properly.
Inspecting For Any Missed Spots
Once the surface has been polished, it’s crucial to inspect it carefully for any missed spots or remnants of the paint protection film. Even the smallest piece of film left behind can affect the overall look and performance of the new film.
To inspect for missed spots, use a bright flashlight and examine the surface from different angles. Look for any remaining film edges or adhesive residue that may have been overlooked during the removal process.
If you find any missed spots, gently remove them using a plastic scraper or your fingertips. Take extra care not to scratch or damage the surface while doing so. Once all the missed spots have been removed, proceed with the installation of the new paint protection film.
Remember, the finishing touches are just as important as the removal process itself. By polishing the surface and inspecting for any missed spots, you’ll ensure a flawless finish and optimal protection for your vehicle.
Maintenance After Film Removal
After removing the paint protection film, it’s essential to perform maintenance to keep the surface in top condition. Start by cleaning the area with a mild detergent and water, then use a microfiber cloth to dry it thoroughly. Finally, apply a quality automotive wax for added protection.
Protecting The Bare Paint
After removing the paint protection film, it is crucial to take steps to protect the bare paint underneath. Without the film’s shield, the paint is exposed to potential damage from external elements. Here are some effective ways to safeguard your paint: 1. Wash and Dry: Prioritize regular washing and drying to keep the paint clean and free from contaminants. Use a mild car shampoo and a soft microfiber cloth or sponge to avoid scratching the surface. After washing, thoroughly dry the car using a clean, lint-free cloth. 2. Apply Wax or Sealant: Applying a high-quality wax or sealant provides an additional layer of protection to the paint. It helps to repel dirt, water, and other environmental pollutants, reducing the risk of damage. Follow the manufacturer’s instructions for application and reapplication frequency. 3. Utilize Paint Protection Film: Consider reapplying paint protection film to maintain long-term protection. This film acts as a barrier against scratches, UV rays, and other hazards. Consult a professional to ensure proper installation and optimal coverage.Recommendations For Future Care
To ensure the longevity of your paint and maintain its pristine appearance, follow these recommendations for future care: 1. Regular Inspection: Perform routine inspections of the paint surface to detect any signs of damage or wear. Promptly address any issues to prevent further deterioration. 2. Avoid Harsh Chemicals: When cleaning the car, avoid using harsh chemicals or abrasive products that may harm the paint. Stick to mild, pH-neutral cleaners specifically formulated for automotive use. 3. Protect from Sun Exposure: Prolonged exposure to sunlight can fade the paint and cause it to deteriorate. Park your vehicle in shaded areas or use a car cover to shield it from direct sunlight when not in use. 4. Keep Away from Environmental Hazards: Avoid parking under trees or near areas where the car may be exposed to bird droppings, tree sap, or other environmental contaminants. These substances can damage the paint if left unattended. 5. Address Scratches Immediately: If you notice any scratches or paint chips, address them promptly to prevent further damage. Touch-up paint or a professional repair may be necessary, depending on the severity of the imperfection. By implementing these maintenance practices, you can ensure the longevity and attractiveness of your car’s paint. Regular care and protection will help keep your vehicle looking its best for years to come.Pros And Cons Of Diy Removal
When considering the removal of paint protection film, weighing the pros and cons of a DIY approach is essential. While opting for a do-it-yourself removal can save money, it also requires time, effort, and the risk of potential damage to the vehicle’s surface. Understanding the advantages and disadvantages of DIY removal compared to professional services can help make an informed decision.
Comparing Diy To Professional Services
DIY removal of paint protection film can be cost-effective, providing savings on labor costs. It allows for flexibility in scheduling and provides a sense of accomplishment. However, it requires access to appropriate tools, knowledge of the removal process, and the patience to avoid causing damage to the underlying paint. On the other hand, professional services offer expertise, specialized tools, and a guarantee of quality results. They can efficiently handle challenging removal tasks and provide peace of mind.
When To Seek Professional Help
If the paint protection film is severely damaged, or if the removal process seems overwhelming, seeking professional assistance is advisable. Professional services can ensure the removal is performed without causing harm to the vehicle’s paint and can address any underlying issues that may arise during the process.

Credit: m.youtube.com
Common Mistakes To Avoid
When removing paint protection film, it’s important to be cautious and avoid common mistakes that can lead to damage or frustration. By understanding these pitfalls, you can ensure a smooth and successful removal process.
Rushing The Process
Rushing through the removal process can lead to errors and potential damage to the underlying paint. It’s essential to work patiently and methodically to avoid causing any unintended harm. Take your time and carefully peel back the film to avoid leaving behind adhesive residue or causing scratches to the surface.
Neglecting Safety Procedures
Neglecting safety procedures during the removal process can result in personal injury or damage to the vehicle. Always wear protective gloves and eyewear to shield yourself from any sharp edges or debris. Additionally, ensure that the work area is well-ventilated to minimize exposure to any fumes or chemicals that may be released during the removal process.
Frequently Asked Questions
How To Remove Paint Protector Film?
To remove paint protector film, gently heat the film using a hairdryer or heat gun. Once it becomes soft, slowly peel it off from one corner. Use a plastic scraper or your fingernail to lift the film and continue peeling until it’s completely removed.
Finally, clean any residue using a mild adhesive remover.
Can I Remove Ppf By Myself?
Removing PPF yourself is possible but tricky. It requires patience and caution. Seek professional help for best results.
Can Ppf Be Removed Without Damaging Paint?
Yes, PPF can be removed without damaging paint if done carefully by a professional.
How To Remove Old Protective Film?
To remove old protective film, gently peel back one corner and slowly pull it off the surface. Use a hairdryer to soften the adhesive if needed. Clean the area with warm soapy water to remove any residue.
Conclusion
Removing paint protection film can be a straightforward process with the right tools and techniques. By following the steps outlined in this guide, you can effectively remove the film without damaging the underlying paint. Remember to take your time and work carefully to achieve the best results.
With patience and attention to detail, you can restore your vehicle’s appearance to its original glory.