Painting wood is a timeless method to enhance and protect your wooden furniture, cabinetry, floors, and other wooden items. Whether you’re refurbishing an old chair or giving your walls a fresh look, painting wood can be an easy and rewarding project if done correctly.
In this guide, we’ll cover several methods for painting wood, the necessary preparation steps, and how to achieve a durable, beautiful finish.
Contents
Why Painting Wood is Different
Wood is a natural material with unique properties that affect how paint adheres to its surface. It expands and contracts with changes in temperature and humidity, has a porous texture, and sometimes contains natural oils or knots that can bleed through paint. Proper preparation and using the right products are essential to ensure a long-lasting finish.
Preparing Wood for Painting
The key to a smooth, professional paint job on wood is proper preparation. Whether the wood is bare, stained, or previously painted, these steps will ensure your paint adheres well and lasts for years.
1. Cleaning the Surface
The first step in preparing any wood surface is to clean it thoroughly. Dust, dirt, grease, and oils can prevent paint from adhering properly.
Steps for Cleaning:
- Use a mild detergent or wood cleaner: Mix a solution of water and dish soap, or use a specialized wood cleaner.
- Wipe the surface with a cloth: Use a clean cloth or sponge to scrub the wood surface.
- Rinse with clean water: Make sure to remove any soap residue with a damp cloth.
- Let the wood dry: Allow the surface to dry completely before moving on to the next step.
2. Sanding the Wood
Sanding is essential for creating a smooth surface for paint to adhere to. It removes any rough spots, old paint, or finishes and helps the new paint stick better.
Steps for Sanding:
- Use medium-grit sandpaper (80-120 grit): Start with medium-grit sandpaper to remove old finishes or rough areas.
- Follow with fine-grit sandpaper (180-220 grit): For a smooth, even surface, follow up with fine-grit sandpaper.
- Sand in the direction of the grain: Always sand along the natural grain of the wood to avoid scratches.
- Wipe away dust: After sanding, use a tack cloth or a damp rag to remove any dust or debris.
3. Filling Holes and Cracks
If your wood surface has any cracks, dents, or nail holes, fill them in before painting.
Steps for Filling:
- Use wood filler: Apply wood filler to any holes or cracks using a putty knife.
- Let it dry: Allow the wood filler to dry completely according to the manufacturer’s instructions.
- Sand the filled areas: Once dry, sand the filled spots smooth with fine-grit sandpaper.
4. Priming the Wood
Priming is a critical step, especially when painting bare or stained wood. Primer helps paint adhere better, blocks stains, and ensures an even finish.
Types of Primer:
- Oil-based primer: Best for stained or knotty wood, as it prevents stains from bleeding through the paint.
- Water-based primer: Ideal for general interior projects and works well on bare wood.
- Shellac-based primer: Great for tough stains or wood with lots of tannins, like cedar or redwood.
Steps for Priming:
- Apply a thin, even coat: Use a brush or roller to apply the primer in smooth, even strokes.
- Let the primer dry: Follow the manufacturer’s drying time before applying paint.
- Lightly sand between coats: If you apply multiple coats of primer, sand lightly between each coat for a smoother finish.
Different Ways to Paint Wood
Now that your wood is prepped and ready, it’s time to choose a painting method. The technique you use depends on the type of wood, the project’s size, and your desired finish. Below are various ways to paint wood.
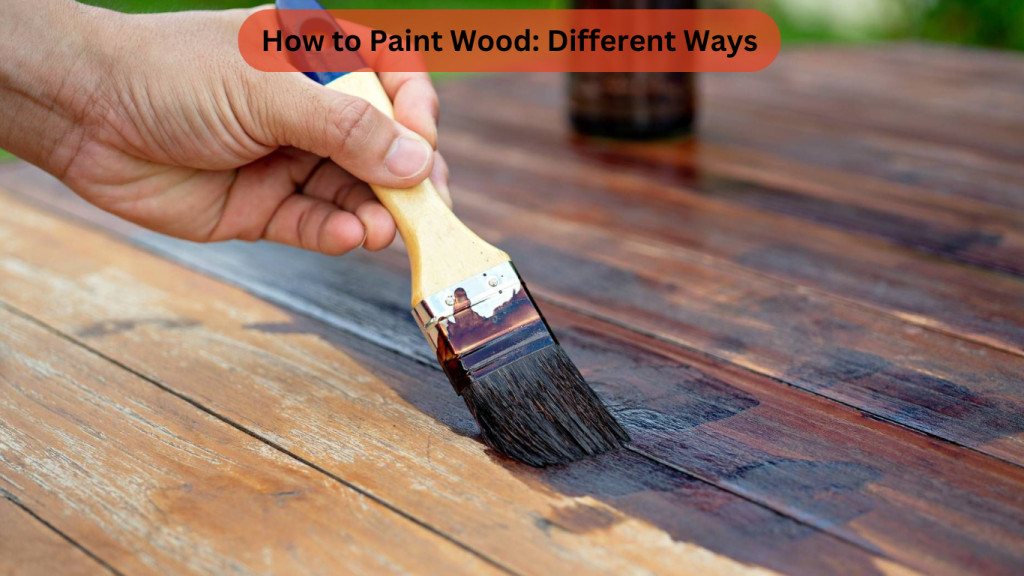
1. Brush Painting Wood
Using a paintbrush is one of the most traditional methods of painting wood. It’s ideal for detailed work, such as trim, furniture, and smaller surfaces.
Tools and Materials:
- High-quality paintbrush
- Latex or oil-based paint (depending on your project)
- Painter’s tape (optional)
Step-by-Step Guide:
- Choose the right brush: For water-based paints, use a synthetic bristle brush. For oil-based paints, use a natural bristle brush.
- Dip the brush lightly into the paint: Avoid overloading the brush to prevent drips.
- Apply in long, even strokes: Start with long strokes along the grain of the wood for the smoothest finish.
- Let the paint dry: Allow each coat of paint to dry completely before applying the next.
- Apply a second coat: Depending on the paint and wood type, a second or third coat may be necessary for full coverage.
2. Spray Painting Wood
Spray painting is fast and provides a smooth, professional-looking finish. It’s ideal for larger projects like furniture or cabinets, or for surfaces with intricate details.
Tools and Materials:
- Spray paint designed for wood
- Drop cloths or newspaper to protect surroundings
- Painter’s tape
- Respirator mask (for ventilation)
Step-by-Step Guide:
- Shake the spray can: Shake the spray paint can for at least a minute to mix the paint.
- Test on scrap wood: Test the spray paint on a scrap piece of wood to adjust your technique.
- Apply in light, even coats: Hold the spray can about 8-12 inches from the surface and apply thin, even coats. Move the can in a steady, sweeping motion.
- Allow paint to dry: Let each coat dry completely before applying the next.
- Apply a clear coat (optional): For extra protection, apply a clear topcoat to seal the paint and enhance durability.
3. Using a Paint Sprayer on Wood
For larger surfaces, like fences or wooden siding, a paint sprayer can save time and provide a smooth, consistent finish.
Tools and Materials:
- Paint sprayer
- Paint (latex or oil-based)
- Drop cloths
- Mask or respirator
Step-by-Step Guide:
- Prepare the sprayer: Fill the sprayer’s reservoir with paint, thinning the paint as necessary according to the manufacturer’s guidelines.
- Test the sprayer: Always test the sprayer on a scrap surface to adjust the spray pattern and pressure.
- Apply paint in even passes: Hold the sprayer 6-12 inches away from the surface and move in steady, overlapping passes.
- Let the paint dry: Allow the paint to dry before applying additional coats.
- Seal the finish (optional): Apply a clear protective coat to enhance the durability of the paint job, especially for outdoor projects.
4. Rollers for Wood Surfaces
For flat, large surfaces, like floors, walls, or tables, using a roller can provide smooth, even coverage.
Tools and Materials:
- Foam or short-nap roller
- Paint tray
- Painter’s tape
Step-by-Step Guide:
- Choose the right roller: Use a foam roller for a smooth finish or a short-nap roller for a textured surface.
- Load the roller with paint: Pour paint into the tray and roll the roller in the paint until it is evenly coated.
- Apply the paint evenly: Roll the paint onto the wood surface in long, even strokes.
- Let the paint dry: Allow the first coat to dry before applying a second coat.
- Apply additional coats: Apply more coats as needed for full coverage.
Types of Paint for Wood
Choosing the right paint is essential for the look and longevity of your project. There are several types of paint to consider based on your needs.
1. Latex Paint
Latex, or water-based paint, is popular for interior wood surfaces. It dries quickly, has low odor, and cleans up easily with soap and water. However, it may not be as durable as oil-based paint on high-traffic or outdoor surfaces.
2. Oil-Based Paint
Oil-based paint is durable and ideal for surfaces exposed to wear and tear, such as doors, trim, and outdoor furniture. It takes longer to dry and requires paint thinner for cleanup, but it provides a smooth, hard finish.
3. Chalk Paint
Chalk paint creates a matte, vintage finish that’s popular for furniture and decorative projects. It requires minimal surface prep and can be easily distressed for an antique look.
4. Milk Paint
Milk paint is an eco-friendly, non-toxic option made from natural ingredients. It’s ideal for creating a rustic or distressed finish on furniture and cabinetry.
Special Considerations for Different Wood Types
1. Painting Bare Wood
When painting bare wood, primer is essential. Bare wood is porous and will absorb paint unevenly without a primer, resulting in an uneven finish. Use a primer that’s suitable for the type of paint you’re applying.
2. Painting Stained Wood
Stained wood can be tricky to paint because stains often bleed through paint. To prevent this, use a stain-blocking primer. Oil-based primers work best for sealing in stain.
3. Painting Varnished or Lacquered Wood
Before painting varnished or lacquered wood, you’ll need to sand the surface thoroughly to remove the shiny finish. This will help the paint adhere properly.
Tips for a Professional Finish
- Use high-quality brushes and rollers: Cheap brushes can leave streaks and brush marks. Invest in good-quality tools for a smoother finish.
- Sand between coats: Lightly sand between each coat of paint to achieve a super-smooth finish.
- Apply multiple thin coats: Rather than applying one thick coat, apply multiple thin coats for better coverage and durability.
- Protect your paint job: For high-traffic areas or outdoor wood, apply a clear sealant to protect your paint job from wear and the elements.
Conclusion
Painting wood can completely transform your home or furniture projects. Whether you choose to brush, spray, or roll your paint, following the proper preparation steps will ensure a long-lasting, professional-looking finish.
Make sure to select the right paint, tools, and technique based on your project and wood type. With these tips, you can confidently tackle any wood painting project and achieve stunning results.