To paint rope, start by cleaning the surface to remove dirt and oils. Use a spray paint designed for fabric or rope for even coverage.
Rope can be a versatile and creative material for various projects. Whether you’re enhancing home decor, crafting jewelry, or making outdoor items, painting rope adds a unique touch. The right paint can transform plain rope into vibrant, eye-catching pieces. This guide will help you understand the steps and materials needed for painting rope effectively.
You’ll discover tips to ensure the paint adheres well and maintains the rope’s texture. With a few simple steps, you can achieve a beautiful finish that elevates your projects. Get ready to unleash your creativity and bring your ideas to life!
Contents
- Introduction To Rope Painting
- Selecting The Right Rope
- Setting Up Your Workspace
- Priming Your Rope
- Choosing Your Paints
- Painting Techniques For Rope
- Drying And Curing Your Rope Art
- Sealing And Protecting Your Work
- Creative Ideas For Displaying Painted Rope
- Troubleshooting Common Issues
- Maintaining Your Painted Rope Creations
- Frequently Asked Questions
- Conclusion
Introduction To Rope Painting
Rope painting is a fun and creative way to transform ordinary materials. This art form uses simple ropes to create unique designs. It adds texture and depth to any project. Whether you want to decorate a wall or make a gift, rope painting is perfect. Let’s explore the appeal and materials needed for this exciting craft.
The Appeal Of Textured Art
Textured art brings life to any space. Here are some reasons why rope painting is appealing:
- Unique Designs: Each piece is one-of-a-kind.
- Visual Interest: Textures catch the eye quickly.
- Versatile Usage: Works well for home decor or gifts.
- Easy to Learn: Suitable for all skill levels.
Creating with ropes allows for endless possibilities. You can mix colors and patterns easily.
Materials Needed For Rope Painting
Gather the right materials before starting. Here’s a simple list:
| Material | Purpose |
|---|---|
| Rope | Main material for the artwork. |
| Paint | For coloring the rope. |
| Brushes | To apply paint smoothly. |
| Canvas or Board | Surface to attach the rope. |
| Glue | To secure the rope in place. |
With these materials, you can start your rope painting project. Choose colors that inspire you. Have fun creating your textured masterpiece!

Credit: forums.getpaint.net
Selecting The Right Rope
Choosing the right rope is crucial for painting projects. Different types of rope behave differently with paint. Understanding these aspects ensures a successful outcome.
Types Of Rope
Rope comes in various materials and styles. Here are some common types:
| Type of Rope | Material | Best Use |
|---|---|---|
| Natural Fiber Rope | Jute, cotton, sisal | Decorative purposes |
| Synthetic Rope | Nylon, polyester | Durability and strength |
| Wire Rope | Steel | Heavy-duty tasks |
Natural fibers absorb paint well. Synthetic ropes repel paint. Choose based on your project needs.
Considerations For Paint Adhesion
Paint adhesion varies by rope type. Here are key factors:
- Surface Texture: Rough surfaces hold paint better.
- Material Type: Some materials resist paint.
- Preparation: Clean the rope before painting.
- Type of Paint: Use spray paint for better coverage.
Test a small section first. This ensures the paint adheres well. Follow these tips for optimal results.
Setting Up Your Workspace
Creating a well-organized workspace is key to painting rope effectively. A clean area helps you focus. Proper setup also ensures safety and efficiency.
Preparing The Area
Follow these steps to prepare your workspace:
- Choose a flat, stable surface.
- Cover the surface with a drop cloth.
- Gather all necessary tools and materials:
| Tool/Material | Purpose |
|---|---|
| Rope | The main item to paint. |
| Paint | To add color to the rope. |
| Brush/Spray | For applying the paint. |
| Gloves | To protect your hands. |
| Masking Tape | To create clean edges. |
Ensure good ventilation in the area. Open windows or use a fan. This helps reduce paint fumes.
Safety Precautions
Taking safety measures is essential. Follow these tips:
- Wear a mask to avoid inhaling fumes.
- Use gloves to protect your skin.
- Keep children and pets away from the workspace.
- Store paint and tools safely after use.
Check for any allergies to paint materials. Always read labels for safety instructions. A safe workspace leads to a successful project.
Priming Your Rope
Priming your rope is a crucial step in the painting process. It ensures that the paint adheres well and creates a smooth finish. Proper priming helps to protect the rope and enhances its appearance. Let’s explore the benefits and techniques for effective priming.
Benefits Of Priming
- Improved Adhesion: Priming helps paint stick better.
- Uniform Color: It prevents color fading or blotching.
- Durability: Primed ropes resist wear and tear.
- Moisture Resistance: It protects against water damage.
- Easy Application: Priming makes painting smoother.
Application Techniques
Follow these steps for best results:
- Choose the Right Primer: Use a primer suitable for fabric or rope.
- Clean the Rope: Remove dirt and debris with soapy water.
- Dry Thoroughly: Ensure the rope is completely dry.
- Apply Primer Evenly: Use a brush or spray for an even coat.
- Allow to Dry: Let the primer dry according to the manufacturer’s instructions.
Remember, priming your rope enhances both its look and longevity. Follow these steps for successful priming.
Choosing Your Paints
Choosing the right paint is crucial for painting rope. The type of paint affects the finish and durability. Consider your project needs before deciding.
Oil Vs. Acrylic
Both oil and acrylic paints have unique features. Here’s a quick comparison:
| Feature | Oil Paint | Acrylic Paint |
|---|---|---|
| Drying Time | Slower | Faster |
| Finish | Glossy | Matte or Glossy |
| Durability | High | Medium |
| Clean-Up | Thinner Required | Water Soluble |
Oil paints offer a glossy finish. They last longer on outdoor items. Acrylic paints dry quickly and are easy to clean. Use acrylics for indoor projects.
Choosing Colors
Select colors that match your project’s theme. Consider the following tips:
- Pick colors that complement each other.
- Test colors on a small section first.
- Use lighter colors for small spaces.
Bright colors can add energy. Muted tones create a calming effect. Think about the rope’s final use. Choose colors that enhance its purpose.

Credit: m.youtube.com
Painting Techniques For Rope
Transforming ordinary rope into a vibrant piece of art is easy. Use the right techniques to achieve stunning results. The following sections explore key methods for painting rope effectively.
Brush Selection
Selecting the right brush is crucial for painting rope. Different brushes create various effects. Here are some options:
- Flat Brushes: Ideal for applying base coats.
- Round Brushes: Great for detailed work.
- Sponge Brushes: Perfect for textured finishes.
Choose a brush based on your design needs. Soft bristles work well for smooth applications. Stiffer bristles are better for adding texture.
Applying Base Coats
Start by applying a base coat. This sets the foundation for your design.
- Prepare the rope. Clean and dry it first.
- Select a suitable paint. Use acrylic or fabric paint.
- Use a flat brush for even coverage.
- Apply a thin layer of paint. Let it dry completely.
- Consider a second coat for richer color.
Base coats enhance color vibrancy. Ensure even application for the best results.
Adding Texture And Detail
Texture and detail add character to painted rope. Use various techniques to achieve this.
| Technique | Description |
|---|---|
| Sponging | Dab paint with a sponge for a unique look. |
| Stippling | Use a stippling brush for a dotted effect. |
| Dry Brushing | Lightly brush paint on the surface for highlights. |
Experiment with these techniques. Combine them for unique designs. Enjoy the creative process!
Drying And Curing Your Rope Art
Drying and curing are essential steps in painting rope. These processes ensure that your artwork remains durable and vibrant. Proper drying allows the paint to set correctly. Curing helps to strengthen the bond between the paint and the rope fibers.
Drying Times
Drying times can vary based on several factors. Here are key points to consider:
- Type of paint used
- Humidity levels in the air
- Temperature of the environment
Generally, most acrylic paints dry within:
| Paint Type | Drying Time |
|---|---|
| Acrylic Paint | 1-2 hours |
| Oil-Based Paint | 6-8 hours |
Thicker layers of paint will take longer to dry. Check for tackiness before handling your rope.
Ensuring Proper Curing
Curing is critical for the longevity of your painted rope. Follow these tips for effective curing:
- Leave the painted rope in a well-ventilated area.
- Avoid direct sunlight to prevent fading.
- Keep the rope at a stable temperature.
- Allow at least 24 hours for the paint to cure completely.
Proper curing enhances the paint’s durability. This will help your rope art withstand wear and tear.
Sealing And Protecting Your Work
After painting rope, sealing it is crucial. This step protects your artwork from damage. Sealants help maintain color and texture. They also prevent wear and tear over time.
Types Of Sealants
Choosing the right sealant is essential. Here are some popular options:
| Sealant Type | Description | Best For |
|---|---|---|
| Acrylic Sealant | Water-based and dries clear. Non-toxic. | Indoor projects and crafts. |
| Polyurethane | Durable and waterproof. Offers strong protection. | Outdoor use and high-traffic areas. |
| Spray Sealant | Easy to apply. Provides an even coat. | Quick projects and hard-to-reach areas. |
Application Tips
Follow these tips for best results:
- Choose a well-ventilated area. Good airflow helps drying.
- Use a clean brush or spray. This ensures even coverage.
- Apply thin coats. Thin layers dry faster and look better.
- Let each coat dry completely. Follow the manufacturer’s instructions.
- Reapply as needed. More coats provide better protection.
Sealing your painted rope enhances its lifespan. It keeps your work looking fresh and vibrant.
Creative Ideas For Displaying Painted Rope
Painted rope can add a unique touch to any space. Use it in various ways to enhance your home decor or create thoughtful gifts. Here are some creative ideas to inspire you.
Incorporating Into Home Decor
Painted rope blends beautifully with different styles. Here are some ways to use it:
- Wall Art: Create a stunning piece by arranging painted rope in various shapes.
- Rope Baskets: Weave painted rope into baskets for storage.
- Framed Displays: Frame sections of painted rope for a modern art look.
- Table Centerpieces: Use painted rope as a base for floral arrangements.
Gift Ideas
Painted rope makes for thoughtful and personalized gifts. Consider these ideas:
- Customized Coasters: Cut and paint rope into coaster shapes.
- Keychains: Create fun keychains using colorful painted rope.
- Bookmarks: Make unique bookmarks by painting and cutting rope.
- Decorative Wall Hangings: Craft beautiful hangings as gifts.
These ideas can delight friends and family. Get creative with painted rope for stunning displays.
Troubleshooting Common Issues
Painting rope can be fun and creative. Yet, problems may arise. Understanding these common issues helps you achieve the best results.
Paint Cracking
Paint cracking can ruin your project. Here are some reasons and fixes:
- Improper Drying: Allow adequate drying time between coats.
- Incorrect Paint Type: Use paint designed for flexible surfaces.
- Environmental Factors: Avoid painting in extreme temperatures.
To fix cracking:
- Sand the affected area lightly.
- Apply a primer for better adhesion.
- Repaint with the correct paint type.
Color Fading
Color fading can diminish your rope’s look. Here are causes and solutions:
- Sun Exposure: UV rays can fade colors quickly.
- Poor Quality Paint: Cheap paints may not hold color well.
- Improper Sealing: Not sealing the paint can lead to fading.
To prevent fading:
- Use UV-resistant paint.
- Seal with a clear coat after painting.
- Avoid direct sunlight exposure as much as possible.
Rope Fraying
Rope fraying can be a common issue. This can happen due to:
- Paint Weight: Heavy paint can weigh down fibers.
- Improper Handling: Rough handling can cause fraying.
- Poor Quality Rope: Low-quality rope is more prone to fray.
To fix fraying:
- Cut any frayed ends neatly.
- Use fabric glue to secure the ends.
- Consider using a lighter paint for flexibility.
Maintaining Your Painted Rope Creations
After you have painted your rope creations, proper care is essential. This ensures they stay vibrant and last longer. Here are some effective tips to maintain your painted rope.
Cleaning Tips
Keeping your painted rope clean is crucial. Follow these simple steps:
- Use a soft cloth to wipe off dust.
- For stains, mix mild soap with water.
- Gently scrub the stained area with a soft brush.
- Rinse with clean water and dry completely.
Avoid using harsh chemicals. They can damage the paint. Regular cleaning will keep your creations looking fresh.
Long-term Care
Long-term care helps to maintain the quality of your painted rope. Follow these guidelines:
- Store your rope in a cool, dry place.
- Avoid direct sunlight to prevent fading.
- Check for signs of wear or damage regularly.
- If the paint starts to chip, touch it up immediately.
Consider using a protective spray. This adds a layer of defense against dust and moisture.
| Care Tip | Frequency |
|---|---|
| Dusting | Weekly |
| Deep Cleaning | Monthly |
| Inspection | Every 3 Months |
Following these tips will keep your painted rope creations beautiful. Enjoy your artistic work for years to come!
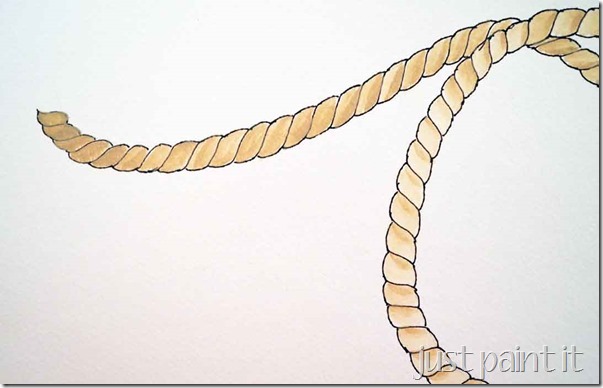
Credit: justpaintitblog.com
Frequently Asked Questions
What Paint To Use On Rope?
Use acrylic or fabric paint for rope projects. These types provide flexibility and adhere well. Ensure the paint is non-toxic if the rope will touch skin. Always test on a small area first to check for compatibility.
Can You Spray Paint Nylon Rope?
Yes, you can spray paint nylon rope. Use a fabric or flexible spray paint for best results. Ensure the rope is clean and dry before painting. Allow ample drying time to avoid smudging. Test a small section first to check for adhesion and color fastness.
How To Make Rope Color?
To make rope color, choose a dye suitable for the rope material. Mix the dye with water according to instructions. Submerge the rope and let it soak for the recommended time. Rinse thoroughly, then dry. Ensure proper ventilation during the dyeing process for safety.
Can You Paint Jute With Acrylic Paint?
Yes, you can paint jute with acrylic paint. Ensure the surface is clean and dry before application. Use a primer for better adhesion. Allow ample drying time between coats for optimal results. This method enhances the texture and color vibrancy of jute items.
Conclusion
Painting rope can transform your projects with vibrant colors. It’s an easy and fun way to enhance decor. Remember to choose the right paint and apply it carefully for the best results. With these tips, you can create stunning pieces that stand out.
Enjoy your painting adventure and unleash your creativity!