To paint a popcorn ceiling, begin by preparing the surface by covering the floors and furniture, and removing any loose or damaged texture. Next, prime the ceiling with a stain-blocking primer to ensure the paint adheres properly.
Use a roller with a thick nap to apply the paint in small, even sections, working in one direction. Apply a second coat if necessary, allowing each coat to dry thoroughly. Finally, clean up any mess and remove the protective coverings.
Painting a popcorn ceiling can be a simple and effective way to freshen up a room and give it a new look.

Credit: robinsonpaintingllc.com
Contents
Introduction To Popcorn Ceilings
Painting a popcorn ceiling can be a tricky task, but with the right approach, it can be done effectively. Start by preparing the room, covering the floors and furniture to protect them from paint splatter. Use a thick-nap roller to apply a coat of paint evenly, and consider using a paint sprayer for larger areas to achieve a smoother finish.
Brief History
Popcorn ceilings, also known as acoustic ceilings or textured ceilings, gained popularity in the mid-20th century. They were commonly used in residential and commercial buildings due to their affordability and ability to hide imperfections.
During the 1950s to the 1980s, popcorn ceilings were a common sight in homes across the United States. The texture was achieved by spraying a mixture of water, paint, and Styrofoam or asbestos particles onto the ceiling surface. The resulting texture resembled the look of popcorn or cottage cheese, hence the name.
Benefits And Challenges
Popcorn ceilings offered several benefits that contributed to their popularity. Firstly, they provided soundproofing qualities by reducing echoes and noise transmission between floors. Additionally, the textured surface helped to hide cracks, imperfections, and unevenness in the ceiling.
However, over time, popcorn ceilings have fallen out of favor due to the challenges they present. Cleaning and maintaining popcorn ceilings can be difficult as the texture tends to trap dust and cobwebs. Moreover, the presence of asbestos in older popcorn ceilings poses health risks and requires professional removal.
Despite the challenges, many homeowners choose to keep their popcorn ceilings for their unique aesthetic. However, if you’re looking to update the look of your home or remove potential health hazards, painting the popcorn ceiling is a viable solution.
In the next sections, we will explore the step-by-step process of painting a popcorn ceiling, including the necessary preparation and techniques to achieve a smooth and refreshed look.
Preparation Steps
Preparing a popcorn ceiling for painting is crucial to ensure a smooth and professional finish. These preparation steps involve protecting the room and furniture, gathering the necessary materials, and ensuring a clean and safe working environment.
Room And Furniture Covering
Before you begin painting a popcorn ceiling, it’s essential to cover the entire room and any furniture to prevent paint spills and splatters. Here’s how to do it:
- Remove all furniture from the room or place it in the center and cover it with plastic sheets.
- Use drop cloths to cover the floor completely, securing them with painter’s tape to prevent movement.
- Seal off air vents and light fixtures with plastic and painter’s tape to protect them from paint.
Material Checklist
Having the right materials on hand is key to ensuring a successful painting project. Here’s a checklist of essential items you’ll need:
| Materials | Quantity |
|---|---|
| Paint primer | 1 gallon for every 250 square feet |
| Paint rollers | 2-3 with extension poles |
| Paintbrushes | Various sizes for edges and corners |
| Paint tray | 1-2 for roller application |
| Painter’s tape | Several rolls for masking off areas |
| Plastic drop cloths | Heavy-duty for floor and furniture covering |
| Protective clothing and goggles | 1 set per person |
Safety Measures
When working on a home improvement project like painting a popcorn ceiling, safety should be the top priority. Taking the necessary safety measures can help ensure a smooth and secure painting process. Here are some essential safety precautions to consider before tackling the task of painting a popcorn ceiling.
Protective Gear
Wearing the appropriate protective gear is crucial when painting a popcorn ceiling. Protective gear includes safety goggles, a respirator or mask, gloves, and suitable clothing to shield your skin from paint splatters. By donning these items, you minimize the risk of inhaling harmful particles and chemicals, as well as protect your eyes and skin from potential irritation.
Ventilation And Air Quality
Before starting the painting process, it’s important to ensure that the area is well-ventilated. Ventilation and air quality play a significant role in maintaining a safe and healthy environment. Open windows and use fans to improve air circulation. Additionally, consider using low-VOC (volatile organic compounds) paint to minimize indoor air pollution and promote better air quality.
Credit: www.fivestarpainting.com
Cleaning The Ceiling
To paint a popcorn ceiling, first, ensure the surface is clean and free from any dirt or debris. Next, use a roller with a thick nap to apply the paint in a gentle and even manner. Take caution not to apply too much pressure, as it can cause the popcorn texture to come off.
Cleaning a popcorn ceiling before painting is essential for a successful paint job. A clean surface ensures that the paint adheres well and lasts longer. Here are the steps you should follow to clean your popcorn ceiling before painting.
Dust And Debris Removal
Before you start cleaning the ceiling, you need to remove all the dust and debris. You can use a vacuum cleaner with a soft brush attachment to remove the dust. Make sure the vacuum cleaner is not too powerful as it can damage the popcorn texture. Alternatively, you can use a soft-bristled broom or a duster to remove the dust. Remember to wear a mask to protect yourself from the dust.
Spot Cleaning Stains
If your popcorn ceiling has stains, you need to spot clean them before painting. You can use a mixture of warm water and mild dish soap to clean the stains. Dip a sponge or a soft cloth in the solution and gently rub the stain. Don’t apply too much pressure as it can damage the texture. Rinse the area with clean water and let it dry completely before painting.
Tips
– Don’t use harsh chemicals or abrasive cleaners as they can damage the texture of the popcorn ceiling.
– If your ceiling is heavily stained or dirty, you may need to hire a professional to clean it.
– Always test the cleaning solution on a small, inconspicuous area before applying it to the entire ceiling.
– Make sure the ceiling is completely dry before painting.
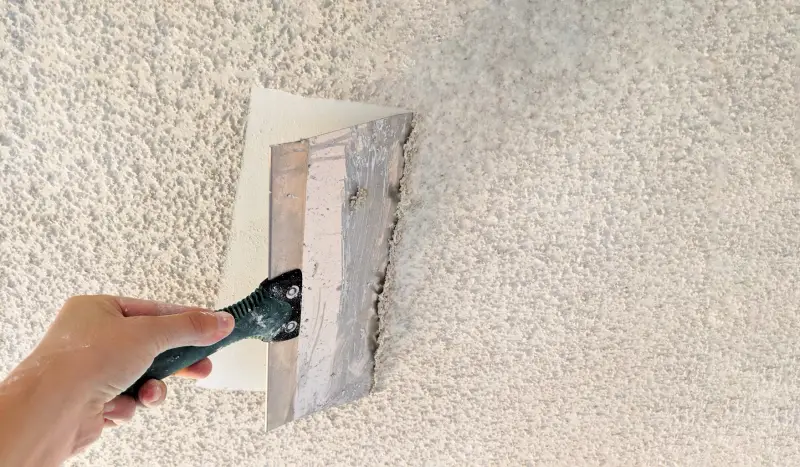
Repairing Damages
To paint a popcorn ceiling, repairing damages is crucial. Start by cleaning the ceiling and patching any holes or cracks. Use a roller with a thick nap to apply a primer and then paint with a sprayer or roller, working carefully to avoid damaging the texture.
Repairing Damages
Identifying Problem Areas
When it comes to repairing damages on a popcorn ceiling, the first step is to identify the problem areas. Start by examining the ceiling carefully for any signs of water damage, cracks, or holes. Look for discoloration, sagging, or peeling areas that may indicate underlying issues. It’s important to address these problems before proceeding with the patchwork techniques.
Patchwork Techniques
Once you have identified the problem areas on your popcorn ceiling, it’s time to apply the patchwork techniques. Here are a few effective methods to repair damages and restore the appearance of your ceiling:
1. Patching Small Holes:
For small holes or cracks, you can use a premixed joint compound. Apply the compound to the damaged area using a putty knife, making sure to feather the edges for a seamless finish. Allow it to dry completely before sanding lightly to smooth out any imperfections.
2. Repairing Larger Holes:
If you have larger holes in your popcorn ceiling, you may need to use a patching material like a drywall patch. Cut the patch to fit the size of the hole and secure it in place using joint compound. Apply multiple thin layers of compound, allowing each layer to dry before applying the next. Sand the area smooth once the compound is completely dry.
3. Concealing Water Stains:
To cover up water stains on your popcorn ceiling, you can use a stain-blocking primer before repainting. Apply the primer directly to the stained area, ensuring complete coverage. Once the primer is dry, paint over it with a color that matches the rest of the ceiling.
4. Blending Repairs with Popcorn Texture:
After completing the patchwork, it’s essential to blend the repaired areas with the existing popcorn texture. You can achieve this by using a texture spray or a specialized texture roller. Practice on a piece of cardboard or scrap material first to ensure the texture matches seamlessly.
In conclusion, repairing damages on a popcorn ceiling involves identifying problem areas and applying the appropriate patchwork techniques. Whether it’s patching small holes, repairing larger holes, concealing water stains, or blending repairs with the popcorn texture, following these steps will help restore the appearance of your ceiling. Remember to take the necessary safety precautions and consult a professional if needed.
Priming The Ceiling
To paint a popcorn ceiling, it’s essential to prime the surface first. Use a roller with a thick nap to apply the primer evenly and ensure it adheres well to the textured surface. This step is crucial for achieving a smooth and long-lasting paint finish.
Primers are crucial for ensuring proper adhesion and achieving a smooth finish on a popcorn ceiling.
Choosing The Right Primer
Select a high-quality primer designed for ceiling surfaces.
Application Methods
Use a roller for large areas and a brush for edges and corners.
Paint Selection
When painting a popcorn ceiling, selecting the right paint is crucial for achieving a professional finish. The type of paint and color you choose can significantly impact the overall look and feel of the room. Here’s a guide to help you make the best paint selection for your popcorn ceiling.
Types Of Paint Suitable For Popcorn Ceilings
When painting a popcorn ceiling, opt for a flat or matte finish paint to effectively cover the textured surface. These types of paints help to minimize light reflection and hide imperfections. Avoid using high-gloss or satin finishes as they can highlight the bumps and texture of the popcorn ceiling.
Color Considerations
When selecting a color for your popcorn ceiling, consider using light shades to brighten up the room and make it feel more spacious. White and off-white colors are popular choices for popcorn ceilings as they blend well with any decor and reflect light effectively.
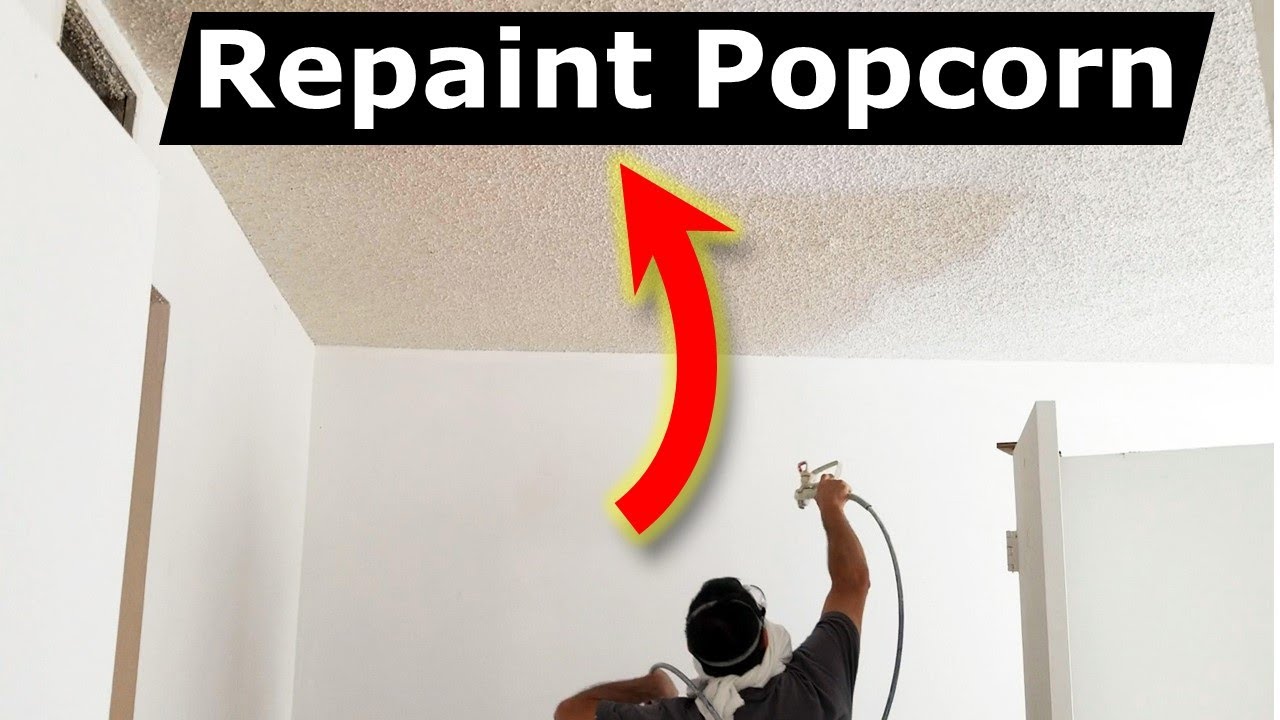
Credit: www.youtube.com
Paint Application
Painting a popcorn ceiling can be a challenging task, but with the right technique, it can be done effectively. Follow these simple steps to achieve a smooth and flawless finish on your ceiling.
Spray Painting Vs. Rolling
Spray painting provides even coverage in less time.
Rolling is suitable for small areas and less messy.
Technique And Coverage
- Use a thick-nap roller for popcorn ceilings.
- Apply paint in small sections for uniform coverage.
- Overlap strokes to avoid missed spots.
When painting a popcorn ceiling, consider the spray painting vs. rolling methods.
For technique and coverage, use a thick-nap roller and apply paint in small sections with overlapping strokes.
Drying And Post-painting Care
After painting a popcorn ceiling, proper drying and post-painting care are crucial. Ensure good ventilation and allow sufficient time for the paint to dry completely before touching or adding any furniture or fixtures to the room. Regular maintenance and gentle cleaning can help preserve the painted surface for years to come.
After painting your popcorn ceiling, it’s crucial to follow proper drying and maintenance steps for a flawless finish.
Drying Time
– Allow ceiling to dry completely before moving furniture back.
– Typical drying time is around 24-48 hours.
– Ensure adequate ventilation to speed up drying process.
Maintenance Tips
– Regularly inspect for signs of peeling or discoloration.
– Avoid harsh cleaning agents to prevent damage.
– Use mild soap and water for cleaning.
– Tackle any repairs promptly to maintain appearance.
Remember, proper care post-painting ensures your popcorn ceiling stays fresh and vibrant for years to come.
Final Touches
Once you have finished painting your popcorn ceiling, it’s important to pay attention to the final touches to ensure a polished and professional look. The final touches include inspecting your work and completing the cleanup procedures. By following these steps, you can ensure that your newly painted popcorn ceiling looks its best.
Inspecting Your Work
Take a step back and carefully inspect your painted popcorn ceiling. Look for any areas where the paint may have dripped or pooled, as well as any missed spots or uneven coverage. Use a bright light or flashlight to help you identify these imperfections.
If you come across any drips or uneven areas, it’s important to address them before the paint fully dries. Use a small brush or roller to touch up these spots, applying a thin layer of paint to blend them in with the rest of the ceiling. Take your time and ensure that the touch-up paint matches the surrounding areas seamlessly.
Cleanup Procedures
Once you are satisfied with the overall appearance of your painted popcorn ceiling, it’s time to tackle the cleanup procedures. Start by carefully removing any drop cloths or plastic coverings that you used to protect your furniture and floors during the painting process.
Gently fold the drop cloths or plastic coverings to contain any paint residue and dispose of them properly. If there are any spills or splatters on your furniture or floors, use a damp cloth or sponge to clean them up immediately. Promptly clean your paint brushes, rollers, and trays according to the manufacturer’s instructions to maintain their longevity.
Additionally, don’t forget to reattach any light fixtures, air vents, or other ceiling fixtures that you may have removed before painting. Make sure they are securely fastened and in proper working order.
By following these final touches and completing the inspection and cleanup procedures, you can ensure that your newly painted popcorn ceiling is flawless and enhances the overall appearance of your space.
Common Mistakes To Avoid
When painting a popcorn ceiling, it’s important to avoid common mistakes such as using the wrong type of paint, not properly preparing the surface, or applying too much pressure. By carefully following the correct steps and using the right tools, you can achieve a smooth and professional finish for your popcorn ceiling.
Common Mistakes to Avoid When Painting a Popcorn Ceiling
Painting a popcorn ceiling is a challenging task that requires time, effort, and patience. If you plan to do it yourself, you need to know the common mistakes to avoid to achieve a smooth and flawless finish. Here are the most common mistakes people make when painting a popcorn ceiling, and how to avoid them.
Over-saturation
One of the most common mistakes people make when painting a popcorn ceiling is over-saturating the roller with paint. Over-saturation can cause the popcorn texture to become too wet, and the texture may fall off the ceiling. To avoid this mistake, make sure to squeeze out the excess paint from the roller before applying it to the ceiling. Also, use a paintbrush to touch up areas that are hard to reach with a roller.
Inconsistent Textures
Another common mistake people make when painting a popcorn ceiling is creating inconsistent textures. This happens when you apply too much or too little paint to the ceiling, causing the popcorn texture to look uneven. To avoid this mistake, make sure to apply the paint evenly and in thin coats. Use a light touch when rolling the paint on the ceiling and avoid pressing too hard.
Here are some additional tips to avoid inconsistent textures:
- 1. Use a primer before painting to create a smooth surface.
2. Use a high-quality paint that is suitable for popcorn ceilings.
3. Use a roller with a thick nap to ensure even coverage.
In conclusion, painting a popcorn ceiling requires attention to detail and patience. By avoiding these common mistakes, you can achieve a smooth and flawless finish that will make your ceiling look brand new.
Professional Help Vs. Diy
Considering the option of professional help versus a DIY approach for painting your popcorn ceiling is a crucial decision. Each option comes with its own set of advantages and considerations. Let’s delve into the details of when to call a professional and the cost-benefit analysis of tackling the project yourself.
When To Call A Professional
If you are unsure about the complexity of the project or lack experience with ceiling painting, it’s advisable to seek professional assistance. Additionally, if your popcorn ceiling contains asbestos, it is imperative to engage a certified professional to handle the removal and painting process safely.
Cost-benefit Analysis
Before embarking on a DIY painting endeavor, it’s essential to assess the cost-benefit aspect. Consider the expenses associated with purchasing equipment, materials, and the time required for the project. Compare these costs to hiring a professional who can efficiently complete the task, potentially saving you time and ensuring a high-quality finish.
Frequently Asked Questions
Can I Just Paint Over A Popcorn Ceiling?
Yes, you can paint over a popcorn ceiling, but it’s important to prepare the surface properly by cleaning it and removing any loose texture. It’s also recommended to use a roller with a thick nap to ensure even coverage and avoid damaging the texture.
Keep in mind that painting over a popcorn ceiling can make it harder to remove later on.
Is It Better To Spray Or Roll Paint On A Popcorn Ceiling?
Spraying paint on a popcorn ceiling is usually better than rolling. It gives a smoother finish and covers the texture more effectively. Spray painting can be faster and more efficient, but it requires proper equipment and technique.
What Kind Of Paint To Use On A Popcorn Ceiling?
Use a flat latex paint for a popcorn ceiling. It helps minimize texture disruption. Avoid using oil-based or high-gloss paints.
What Is The Best Tool To Paint Popcorn Ceiling?
The best tool for painting a popcorn ceiling is a thick-nap roller. It helps to reach into the textured surface and ensure even coverage. Use a roller with a 3/4-inch nap for best results. Be sure to cover the surrounding area to protect from splatter.
Conclusion
Painting a popcorn ceiling can transform the look of a room. By following the right steps and using the appropriate tools, you can achieve a professional finish. Remember to prepare the area, use the right paint, and work carefully. With these tips, you can tackle this project with confidence.