To paint plastic chrome, first sand the surface and clean it with soap and water. Then, apply a coat of plastic primer and let it dry.
Finally, spray paint the chrome with a color of your choice. Painting plastic chrome can be a challenging task, but with the right materials and techniques, it is possible to achieve a professional-looking finish. Whether you want to revamp the look of your car’s chrome trim or update the style of a plastic chrome accessory, such as a lamp or vase, painting it can give it a fresh new look.
However, it is important to follow the proper steps to ensure that the paint adheres properly and the finish is durable. We will provide a step-by-step guide on how to paint plastic chrome and achieve a high-quality finish.

Credit: m.youtube.com
Contents
Introduction To Painting Plastic Chrome
Discover the art of painting plastic chrome to give it a fresh new look. Learn the step-by-step process for prepping, priming, and applying paint to achieve a professional finish. Transform your plastic chrome surfaces with this easy and cost-effective DIY technique.
The Appeal Of Plastic Chrome
Plastic chrome offers a sleek, modern look that can enhance the appearance of various items, from car parts to household fixtures. The shiny, reflective finish adds a touch of sophistication and can elevate the aesthetic appeal of any object it adorns.
Challenges With Plastic Chrome
However, painting plastic chrome presents unique challenges. Due to its smooth and non-porous surface, achieving proper adhesion can be difficult. Additionally, the reflective nature of the chrome finish can make imperfections more noticeable, demanding meticulous preparation and application techniques.
Materials Needed
When painting plastic chrome, it’s essential to have the right materials to achieve a professional and durable finish. Here’s a breakdown of the materials needed to get the job done right:
Choosing The Right Paint
Choosing the correct paint is crucial for achieving a high-quality finish on plastic chrome. Look for a high-quality chrome spray paint specifically designed for use on plastic surfaces. Ensure the paint is suitable for outdoor use to guarantee durability. Consider using a paint with built-in primer for added adhesion and longevity.
Essential Tools For The Job
Gather the following essential tools to ensure a successful plastic chrome painting project:
- High-grit sandpaper for smoothing the surface
- Clean, lint-free cloths for wiping down the chrome
- Adhesive tape to protect surrounding areas
- High-quality masking tape for precise edges
- Plastic primer for improved paint adhesion
- High-quality chrome spray paint designed for plastic
- Clear coat spray for added protection and shine
- Respirator mask for personal protection
- Well-ventilated workspace to ensure proper air circulation
Preparation Steps
In order to paint plastic chrome, there are several preparation steps you should follow. These include thoroughly cleaning the surface, sanding it lightly to create texture, applying a primer, and using multiple thin coats of paint for a smooth finish.
Additionally, make sure to let each coat dry completely before applying the next one.
Cleaning The Surface
To ensure a successful paint job on plastic chrome, it’s crucial to start with a clean surface. Begin by washing the chrome thoroughly with warm, soapy water. Use a soft cloth or sponge to remove any dirt, grime, or grease. Rinse the surface with clean water and allow it to dry completely.
Sanding For Better Adhesion
Sanding the plastic chrome helps to create a rough surface, allowing the paint to adhere better. Start by using a fine-grit sandpaper (around 320 grit) to gently roughen the chrome surface. Be cautious not to sand too aggressively, as this may damage the plastic. Once you’ve sanded the entire surface, wipe away any residue with a clean, damp cloth.
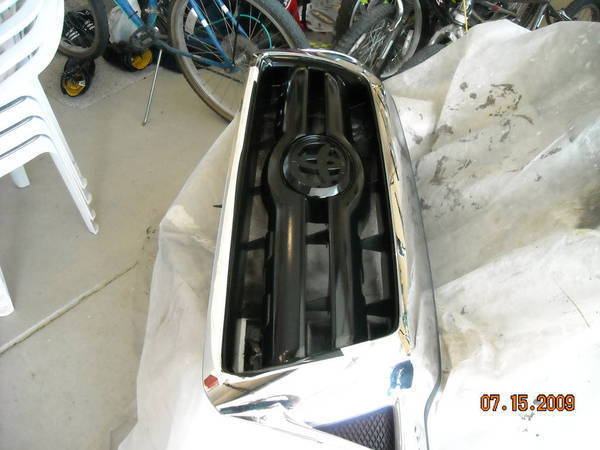
Credit: www.tacomaworld.com
Priming The Surface
Before you start painting plastic chrome, it’s essential to prime the surface. Priming creates a smooth and adhesive base for the paint to adhere to, ensuring a long-lasting and professional finish. In this section, we will discuss the necessary steps for priming your plastic chrome effectively.
Selecting A Primer
Choosing the right primer is crucial for achieving the desired results. When it comes to painting plastic chrome, it’s recommended to use a high-quality adhesion-promoting primer specifically designed for plastic surfaces. Look for primers that are labeled as suitable for plastic and chrome finishes. These primers have special bonding properties that help the paint adhere securely to the surface, preventing chipping or peeling.
It’s also important to consider the color of the primer. Select a primer that closely matches or complements the color of the paint you intend to use. This will help provide a solid base for the paint and ensure better coverage and color vibrancy.
Application Techniques
Once you have chosen the appropriate primer, it’s time to apply it to the plastic chrome surface. Here are some application techniques to consider:
- Clean the surface: Before applying the primer, make sure the plastic chrome surface is clean and free from any dirt, grease, or debris. Use a mild detergent and water solution to remove any contaminants. Rinse thoroughly and allow the surface to dry completely.
- Prepare the primer: Follow the manufacturer’s instructions on the primer container for proper preparation. Some primers may require stirring or shaking before use.
- Apply the primer: Using a brush or a spray gun, apply a thin and even coat of primer to the plastic chrome surface. Start from one end and work your way to the other, ensuring complete coverage. Avoid applying too much primer as it can lead to drips or uneven drying.
- Allow drying time: Refer to the primer’s instructions for the recommended drying time. It’s crucial to allow sufficient drying time to ensure proper adhesion and avoid any issues during the painting process.
- Sand if necessary: If the primer has any imperfections or rough spots, you can lightly sand the surface with fine-grit sandpaper. This will help create a smoother base for the paint.
By following these steps and using the right primer, you will be well on your way to achieving a flawless and durable paint job on your plastic chrome surface. The primer acts as a foundation for the paint, ensuring a professional finish that will withstand the test of time.
Painting Process
To paint plastic chrome, start by cleaning the surface with soap and water, then sanding it down to create a rough texture. Apply a plastic primer, followed by a coat of chrome spray paint. Finish with a clear coat to protect the finish.
Painting plastic chrome can be a bit tricky, but with the right tools and techniques, you can achieve a professional-looking finish that will last. In this guide, we will go over the painting process step by step, including layering your paint and drying times and conditions.Layering Your Paint
When it comes to painting plastic chrome, it’s important to use a high-quality primer designed specifically for plastic surfaces. This will ensure that the paint adheres properly and doesn’t flake or peel over time. Once the primer has dried, you can start layering your paint. Start with a light coat of paint and let it dry completely before applying another coat. Be sure to hold the spray can about 6 to 8 inches away from the surface and use a sweeping motion to apply the paint evenly. Repeat this process until you’ve achieved the desired level of coverage.Drying Times And Conditions
Drying times and conditions are crucial when it comes to achieving a smooth and even finish. Make sure to follow the manufacturer’s instructions for drying times and conditions, as these can vary depending on the type of paint you’re using. In general, you should allow each coat of paint to dry for at least 30 minutes before applying another coat. You should also avoid painting in humid or cold conditions, as this can cause the paint to dry unevenly or take longer to dry. By following these tips and techniques, you can achieve a flawless finish when painting plastic chrome. So grab your spray can and get to work!Adding Details And Effects
To paint plastic chrome, you can add details and effects by using a primer, spray paint, and a clear coat. Start by sanding the surface of the plastic, then apply a plastic primer. Once dry, spray on the chrome paint and add any desired details or effects.
Finish with a clear coat for added durability.
Creating Textures
To create textures on plastic chrome, you can use a variety of techniques. One popular method is to use a toothbrush to create a speckled effect. Dip the toothbrush in paint and then run your finger over the bristles to create a spray of paint. Then, lightly flick the brush over the plastic chrome surface to create a textured effect. Another technique is to use a sponge to create a stippled effect. Dip the sponge in paint and then dab it onto the plastic chrome surface, creating small dots of paint. This technique can create a rougher texture than the toothbrush method.Applying Highlights
Highlights can be applied to plastic chrome to create a more realistic and detailed look. To apply highlights, use a small brush to apply a lighter shade of paint to the raised areas of the plastic chrome. This will create a reflective effect, making the plastic chrome appear more like real metal. When applying highlights, it’s important to use a light touch and build up the color gradually. You can always add more paint, but it’s difficult to remove it once it’s been applied.Summary
Adding details and effects is a crucial step in painting plastic chrome. By creating textures and applying highlights, you can take your plastic chrome from a basic finish to a realistic and eye-catching one. With a little practice and patience, you can create a professional-looking finish that will enhance the appearance of your project.Sealing The Paint
To seal the paint on plastic chrome, follow these simple steps: Clean the surface thoroughly, apply a plastic adhesion promoter, use a plastic-compatible primer, apply several thin coats of paint, let it dry completely, and finish with a clear coat for added protection.
This process will ensure a long-lasting and professional-looking finish.
Choosing A Sealant
When it comes to sealing the paint on your plastic chrome surface, it is essential to choose the right sealant. Not all sealants are suitable for plastic chrome, so it’s important to look for one specifically designed for this purpose. A clear acrylic sealant is often the best choice, as it provides a protective layer without compromising the glossy chrome finish. Make sure to read the label and select a sealant that is compatible with plastic and chrome surfaces.
Sealant Application Tips
Applying the sealant correctly is crucial to ensure the longevity and durability of your painted plastic chrome. Here are some tips to help you achieve the best results:
- Clean the surface: Before applying the sealant, make sure the painted surface is clean and free from any dust, dirt, or grease. Use a mild detergent and water to clean the surface thoroughly. Rinse it off and allow it to dry completely.
- Preparation is key: Prepare the sealant according to the manufacturer’s instructions. Some sealants may require mixing or dilution. Follow the guidelines provided to ensure the proper consistency and application.
- Apply thin coats: It’s better to apply multiple thin coats of sealant rather than one thick coat. This allows for better adhesion and prevents the sealant from pooling or dripping. Use a brush or a spray applicator to apply the sealant evenly across the surface.
- Allow drying time: After each coat, allow the sealant to dry completely before applying the next one. Follow the recommended drying time provided by the manufacturer. This ensures that the sealant cures properly and forms a protective barrier.
- Avoid excessive handling: Once the sealant is applied, avoid touching or handling the surface excessively until it is fully cured. This prevents any smudges, fingerprints, or damage to the sealant while it is still drying.
By following these sealant application tips, you can ensure a smooth and long-lasting finish on your painted plastic chrome. Remember to always read and follow the instructions provided by the sealant manufacturer for the best results.

Credit: pchrome.com
Maintenance And Care
Proper maintenance and care are essential to ensure the longevity and appearance of your painted plastic chrome. By following these guidelines, you can keep your painted surfaces looking sleek and polished for years to come.
Cleaning Painted Surfaces
Regular cleaning of your painted plastic chrome surfaces will help to remove dirt, dust, and other debris that can accumulate over time. To clean your painted surfaces:
- Gently rinse the surface with water to remove loose dirt and grime.
- Prepare a mild soap solution using a gentle, non-abrasive dish soap.
- Using a soft sponge or microfiber cloth, apply the soap solution to the surface and gently scrub in a circular motion.
- Rinse the surface thoroughly with clean water to remove any soap residue.
- Allow the surface to air dry or use a soft, lint-free cloth to gently dry it.
Remember to avoid using harsh chemicals or abrasive cleaners, as these can damage the painted finish. Additionally, do not use rough brushes or abrasive materials that can scratch or mar the surface.
Touch-up Strategies
Over time, your painted plastic chrome may experience minor scratches or chips. Fortunately, there are touch-up strategies you can employ to restore the appearance of your surfaces:
- If you notice a small scratch or chip, use a fine-tip brush or touch-up pen to carefully apply matching paint to the affected area.
- Allow the touch-up paint to dry completely, following the manufacturer’s instructions.
- If necessary, use a fine-grit sandpaper to gently smooth out the touch-up area, being careful not to damage the surrounding painted surface.
- After sanding, clean the area with a mild soap solution and rinse thoroughly.
- Apply a clear coat of protective sealant to the touch-up area to ensure a seamless finish.
By regularly inspecting your painted plastic chrome surfaces and addressing any minor imperfections promptly, you can maintain the overall appearance and quality of the paint job.
Troubleshooting Common Issues
When painting plastic chrome, you may encounter common issues that can affect the final result. Troubleshooting these issues is crucial to achieving a professional-looking finish. Here’s how to address some of the most common problems that may arise during the painting process.
Dealing With Peeling
If you notice peeling after painting plastic chrome, it may be due to inadequate surface preparation. Ensure that the plastic surface is thoroughly cleaned and free of any contaminants before applying the paint. Additionally, consider using a plastic adhesion promoter to enhance paint adhesion and prevent peeling.
Fixing Discoloration
Discoloration on the painted plastic chrome can occur due to various factors such as improper paint application or exposure to harsh environmental conditions. To address discoloration issues, try sanding the affected area lightly and applying a new coat of paint. Consider using a high-quality automotive-grade paint specifically designed for plastic surfaces to minimize the risk of discoloration.
Inspirational Projects
Embarking on a project to paint plastic chrome can be both rewarding and inspiring. Whether you are a seasoned DIY enthusiast or a beginner looking to add a personal touch to your belongings, the possibilities are endless. Let’s explore some inspirational projects, as well as gather valuable tips and tricks from the community.
Showcase Of Painted Items
Discover the endless potential of transforming plastic chrome items with a fresh coat of paint. From household fixtures to automotive accessories, the showcase of painted items will ignite your creativity and motivate you to take on your own projects. Witness how a simple change of color can breathe new life into everyday objects.
Community Tips And Tricks
Gain insights from the experienced and learn from the innovative approaches of fellow DIY enthusiasts. From surface preparation to the selection of the right paint, the community tips and tricks section will equip you with valuable knowledge to ensure a successful painting project. Engage with like-minded individuals and discover the collective wisdom of the community.
Frequently Asked Questions
Can Plastic Chrome Be Painted?
Yes, plastic chrome can be painted using special primers and paints designed for plastic surfaces. Ensure proper preparation and follow manufacturer’s guidelines for best results.
What Kind Of Paint Will Stick To Chrome?
Acrylic or epoxy paints are best for sticking to chrome surfaces. Make sure to clean and sand the chrome before painting.
Can Plastic Be Chromed?
Yes, plastic can be chromed using a process called vacuum metallization. This involves applying a thin layer of metal to the plastic surface, creating a chrome-like finish.
How Do You Revive Plastic Chrome?
To revive plastic chrome, follow these steps: 1. Clean the surface with mild soap and water. 2. Use a chrome polish specifically made for plastic. 3. Apply the polish using a soft cloth in circular motions. 4. Buff the surface until it shines.
5. Repeat the process as needed to maintain the shine.
Conclusion
Painting plastic chrome can be a simple and cost-effective way to transform the look of your items. By following the steps outlined in this blog post, you can achieve professional-looking results without breaking the bank. Remember to properly prepare the surface, choose the right paint and technique, and allow sufficient drying time for a durable finish.
With a little patience and attention to detail, you can give your plastic chrome pieces a fresh, new appearance that will impress. Happy painting!