Painting on plastic can be tricky because plastic surfaces are smooth and non-porous, making it difficult for the paint to adhere properly. However, with the right techniques and materials, you can achieve a long-lasting, professional-looking finish.
Whether you’re updating furniture, crafting, or working on home improvement projects, this guide will help you paint on plastic effectively.
Here, we’ll explore various preparation methods, the best types of paint, and detailed step-by-step instructions for a successful plastic painting project.
Contents
Why Is Painting on Plastic Challenging?
Plastic surfaces are different from materials like wood or metal, which are more porous and easier for paint to stick to. Plastic’s smoothness and flexibility can cause paint to chip, peel, or fail to adhere properly if not prepped correctly. Understanding the challenges will help you avoid common mistakes.
Key Challenges
- Non-porous surface: Paint may not stick to plastic without proper preparation.
- Flexibility: Some plastics flex, causing rigid paints to crack or peel.
- Oil-based properties: Some plastics have a slick, oily surface that repels water-based paints.
Tools and Materials Needed
Before diving into the painting process, gather the right tools and materials. This will ensure you’re fully prepared to complete your project efficiently and with professional results.
Tools
- Sandpaper (220-320 grit): To roughen up the surface.
- Lint-free cloth or microfiber cloth: For cleaning and dust removal.
- Painter’s tape: For masking areas you don’t want to paint.
- Paintbrushes or foam brushes: For detailed painting.
- Paint sprayer (optional): For large, even coverage.
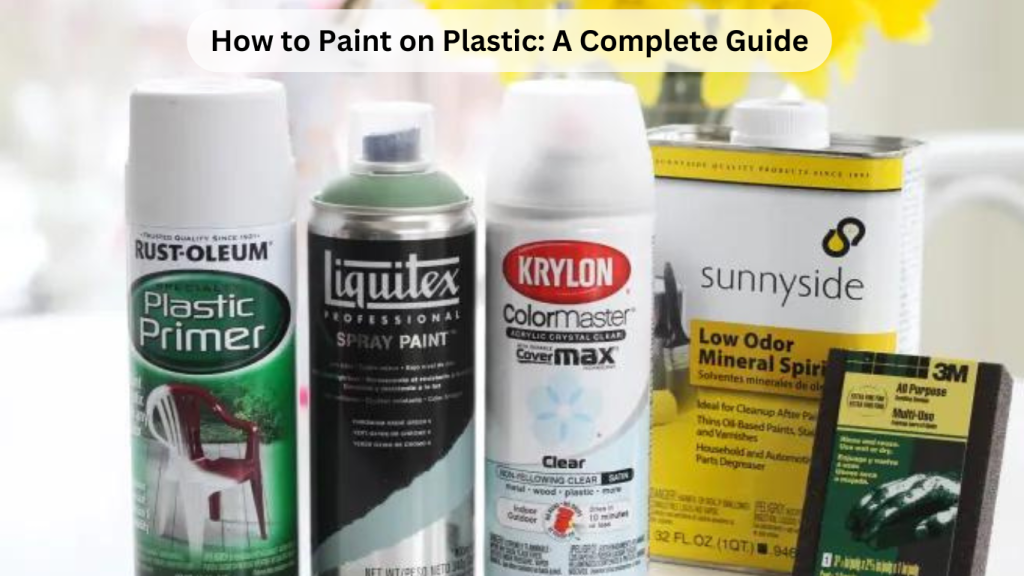
Materials
- Plastic primer: Ensures good adhesion between the plastic surface and the paint.
- Acrylic paint or spray paint: Designed specifically for plastic surfaces.
- Isopropyl alcohol or dish soap: For cleaning and degreasing.
- Clear topcoat (optional): For added durability and protection.
Step-by-Step Guide to Painting on Plastic
Step 1: Clean the Plastic Surface
The first and most important step when painting plastic is to thoroughly clean the surface. Plastic can have oils or dirt that will prevent the paint from adhering.
Cleaning Instructions
- Wash with Soap and Water: Use warm water and a few drops of mild dish soap to clean the plastic surface.
- Rinse and Dry: Rinse with clean water and dry thoroughly with a lint-free cloth.
- Degrease with Alcohol: Wipe the surface with isopropyl alcohol to remove any remaining grease or oils. This is especially important for plastics that feel oily to the touch.
Step 2: Sand the Plastic
Sanding is essential for creating a rough surface that paint can cling to. This step will help improve paint adhesion, especially on smooth plastics.
Sanding Instructions
- Choose the Right Grit: Use fine-grit sandpaper, typically between 220-320 grit, to lightly scuff the surface.
- Sand Lightly: Apply gentle pressure, sanding in circular motions to avoid deep scratches. The goal is to slightly roughen the surface.
- Remove Dust: After sanding, wipe the surface with a damp cloth or tack cloth to remove dust and debris.
Step 3: Apply a Plastic Primer
Primer is crucial when painting on plastic because it provides a surface that paint can bond to. Choose a primer specifically formulated for plastic.
Priming Instructions
- Mask Off Areas: Use painter’s tape to mask off any areas you don’t want to paint, ensuring a clean finish.
- Apply Primer Evenly: Spray the primer in thin, even coats, holding the can about 8-12 inches away from the surface. If using brush-on primer, apply thin, smooth coats with a paintbrush or foam brush.
- Allow Primer to Dry: Let the primer dry according to the manufacturer’s instructions, usually about 30 minutes to an hour.
Pro Tip: Use a high-quality primer to prevent peeling or flaking later on.
Step 4: Choose the Right Paint for Plastic
Not all paints work on plastic surfaces. It’s important to choose a paint specifically formulated for plastic to ensure long-lasting results.
Best Paint Types for Plastic
- Acrylic Paint: Water-based acrylic paints are ideal for most plastic projects because they adhere well and are durable.
- Spray Paint for Plastic: Many brands offer spray paints designed specifically for plastic surfaces, which are ideal for achieving smooth, even coverage.
- Oil-based Paint: For projects requiring extra durability, consider oil-based paints, though they require more time to dry.
Pro Tip: When working with spray paint, shake the can thoroughly for at least 2 minutes to ensure proper mixing.
Step 5: Paint the Plastic Surface
Now that the surface is prepped and primed, it’s time to apply the paint. Depending on the size and type of your project, you can use a brush, roller, or spray can.
Painting Instructions
- Apply Thin Coats: Whether using spray paint or acrylic paint, apply thin, even coats to avoid drips and streaks. For spray paint, hold the can 8-12 inches from the surface.
- Allow Proper Drying Time: Let each coat dry for 15-30 minutes before applying additional layers. Follow the manufacturer’s instructions for the exact drying time.
- Apply Additional Coats: Depending on the color and opacity of the paint, you may need 2-3 coats for full coverage. Be patient, and let each layer dry completely before adding the next.
Step 6: Apply a Clear Topcoat (Optional)
If the painted object will be subjected to frequent handling, exposure to elements, or wear and tear, applying a clear topcoat will provide extra protection.
Topcoat Application Instructions
- Choose a Clear Sealant: Opt for a clear sealant or topcoat designed for plastic surfaces.
- Apply Evenly: Like with the paint, apply the topcoat in thin, even layers.
- Drying Time: Allow the topcoat to dry completely before handling the painted item. This usually takes 24 hours, but follow the manufacturer’s guidelines.
Common Mistakes to Avoid
Even with the best intentions, there are a few common pitfalls that can ruin a plastic painting project. Avoid these mistakes to achieve a flawless finish.
Mistake 1: Skipping the Primer
Priming is essential when painting on plastic. Skipping this step can result in paint peeling, chipping, or failing to adhere properly.
Mistake 2: Not Sanding the Surface
Plastic surfaces are often too smooth for paint to stick to without roughening them up. Always sand the surface lightly before applying primer or paint.
Mistake 3: Applying Paint Too Thickly
Thick layers of paint can lead to drips, streaks, and uneven coverage. Always apply thin, even coats and allow each coat to dry before applying the next.
Mistake 4: Rushing the Drying Process
Paint needs time to cure properly. Rushing through the drying process can cause imperfections like smudges or bubbles in the paint.
Special Considerations for Different Types of Plastic
Not all plastics are the same, and some types may require extra care during the painting process.
Hard Plastics
Hard plastics like PVC, ABS, or polycarbonate typically take paint well, but they still require thorough cleaning and priming. These plastics are often used for furniture, toys, or construction materials.
Soft or Flexible Plastics
Soft plastics (like polyethylene or polypropylene) can be trickier because they flex, which can cause rigid paint to crack or peel. For these plastics, choose flexible paint and use a high-adhesion primer to help the paint adhere better.
Outdoor Plastics
Plastic items used outdoors, such as patio furniture, planters, or plastic shutters, need extra protection from the elements. Be sure to use outdoor-rated spray paint and apply a clear sealant for UV protection and weather resistance.
Maintenance Tips for Painted Plastic Surfaces
Once you’ve painted your plastic item, it’s important to take care of it to maintain the finish. Here are a few tips to help prolong the life of your newly painted plastic surface.
Cleaning Painted Plastic
- Use a Damp Cloth: For regular cleaning, wipe down the surface with a damp cloth and mild soap. Avoid harsh cleaners or scrubbing, which can damage the paint.
- Avoid Abrasive Materials: Never use abrasive sponges or scrubbers, as these can scratch the paint.
Touching Up Paint
- Spot Paint as Needed: If the paint chips or scratches over time, touch up the area with a small brush and matching paint.
- Reapply Clear Coat: If the topcoat wears down or becomes scratched, you may want to reapply a fresh layer of clear sealant for continued protection.
Conclusion
Painting on plastic doesn’t have to be difficult if you follow the right steps. By properly cleaning, sanding, and priming the plastic surface, you can achieve professional-looking, long-lasting results. Whether you’re updating outdoor furniture, crafting, or revamping household items, the methods outlined in this guide will ensure your paint sticks, looks great, and lasts for years to come.
Take your time with each step, especially the preparation phase, to avoid common mistakes and ensure a smooth, even finish. With a little patience and attention to detail, you’ll have beautifully painted plastic surfaces that stand the test of time!