To paint laminate walls in a bathroom, clean the surface thoroughly and apply a primer designed for laminate. Then, use a high-quality paint specifically formulated for bathrooms, applying it with a roller or brush in even coats.
Proper preparation and the right materials will ensure a long-lasting and professional-looking finish for your bathroom walls. In addition to enhancing the overall appearance, painting laminate walls can also provide protection against moisture and mold. By following these steps, you can easily transform the look of your bathroom and create a fresh and inviting space.
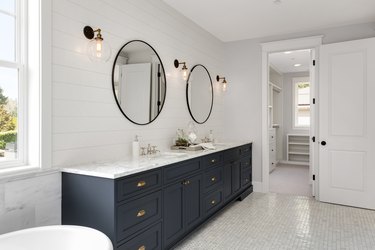
Credit: www.hunker.com
Contents
Introduction To Painting Laminate Walls
Laminate walls in a bathroom can pose a unique challenge when it comes to painting. Whether you are looking to update the color scheme or simply refresh the existing coat, understanding the specific considerations for painting laminate walls is crucial for a successful and long-lasting finish. In this article, we will delve into the benefits of applying a fresh coat of paint to laminate walls, as well as why these walls are different from traditional surfaces.
Benefits Of A Fresh Coat
Painting laminate walls in your bathroom can offer numerous advantages. Not only does it provide an opportunity to revitalize the space and introduce a new aesthetic, but it also allows for easier maintenance and cleaning. A fresh coat of paint can effectively conceal any imperfections or discoloration, giving your bathroom a renewed and polished appearance.
Why Laminate Walls Are Different
Laminate walls present unique challenges due to their smooth and non-porous surface, which can make adhesion difficult for conventional paint. Additionally, the material may expand and contract with fluctuations in temperature and humidity, requiring a specialized approach to ensure the longevity of the painted finish. Understanding these differences is essential for achieving a professional and durable outcome.
Materials And Tools Needed
To paint laminate walls in a bathroom, you’ll need a few essential materials and tools. Prepare by gathering painter’s tape, primer, paint, brushes, rollers, and a drop cloth. With these items on hand, you can transform your bathroom walls with a fresh coat of paint.
Painting laminate walls in your bathroom is an easy way to give your bathroom a quick and inexpensive update. However, before you start painting, you need to gather all the necessary materials and tools. In this post, we will discuss the materials and tools needed to successfully paint laminate walls in your bathroom.Choosing The Right Paint
Choosing the right paint is crucial when painting laminate walls in your bathroom. You need to select a paint that is specifically designed for use on laminate surfaces. Look for a paint that is labeled as “laminate paint” or “cabinet paint.” These paints are formulated to adhere to non-porous surfaces like laminate and will provide a durable, long-lasting finish.Essential Tools For The Job
In addition to the right paint, you will also need some essential tools to complete the job. Here are the tools you will need:| Tools | Description |
|---|---|
| Paintbrushes | You will need a few paintbrushes of varying sizes to apply the paint. |
| Roller | A roller will help you cover large areas quickly and evenly. |
| Paint tray | A paint tray will help you load your roller with paint. |
| Sandpaper | You will need sandpaper to lightly sand the laminate surface before painting. |
| Primer | A primer will help the paint adhere to the laminate surface. |
| Tape | You will need tape to protect areas you don’t want to paint, like trim and fixtures. |
| Cleaner | You will need a cleaner to remove any dirt, grime, or soap scum from the laminate surface. |
Preparing The Bathroom
Preparing the Bathroom for painting laminate walls is an important step to ensure a smooth and successful painting process. Proper preparation will help the paint adhere to the walls and ensure a professional finish. Below are the key steps to prepare your bathroom for painting laminate walls.
Clearing The Space
Prior to starting the preparation process, remove all items from the bathroom to create a clear and clutter-free workspace. Take down any fixtures, shelves, or accessories that may obstruct the walls. This will allow you to have ample space to work and ensure that every part of the walls is easily accessible.
Cleaning And Sanding The Walls
Begin by thoroughly cleaning the walls with a mild detergent and water to remove any dirt, grime, or soap residue. Once the walls are clean and dry, use a fine-grit sandpaper to lightly sand the surface. This will help the paint adhere better to the laminate walls and ensure a smooth finish. After sanding, wipe down the walls with a damp cloth to remove any dust or debris.
Priming Laminate Surfaces
When it comes to painting laminate walls in the bathroom, proper priming is crucial for achieving a professional and long-lasting finish. Priming laminate surfaces helps to ensure proper adhesion of the paint and enhances the durability of the painted surface, especially in high-moisture areas like bathrooms.
Importance Of A Good Primer
Using a high-quality primer specifically designed for laminate surfaces is essential for creating a strong bond between the paint and the wall. This not only improves the overall coverage and finish but also helps prevent peeling, chipping, and discoloration over time. The right primer can also block stains and provide a smooth base for the paint to adhere to, resulting in a more uniform and professional-looking application.
Application Tips
When applying the primer to laminate walls in the bathroom, it’s important to ensure that the surface is clean and free of any dust, grease, or residue. This can be achieved by lightly sanding the walls and wiping them down with a damp cloth before starting the priming process. Additionally, using a synthetic bristle brush or a foam roller can help achieve an even application and better coverage, especially on textured laminate surfaces.
Painting Techniques
Transforming the look of your bathroom can be as simple as painting the laminate walls. Discover effective painting techniques to achieve a fresh and vibrant bathroom space without breaking the bank.
Painting Techniques Painting laminate walls in the bathroom can be a daunting task, especially if you are not familiar with the right techniques. Fortunately, with the right tools and techniques, you can achieve a perfect look that will last for years. In this post, we will focus on painting techniques, with a particular emphasis on roller or brush and achieving even coats. Roller or Brush? The first decision you need to make when painting laminate walls in the bathroom is whether to use a roller or brush. Both tools have their advantages and disadvantages. A roller is ideal for covering large areas quickly, while a brush is perfect for reaching tight spots and corners. If you want to achieve a smooth finish, use a roller with a short nap, and if you prefer a textured finish, use a roller with a long nap. Achieving Even Coats To achieve even coats, you need to prepare the surface properly. Start by cleaning the walls with a mild detergent and warm water, then rinse and let them dry. Next, apply a primer to the walls to ensure the paint adheres properly. Once the primer has dried, you can apply the paint. Make sure to apply thin coats and let each coat dry before applying the next one. If you apply the paint too thickly, it will not dry evenly, and you may end up with a patchy finish. In conclusion, painting laminate walls in the bathroom requires the right tools and techniques. When choosing between a roller or brush, consider the size of the area you need to cover and the finish you want to achieve. To ensure even coats, prepare the surface properly, use a primer, and apply thin coats of paint. With these tips, you can transform your bathroom walls into a work of art.Drying And Re-coating
When it comes to painting laminate walls in the bathroom, ensuring the optimal drying and re-coating process is crucial for a successful and long-lasting finish. The drying and re-coating phase is where attention to detail is key, as it directly impacts the durability and appearance of the painted walls.
Optimal Drying Times
After applying the initial coat of paint, it’s essential to allow ample drying time before applying a second coat. The optimal drying time for paint on laminate walls in the bathroom is 24 to 48 hours. Ensure the area is well-ventilated to expedite the drying process, promoting a smooth and even finish.
When To Apply A Second Coat
It’s crucial to apply the second coat of paint only after the initial coat has fully dried. Applying a second coat too soon can lead to uneven coverage and a less durable finish. Once the optimal drying time has elapsed, carefully inspect the walls for any imperfections or areas that may require additional coverage before proceeding with the second coat.
Finishing Touches
After successfully painting the laminate walls in your bathroom, it’s time to add the finishing touches that will bring the entire project together. These final steps are crucial in ensuring a professional-looking and long-lasting result.
Sealing The Paint
Sealing the paint is an essential step to protect the newly painted laminate walls. A clear sealant will not only safeguard the paint from moisture and humidity but also make the surface easier to clean. Applying a water-based polyurethane sealant is recommended as it is durable and resistant to water damage.
Reinstalling Fixtures
Once the paint has dried and the sealant has been applied, it’s time to reinstall the fixtures that were removed prior to painting. Carefully reattach towel racks, toilet paper holders, and any other bathroom accessories. This step requires precision to ensure that the fixtures are securely in place without causing any damage to the freshly painted walls.

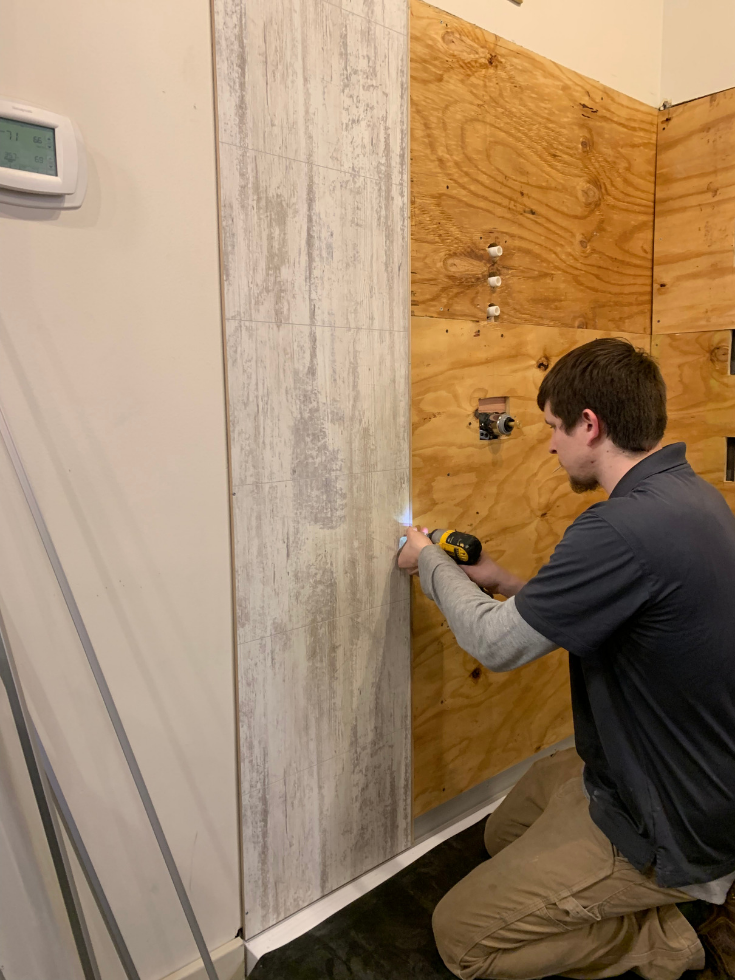
Credit: www.workshop.bunnings.com.au
Maintenance And Care
To paint laminate walls in a bathroom, you must start by cleaning the surface and sanding it lightly to create a rough texture. Then, apply a primer designed for laminate surfaces before painting with a high-quality bathroom paint. Proper maintenance and care of the painted walls can ensure its longevity and prevent peeling or chipping.
Painting laminate walls in the bathroom is a smart way to give your bathroom a fresh look without spending a lot of money. Laminate walls are affordable and durable, but they require proper care and maintenance to keep them looking their best. In this section, we will share some tips on how to maintain and care for your painted laminate walls in the bathroom.Regular Cleaning Tips
Cleaning is an essential part of maintaining painted laminate walls in the bathroom. Regular cleaning helps to keep the walls looking new and fresh. Here are some tips for cleaning your painted laminate walls:- Use a soft cloth or sponge to wipe the walls clean. Avoid using abrasive cleaners or scrubbers as they can damage the paint.
- Use a mild detergent or soap to clean the walls. Harsh chemicals can also damage the paint.
- Rinse the walls thoroughly with clean water and dry them with a soft towel or cloth.
- Use a bathroom fan or open a window to keep the room well-ventilated during and after cleaning.
Touching Up Scratches And Marks
Even with proper care, painted laminate walls in the bathroom can get scratched or marked. However, you can easily touch up these areas to keep the walls looking new. Here are some tips for touching up scratches and marks on your painted laminate walls:- Clean the area around the scratch or mark with a soft cloth and mild detergent.
- Use a fine-grit sandpaper to gently sand the area around the scratch or mark.
- Apply a small amount of paint to the scratch or mark using a small brush or cotton swab.
- Allow the paint to dry completely before applying a second coat if necessary.
- Once the paint is dry, use a fine-grit sandpaper to gently sand the area to blend the touch-up with the rest of the wall.
Credit: blog.innovatebuildingsolutions.com
Frequently Asked Questions
Can I Paint Laminate Walls In The Bathroom?
Yes, you can paint laminate walls in the bathroom. Ensure proper cleaning and use a high-quality primer and paint designed for use in high-moisture areas.
What Are The Steps To Prepare Laminate Walls For Painting?
To prepare laminate walls for painting, clean the surface thoroughly, sand lightly to create texture, apply a primer designed for slick surfaces, and finish with high-quality paint.
What Type Of Paint Should I Use For Laminate Bathroom Walls?
Use a high-quality latex paint with a semi-gloss or satin finish for the best results on laminate bathroom walls. This type of paint is durable and moisture-resistant.
Can I Use Any Color Of Paint For Laminate Bathroom Walls?
Yes, you can use any color of paint for laminate bathroom walls. Choose a color that complements your bathroom decor and creates the desired atmosphere. Ensure the paint is suitable for high-moisture areas.
Conclusion
Painting laminate walls in the bathroom can be a cost-effective and simple way to update the space without having to replace the walls. By following the step-by-step process, including proper cleaning and priming, using the right tools and techniques, and selecting the appropriate paint, you can achieve a professional-looking finish.
With a little effort and patience, your bathroom can have a fresh new look in no time. So go ahead, grab your paintbrush, and get started on your bathroom makeover today!