Painting concrete is an excellent way to enhance the aesthetic appeal of floors, walls, driveways, and other surfaces. Whether you’re looking to refresh an old patio, add color to your basement, or create a unique design, painting concrete can give it a new life.
This guide will explore various methods of painting concrete, the necessary preparations, and how to achieve a durable and beautiful finish.
Contents
Why Paint Concrete?
Concrete is a versatile material that can be found in many areas, both indoors and outdoors. However, it can often look dull and uninviting. Painting concrete can serve several purposes:
- Aesthetic Improvement: Adding color or patterns can significantly enhance the visual appeal of concrete surfaces.
- Protection: Paint can protect concrete from stains, moisture, and damage from UV rays.
- Maintenance: A well-painted surface is easier to clean and maintain compared to bare concrete.
- Safety: Special coatings can improve traction on slippery concrete surfaces, making them safer to walk on.
Preparing Concrete for Painting
Proper preparation is crucial for achieving a successful paint job on concrete. The right preparation ensures that the paint adheres well and lasts longer. Here’s how to prepare your concrete surface effectively:
1. Cleaning the Surface
Before applying any paint, the concrete surface must be thoroughly cleaned. Dirt, grease, and debris can prevent paint from adhering properly.
Steps for Cleaning:
- Remove loose debris: Use a broom or vacuum to remove loose dirt and debris from the surface.
- Wash with soap and water: Mix a solution of warm water and a mild detergent, and scrub the concrete with a stiff brush or mop.
- Use a pressure washer: For heavily soiled areas, a pressure washer can effectively remove dirt and grime.
- Rinse thoroughly: Ensure all soap residue is rinsed off with clean water, and allow the concrete to dry completely.
2. Repairing Damages
Inspect the concrete for any cracks, holes, or damage. Repairing these imperfections is essential for a smooth finish.
Steps for Repairing:
- Fill cracks and holes: Use a concrete filler or patching compound for small cracks and holes. Larger areas may require a concrete resurfacer.
- Allow repairs to cure: Follow the manufacturer’s instructions for curing time, typically 24-48 hours.
3. Etching the Surface (if necessary)
If you’re painting bare concrete, etching the surface can help improve paint adhesion. This process involves using an acid solution to create a rough texture.
Steps for Etching:
- Choose an etching solution: Use a concrete etcher or a mixture of one part muriatic acid to ten parts water.
- Apply the solution: Wear protective gear, including gloves and goggles. Apply the etching solution evenly with a brush or sprayer.
- Scrub the surface: Use a stiff brush to scrub the surface while the solution is still wet.
- Rinse thoroughly: After scrubbing, rinse the surface with water to neutralize the acid, then allow it to dry.
4. Priming the Surface
Priming is essential, especially for porous concrete. A good primer will improve paint adhesion and block stains.
Steps for Priming:
- Choose a concrete primer: Use a water-based or oil-based primer suitable for concrete.
- Apply the primer: Use a roller or brush to apply a thin, even coat of primer, making sure to cover all areas.
- Allow the primer to dry: Follow the manufacturer’s instructions for drying time before proceeding to paint.
Different Ways to Paint Concrete
Now that your concrete is prepped, you can choose from several methods to paint it. Each method has its benefits, so select one based on your project needs.
1. Brush Painting Concrete
Brush painting is a traditional method that works well for smaller areas or detailed work, such as trim or intricate designs.
Tools and Materials:
- High-quality paintbrush
- Concrete paint (latex or epoxy)
- Painter’s tape (optional)
Step-by-Step Guide:
- Select the right brush: Choose a brush designed for concrete or masonry for the best results.
- Dip the brush in paint: Avoid overloading the brush to prevent drips.
- Apply paint in even strokes: Use long, even strokes to apply the paint, working in sections.
- Let the paint dry: Allow the first coat to dry completely before applying additional coats.
- Apply a second coat: Depending on the paint and color, a second or third coat may be necessary for full coverage.
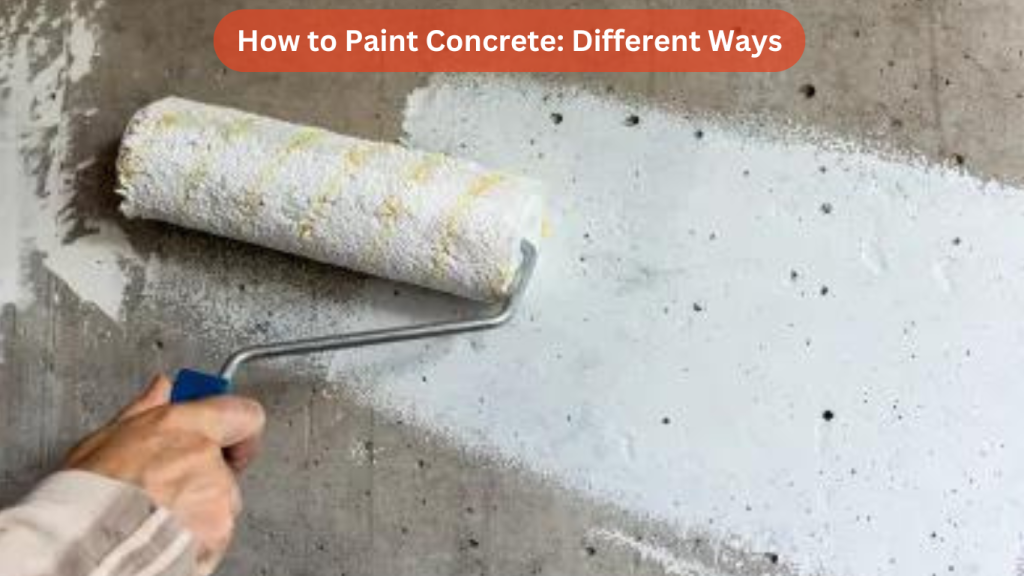
2. Roller Painting Concrete
Rollers are ideal for larger areas, such as floors and walls, providing even coverage and efficiency.
Tools and Materials:
- Paint roller with a long handle
- Paint tray
- Concrete paint (latex or epoxy)
Step-by-Step Guide:
- Choose the right roller: Use a roller with a nap suited for concrete surfaces. A ¾-inch nap is generally good for textured surfaces.
- Pour paint into the tray: Fill the paint tray with an adequate amount of paint.
- Load the roller: Dip the roller into the paint and roll it on the tray to remove excess.
- Apply paint in sections: Roll the paint onto the surface in sections, overlapping each stroke for an even finish.
- Let the paint dry: Allow the first coat to dry before applying additional coats.
3. Spray Painting Concrete
Spray painting is a quick method for covering large areas and can create a smooth finish without brush strokes.
Tools and Materials:
- Spray paint designed for concrete
- Paint sprayer (airless or compressed air)
- Drop cloths or newspaper for protection
Step-by-Step Guide:
- Prepare the sprayer: Fill the sprayer with paint, ensuring it’s properly thinned according to the manufacturer’s recommendations.
- Test the sprayer: Practice on a scrap piece of concrete to adjust the spray pattern and pressure.
- Apply in smooth, even passes: Hold the sprayer about 8-12 inches from the surface and move in a steady, overlapping motion.
- Allow paint to dry: Let each coat dry before applying additional coats.
4. Stenciling on Concrete
Stenciling allows for creative designs and patterns, perfect for patios, walkways, and decorative floors.
Tools and Materials:
- Stencil of your choice
- Concrete paint (latex or acrylic)
- Sponge or roller
- Painter’s tape
Step-by-Step Guide:
- Choose and position the stencil: Place the stencil securely on the desired area. Use painter’s tape to keep it in place.
- Apply paint: Using a sponge or roller, apply paint over the stencil, being careful not to go outside the edges.
- Remove the stencil: Carefully lift the stencil away while the paint is still wet for clean lines.
- Let it dry: Allow the paint to dry completely before applying a sealant.
Types of Paint for Concrete
Selecting the right paint is essential for the longevity and look of your project. Here are some common types of paint suitable for concrete:
1. Latex Paint
Latex paint is water-based and suitable for indoor concrete surfaces. It dries quickly, has low odor, and is easy to clean up. However, it may not be as durable as other options for outdoor surfaces.
2. Epoxy Paint
Epoxy paint is a popular choice for garage floors and high-traffic areas. It creates a tough, durable surface that can withstand heavy use, moisture, and stains. Epoxy paints typically require a primer and may take longer to cure.
3. Concrete Stain
Concrete stains penetrate the surface of the concrete and provide a translucent color that enhances the natural look of the material. Stains are ideal for creating a natural, mottled effect and are available in both acid-based and water-based formulations.
4. Sealers
Concrete sealers are often used as a topcoat after painting to provide added protection against moisture, stains, and UV rays. Sealers come in various finishes, including matte, satin, and gloss.
Tips for a Successful Concrete Painting Project
- Choose the right day: Ideal weather for outdoor painting is warm and dry. Avoid painting in direct sunlight or during high humidity.
- Test the paint: Always test your paint on a small area first to see how it adheres and the color.
- Use quality materials: Invest in high-quality paint, brushes, and rollers for the best results.
- Follow manufacturer instructions: Always adhere to the guidelines provided by the paint and primer manufacturers for the best results.
- Consider anti-slip additives: If painting a floor or outdoor surface, consider mixing in anti-slip additives to improve safety.
Troubleshooting Common Problems
1. Peeling Paint
If the paint begins to peel after application, it may be due to insufficient surface preparation or applying paint in humid conditions. Ensure the surface is clean, dry, and properly primed before repainting.
2. Uneven Coverage
Uneven paint coverage can occur from applying too thick of a coat or not using enough paint. Apply thin, even layers, and use a roller for larger areas.
3. Stains Bleeding Through
Stains from the concrete can bleed through the paint, particularly if the concrete is not properly sealed. Use a stain-blocking primer to prevent this issue.
Conclusion
Painting concrete can dramatically enhance the look and durability of surfaces in your home or outdoor areas. Whether you choose to brush, roll, spray, or stencil your concrete, following the right preparation and application methods will yield stunning results.
With the right tools and techniques, you can create beautiful, long-lasting finishes that transform dull concrete into vibrant, eye-catching surfaces.
Remember to select the right paint for your specific needs and always prioritize surface preparation for the best outcomes. Happy painting!