To paint a basement ceiling black, start by cleaning the surface and protecting the surrounding area. Use a flat black paint and a sprayer for even coverage and a professional finish.
Transforming your basement ceiling with a coat of black paint can do wonders for the look and feel of your space. It’s a modern design choice that can make the ceiling seem higher and hide a multitude of imperfections. This task requires preparation, the right tools, and a bit of know-how.
By selecting a quality paint and taking the proper steps to prepare the surface, you can achieve a sleek, stylish look that enhances your basement’s overall aesthetic. Painting your basement ceiling black also helps in concealing exposed ductwork, pipes, and wires, giving your space a clean, finished appearance. Let’s delve into the process and provide you with a step-by-step guide to ensure your project is a success.
Credit: buildingbluebird.com
Contents
- Introduction To Black Basement Ceilings
- Preparation For Painting
- Choosing The Right Paint
- Cleaning And Priming The Ceiling
- Techniques For Painting Overhead
- Navigating Obstacles And Fixtures
- Applying Multiple Coats
- Finishing Touches
- Maintenance And Upkeep
- Before And After: Visual Transformations
- Frequently Asked Questions
- Conclusion
Introduction To Black Basement Ceilings
Introduction to Black Basement Ceilings sets the stage for a dramatic transformation of your lower-level space. Embracing a black ceiling can revolutionize the way you perceive and utilize your basement. This bold move not only elevates the aesthetic but also delivers practical benefits.
Rising Trend In Home Design
Black ceilings have emerged as a popular choice for homeowners. This trend aligns with modern, industrial, and minimalist design themes. It brings a touch of sophistication to basements, which are often overlooked in home design.
Benefits Of A Black Ceiling
- Visual Expansion: Black paint can make ceilings appear higher, creating an illusion of more space.
- Conceals Imperfections: It easily hides unsightly pipes, ductwork, and irregularities.
- Enhances Ambiance: A black ceiling adds depth and character, perfect for home theaters or lounges.
- Focus on Decor: It shifts the focus to the walls and furniture, allowing them to pop.
- Maintenance Ease: Darker hues require less frequent touch-ups to maintain a clean look.
Preparation For Painting
Before transforming a basement ceiling with a fresh coat of black paint, proper preparation is key. This initial step is crucial for a smooth painting process. It ensures a professional-looking finish that lasts. Let’s dive into how to set the stage for a successful basement ceiling makeover.
Clearing The Area
Empty the basement. Begin by removing furniture, boxes, and other items. This creates a safe workspace. It also protects belongings from paint splatters.
- Store items in another room.
- Cover any immovable objects with drop cloths.
Ensure good lighting. A well-lit space is essential for even paint application. Use additional lamps if needed.
Safety Measures
Protect yourself. Painting a ceiling can involve falling debris and paint. Wear safety glasses, gloves, and a hat.
Ventilation is vital. Open windows and use fans. This helps clear out paint fumes.
Use a sturdy ladder. A reliable ladder provides safe access to the ceiling. Make sure it is stable and the right height.
Gathering Materials
| Material | Quantity | Notes |
|---|---|---|
| Black Paint | Varies | Matte or satin finish recommended |
| Primer | Based on area | Essential for paint adhesion |
| Rollers | 2-3 | Extension poles needed |
| Brushes | Multiple sizes | For edges and tight spots |
| Drop Cloths | Enough to cover | Protect floors and items |
| Painter’s Tape | 1-2 rolls | For clean lines |
Gather all necessary materials before starting. This ensures an uninterrupted workflow. Double-check quantities to avoid mid-project shopping trips.
Choosing The Right Paint
Transforming a basement ceiling with black paint can create an illusion of depth and space. It’s essential to select the best paint for a long-lasting, professional appearance. Factors like moisture resistance and coverage ability are key.
Types Of Paint Suitable For Basements
Basements require special paint to handle humidity and low light. Here are the paints to consider:
- Water-based Acrylics: Quick drying and easy to clean.
- Oil-based Paints: Durable but with longer drying times.
- Anti-mold Paints: Prevents mold growth, perfect for basements.
Finish Options: Matte Vs. Gloss
Choosing the right finish can affect the ceiling’s look and feel. Let’s compare:
| Finish Type | Appearance | Practicality |
|---|---|---|
| Matte | Non-reflective, hides imperfections. | Great for low traffic areas, easy touch-ups. |
| Gloss | Shiny, reflective finish. | Easy to clean, ideal for frequent use. |

Credit: m.youtube.com
Cleaning And Priming The Ceiling
Before transforming a basement ceiling, the groundwork is key. Cleaning and priming are crucial first steps. They ensure a smooth, lasting finish. Let’s prepare the ceiling the right way.
Removing Dust And Debris
Start with a clean canvas. A clutter-free ceiling is vital.
- Wear safety goggles and a mask.
- Use a vacuum with a brush attachment to remove dust.
- Wipe down the surface with a damp cloth.
- Allow the ceiling to dry completely.
Applying Primer Effectively
Priming is essential for a uniform color and adhesion.
- Select a high-quality primer suitable for ceilings.
- Cover the floor and walls with drop cloths.
- Use a paint roller for even application.
- Apply primer in consistent, overlapping strokes.
- Let the primer dry thoroughly before painting.
Techniques For Painting Overhead
Transforming your basement ceiling with a fresh coat of black paint can create a modern and spacious feel. But painting overhead surfaces requires specific techniques to ensure a clean, even finish without the mess.
Using Rollers For Even Coats
Rollers are essential for covering large ceiling areas quickly and evenly. Here’s a step-by-step guide:
- Choose the right roller: A thick nap roller is best for textured surfaces.
- Use an extension pole: This tool allows you to reach high areas without a ladder.
- Apply paint in sections: Work in manageable areas to maintain a wet edge.
- Roll in different directions: This technique helps to avoid roller marks.
- Cover thoroughly: Ensure no spots are missed for an even coat.
Brush Work For Corners And Edges
For precision around the perimeter of your basement ceiling, brushes are the way to go:
- Opt for an angled brush: It gives better control along edges.
- Dip halfway: This prevents dripping and ensures a smooth application.
- Paint in short strokes: This method offers more precision.
- Feather out the edges: Blending the paint prevents visible lines.
Transforming a basement ceiling into a sleek, black canvas can breathe new life into your space. Yet, this task comes with unique challenges. Pipes, wires, ductwork, and lighting fixtures can turn this project into an obstacle course. The key to success lies in careful planning and execution. Here’s how to tackle each hurdle with ease.
Working Around Pipes And Wires
Painting around pipes and wires requires patience and precision. Follow these steps:
- Turn off the power to ensure safety.
- Use painter’s tape to cover wires or small pipes.
- For larger pipes, apply brush strokes parallel to the pipe.
- Choose flat black paint to minimize reflections.
Dealing With Ductwork And Lighting
Ductwork and lighting fixtures can be tricky. Here’s a guide to navigate:
- Remove light bulbs and covers first.
- Cover lighting sockets with protective tape.
- Use a mini roller to paint ducts evenly.
- Apply multiple thin coats for best coverage.
Applying Multiple Coats
Transforming a basement ceiling with a fresh coat of black paint can make a dramatic impact. Applying multiple coats ensures a rich, even finish. This section guides you through the process.
Determining The Number Of Coats
Assess the current ceiling condition to decide how many coats you’ll need. Bare or unpainted surfaces typically require at least two coats. For previously painted ceilings, one coat might suffice, provided the existing color is similar and in good shape.
Consider the paint’s opacity. High-opacity paints might cover in fewer coats. Test a small area first to gauge coverage.
Drying Time Between Coats
Each coat needs time to dry. Check the paint can for the manufacturer’s recommended drying time. Typically, wait at least 2-4 hours before applying the next coat.
Avoid touching the ceiling while it’s drying. Keep the basement well-ventilated to speed up the drying process.
Remember, rushing between coats can lead to uneven texture or visible streaks. Patience is key.
Finishing Touches
The journey of transforming your basement ceiling with sleek black paint is almost complete. The painting part is done, but the job is not finished until the final touches are in place. These steps ensure your hard work lasts longer and looks better. Let’s dive into sealing the paint and reinstalling fixtures, the final strides to a stunning basement makeover.
Sealing And Protecting The Paint
With the black paint dry, it’s time to seal and protect your new ceiling. Sealing is vital; it guards the paint against moisture and dust. Here’s how to do it:
- Choose the right sealant: Pick a sealant meant for ceilings and compatible with your paint.
- Apply evenly: Use a paint roller or sprayer for an even coat.
- Let it dry: Follow the manufacturer’s instructions for drying time.
After sealing, your ceiling’s new color is safe from the elements.
Reinstalling Fixtures
With the paint sealed, it’s time to put everything back in place. This step brings back functionality and completes the look. Follow these tips for a smooth process:
- Check fixtures: Before reinstalling, make sure all fixtures work properly.
- Replace bulbs: Consider new, energy-efficient bulbs for better lighting.
- Secure tightly: Fixtures should fit snugly to avoid future issues.
Reinstalling fixtures is the final touch to a professional-looking basement ceiling update.
Maintenance And Upkeep
A sleek black basement ceiling can significantly boost your space’s style quotient. Yet, to keep its striking look, regular maintenance is key. Let’s explore effective ways to maintain the chic appearance of your black ceiling.
Cleaning The Black Ceiling
Dust and cobwebs can dull the sharpness of a black ceiling. Regular cleaning ensures it stays pristine. Use a long-handled duster for hard-to-reach spots. For stains, mix water with mild detergent. Dip a soft cloth in this solution and gently wipe the stained area. Always avoid harsh chemicals, as they can strip the paint.
- Dust regularly to prevent build-up.
- Spot clean stains with a gentle detergent solution.
- Avoid harsh chemicals that can damage the paint.
Touch-up Strategies
Even with careful maintenance, your ceiling may need touch-ups. Keep leftover paint from your initial job for this purpose. Use a small brush for minor nicks and scratches. For larger areas, a roller will provide a more even coverage. Remember to cover the floor and furniture to protect from splatters.
| Touch-up Tool | Use Case |
|---|---|
| Small Brush | Minor nicks and scratches |
| Roller | Larger areas |
Match the original finish for a seamless look. Apply thin layers and allow them to dry completely. This method ensures a uniform appearance across your ceiling.
Before And After: Visual Transformations
Turning a drab basement into a sleek space starts with a bold move: painting the ceiling black. This transformation not only adds depth to the room but also conceals unsightly pipes and ductwork. Witness stunning before and after results that prove a black ceiling can revolutionize any basement.
Showcasing Project Results
Photos capture the dramatic change a black ceiling brings. Before, white or unfinished ceilings make basements feel cluttered and unfinished. After, the black paint unifies the space and highlights features like lighting and furniture.
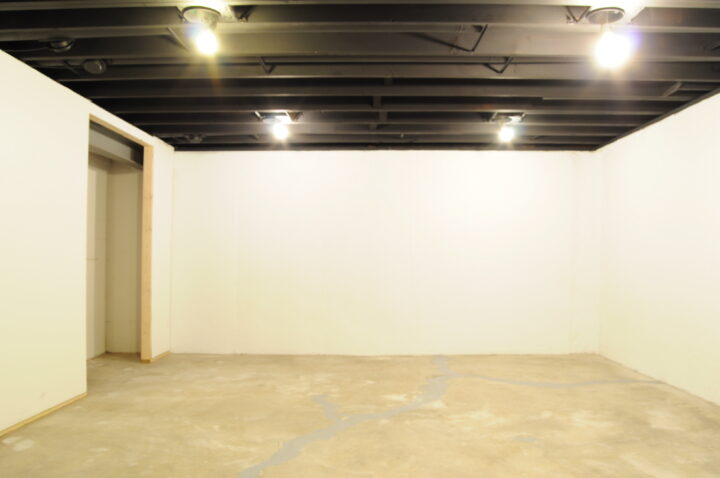
- Before: Exposed wires and patchy insulation distract the eye.
- After: A seamless black canvas directs focus to room decor.
Contrast becomes the designer’s tool, with black ceilings acting as the backdrop. This visual trick creates an illusion of height, making the basement appear larger.
Real-life Examples
Real homes showcase the beauty of black basement ceilings. One homeowner saw their low-ceiling basement transform into a cozy den. Another turned a cluttered storage area into a modern home theater.
| Homeowner | Before | After |
|---|---|---|
| Den Makeover | Crammed and dim | Spacious and inviting |
| Theater Conversion | Cluttered and dull | Sleek and exciting |
Through these examples, the power of a black ceiling to transform a space becomes clear. It’s not just a color choice; it’s a design decision that alters perception and enhances function.

Credit: www.macfarlandpainting.com
Frequently Asked Questions
What Kind Of Paint Do You Use To Paint Basement Ceiling Black?
Use a flat or matte black spray paint or acrylic latex paint for painting a basement ceiling. These types resist moisture and prevent light reflection.
How Much Does It Cost To Paint A Basement Ceiling Black?
The cost to paint a basement ceiling black typically ranges from $1 to $3 per square foot, depending on factors such as ceiling height and surface condition.
Why Do People Paint Their Basement Ceiling Black?
People paint their basement ceilings black to create an illusion of depth and hide imperfections, wires, and ductwork. This color choice can also enhance the ambiance and make the ceiling appear higher.
Is Painting Your Ceiling Black A Good Idea?
Painting your ceiling black can create a bold, modern look and enhance room ambiance, but it may make spaces feel smaller and darker. Consider room size and lighting before deciding.
Conclusion
Transforming your basement into a sleek, modern space is simple with a fresh coat of black paint on the ceiling. Follow the steps outlined, and remember, a darker ceiling can truly redefine your basement’s ambiance. Ready to make a bold statement?
Grab your brushes and let the magic unfold in your underground haven.