Painting your car can completely transform its appearance, whether you’re restoring an old vehicle, covering up damage, or simply changing the color. While painting a car might seem like a task reserved for professionals, with the right tools, preparation, and patience, you can successfully paint your own car at home.
In this comprehensive guide, we’ll walk you through every step of painting a car, from the preparation process to applying the final coat. By the end of this post, you’ll have a solid understanding of how to paint a car and achieve a professional-looking finish.
Contents
Why Paint Your Car?
There are several reasons why you might want to paint your car:
- Restore an Old or Faded Paint Job: Over time, a car’s original paint job can fade, become scratched, or look dull due to exposure to the sun and weather. Repainting gives your car a fresh, vibrant appearance.
- Change the Car’s Color: If you’re tired of your car’s color, painting it a new shade is a great way to personalize your vehicle and make it feel brand new.
- Repair Damage: Scratches, dents, and other damage can cause the paint to chip away. A fresh coat of paint can cover up these imperfections and protect the underlying metal.
- Increase Resale Value: If you’re planning to sell your car, a new paint job can improve its appearance and increase its resale value.
Tools and Materials Needed for Painting a Car
Before you begin, it’s important to gather all the necessary tools and materials. Here’s a list of what you’ll need:
Essential Tools:
- Air compressor and spray gun (for a professional finish)
- Sandpaper (400-grit and 2000-grit)
- Electric sander (optional but recommended for larger jobs)
- Masking tape and plastic sheeting (to protect areas you don’t want to paint)
- Respirator or face mask (to protect from fumes)
- Safety goggles and gloves
- Tack cloth (for wiping down the surface)
- Primer (specific for automotive use)
- Car paint (automotive-grade, such as urethane, acrylic, or enamel)
- Clear coat (for protection and shine)
- Paint thinner (to clean the spray gun and thin paint if needed)
- Mixing buckets (for preparing paint and primer)
Optional Tools:
- Body filler (for repairing dents)
- Polishing compound and buffer (for a high-gloss finish after painting)
Choosing the Right Paint
When painting a car, it’s important to choose the right type of automotive paint. There are three main types of car paint:
1. Acrylic Lacquer:
- Pros: High gloss and easy to apply.
- Cons: Not as durable as other options and can fade under UV exposure.
2. Acrylic Enamel:
- Pros: More durable than lacquer, provides a hard, long-lasting finish.
- Cons: Requires a clear coat to protect the paint, and drying times can be longer.
3. Urethane:
- Pros: Extremely durable, resistant to chipping and fading, and provides a professional-grade finish.
- Cons: More expensive than other types of paint and more difficult to work with due to its thicker consistency.
Step-by-Step Guide: How to Paint a Car
Step 1: Prepare the Workspace
Before you begin painting, you’ll need a clean, well-ventilated space with good lighting. Ideally, this should be a garage or a covered area that is free of dust and debris.
- Ensure proper ventilation: You’ll be working with toxic chemicals, so make sure your workspace is well-ventilated.
- Minimize dust: Sweep the floor and wipe down surfaces to minimize dust particles, which can ruin your paint job.
- Use protective equipment: Always wear a respirator or mask, gloves, and goggles to protect yourself from fumes and chemicals.
Step 2: Prep the Car’s Surface
Proper preparation is the most important part of painting a car. The better you prep, the smoother and more professional your paint job will look.
1. Wash the Car:
- Start by washing the car thoroughly to remove dirt, grease, and grime. Use a car soap and a microfiber cloth, then rinse and let it dry completely.
2. Sand the Surface:
- Sanding the car is critical to ensure the new paint adheres properly. Begin with 400-grit sandpaper, working over the entire surface of the car.
- If there are deep scratches or dents, use an electric sander to smooth out the surface. You can also apply body filler to repair any dents or imperfections.
3. Clean the Surface Again:
- After sanding, use a tack cloth to wipe away dust and debris. You can also use a degreaser to ensure the surface is completely clean.
4. Mask Off Areas You Don’t Want to Paint:
- Use masking tape and plastic sheeting to cover windows, mirrors, lights, tires, and any other areas you don’t want to paint. Be precise with your tape lines to avoid overspray.
Step 3: Apply Primer
Primer is essential for creating a smooth surface and helping the paint adhere to the car’s body.
1. Mix the Primer:
- Mix the primer according to the manufacturer’s instructions. Automotive primer usually comes in a two-part formula, with a base and an activator.
2. Spray the Primer:
- Use your spray gun to apply an even coat of primer to the car. Hold the spray gun about 6-8 inches away from the surface and spray in even, overlapping strokes.
- Apply 2-3 coats of primer, allowing each coat to dry for about 15-20 minutes in between. Once all coats are applied, let the primer cure for at least 1 hour.
3. Sand the Primer:
- Once the primer is fully dry, use 800-grit sandpaper to lightly sand the surface. This removes any imperfections and creates a smooth base for the paint.
Step 4: Apply the Base Coat (Color)
Now that your car is prepped and primed, it’s time to apply the base coat, which is the color layer of the paint.
1. Mix the Paint:
- Mix your automotive paint with a thinner if required, following the manufacturer’s instructions. Thinning the paint ensures it sprays evenly and smoothly.
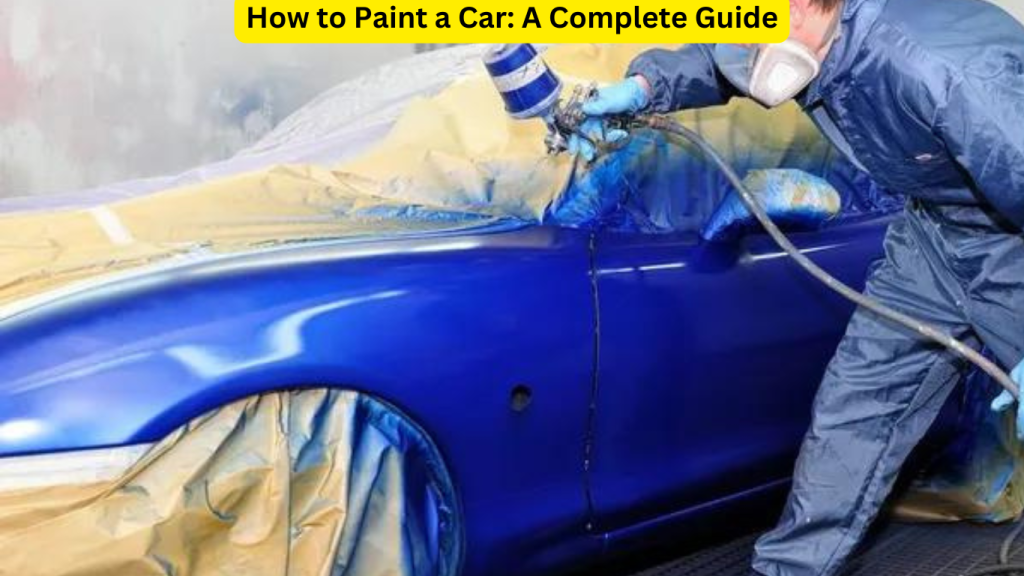
2. Spray the Paint:
- Begin spraying the base coat in the same manner as the primer, holding the spray gun 6-8 inches from the surface. Use smooth, sweeping motions, and overlap each pass to avoid streaks.
- Apply 2-3 thin coats, allowing 10-15 minutes of drying time between coats.
Tips:
- Avoid heavy coats to prevent drips and runs. Thin, even layers are better.
- Work in sections, starting with the roof, then moving to the hood, doors, and other panels.
3. Let the Base Coat Dry:
- Once you’ve applied the final base coat, let the paint dry for about 30 minutes to an hour before moving to the next step.
Step 5: Apply the Clear Coat
The clear coat provides a glossy finish and protects the base coat from UV damage, scratches, and wear.
1. Mix the Clear Coat:
- Mix the clear coat with its activator (if necessary) following the manufacturer’s instructions.
2. Spray the Clear Coat:
- Apply 2-3 coats of clear coat in the same manner as the base coat, using even strokes and overlapping each pass.
- Allow each coat to dry for 10-15 minutes before applying the next one.
3. Let the Clear Coat Dry:
- Once you’ve applied the final clear coat, allow the car to dry for 24-48 hours in a clean, dust-free environment. Avoid touching the car during this time to prevent smudging or fingerprints.
Step 6: Buff and Polish
Once the clear coat has fully dried and cured, you can buff and polish the surface to give it a professional, high-gloss finish.
1. Wet Sand the Surface:
- Using 2000-grit sandpaper, lightly wet sand the clear coat to remove any minor imperfections, such as orange peel or dust nibs. Be careful not to sand too aggressively, as this can remove the clear coat.
2. Buff the Surface:
- Use a polishing compound and a buffer to bring out the shine. Work in small sections, applying light pressure, and buff until the surface is smooth and glossy.
3. Apply Wax (Optional):
- For extra protection and shine, you can apply a high-quality car wax to the newly painted surface. This will also help protect against environmental damage.
Final Tips for a Professional Finish
- Patience is Key: Take your time with each step. Rushing can lead to uneven coats, drips, and imperfections.
- Practice Makes Perfect: If you’re new to painting, consider practicing on a smaller surface, like an old panel or even a scrap piece of metal, before tackling your entire car.
- Temperature and Humidity Matter: Paint in a controlled environment. High humidity can cause the paint to take longer to dry, while extreme temperatures can affect the finish.
- Safety First: Always wear protective gear, including a respirator, gloves, and safety glasses. Paint fumes are toxic and can be harmful if inhaled.
Conclusion
Painting a car is a rewarding but time-consuming process that requires precision and attention to detail. With the right tools, preparation, and techniques, you can achieve a high-quality finish that looks just as good as a professional paint job.
By following this step-by-step guide, you’ll be well on your way to transforming your car’s appearance and enjoying the satisfaction of a job well done.