Painting a bumper can refresh the look of your vehicle, cover up scratches, and even enhance its value. Whether you’re dealing with a plastic or metal bumper, painting it yourself is a cost-effective option that can save you money compared to a professional service.
This guide will explore the various ways you can paint a bumper, along with step-by-step instructions, tools you’ll need, and tips for ensuring a smooth, professional-looking finish.
Contents
Why Paint Your Bumper?
Bumpers are one of the most vulnerable parts of a vehicle. They protect the car from minor collisions and damage but also take the brunt of scratches, scuffs, and dings. Here are some common reasons you might want to repaint your bumper:
- Scratch and Dent Repair: Minor scratches and dents can make a vehicle look old or poorly maintained. A fresh coat of paint can restore your bumper to its former glory.
- Color Change: You might want to change the color of your bumper to match a new paint job or give your car a more customized look.
- Rust Prevention: On metal bumpers, repainting prevents rust, which can eat away at the bumper and create long-term structural damage.
Preparation Before Painting
Tools and Materials Needed
Before you begin painting your bumper, gather the necessary tools and materials:
- Sandpaper (ranging from 180 to 600 grit)
- Primer (specific for plastic or metal surfaces)
- Paint (automotive spray paint or traditional paint depending on method)
- Clear coat (for protection and glossy finish)
- Masking tape and plastic sheets
- Painter’s mask
- Tack cloth
- Soap and water
- Paint thinner (optional for cleaning)
Step-by-Step Preparation
- Remove the Bumper (If Needed)
If you can, remove the bumper from the car for better access to the entire surface. Use basic tools like a screwdriver or wrench to detach the bumper. If removing it isn’t an option, make sure to mask off the surrounding areas carefully. - Clean the Bumper
Use soap and water to thoroughly clean the surface of the bumper. Any grease, dirt, or debris can prevent the paint from adhering properly. - Sand the Surface
Sand the entire bumper using 180-240 grit sandpaper for the first pass. This removes the top layer of old paint or finishes and provides a rough surface for the primer and paint to stick to. Then, smooth it out with a finer grit (400-600 grit) to remove any deeper scratches. - Mask Off Surrounding Areas
If you haven’t removed the bumper, use masking tape and plastic sheets to cover any areas you don’t want to paint, including nearby bodywork, headlights, and grills. - Apply Primer
The primer is essential for creating a smooth surface and helps the paint adhere better. Use a primer designed for the bumper material (plastic or metal). Apply two or three thin coats, allowing each coat to dry for about 10 minutes before applying the next.
Different Ways to Paint a Bumper
Method 1: Using Spray Paint
Spray painting is one of the most common methods for repainting a bumper, especially for DIY enthusiasts. It’s inexpensive and relatively easy to do with the right technique.
Step-by-Step Instructions
- Shake the Spray Paint Can
Shake the can for at least 2-3 minutes to ensure the paint mixes well. This prevents blotches or uneven application. - Apply Thin Coats
Hold the can about 8-12 inches from the surface of the bumper. Apply the paint in light, even strokes, moving in a side-to-side motion. Apply several thin coats rather than one thick coat to avoid drips and runs. - Wait for Each Coat to Dry
Let each coat dry for about 10-15 minutes before applying the next. Aim for 3-4 coats of paint for a solid, even finish. - Apply Clear Coat
After the final coat of paint has dried (wait 30 minutes), apply a clear coat. This will give the bumper a glossy, protective finish and help the paint last longer. - Let It Dry
Allow the bumper to dry completely for at least 24-48 hours before handling or reattaching it to your car.
Pros:
- Cost-effective and easy to do at home.
- Spray paint cans are widely available.
Cons:
- May require multiple coats for even coverage.
- Risk of overspray and uneven finish without practice.
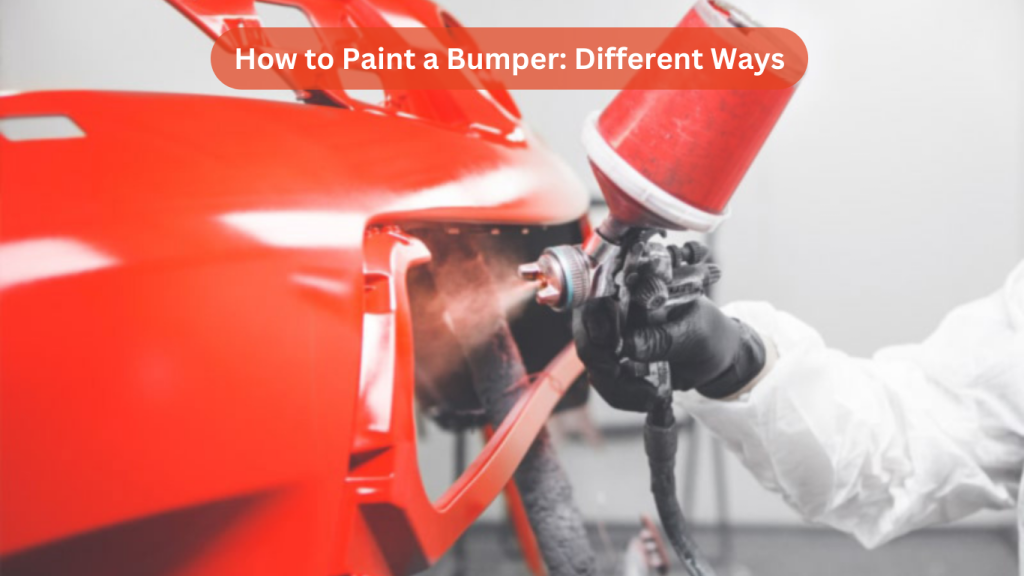
Method 2: Using a Paint Gun (for Professional Finish)
For a more professional finish, using a paint gun is the preferred method. This method gives you more control over the amount of paint applied and results in a smoother, more consistent surface.
Step-by-Step Instructions
- Set Up the Paint Gun
Use an air compressor and a paint gun suitable for automotive paint. Adjust the pressure and spray settings according to the paint manufacturer’s instructions. - Apply Primer with the Paint Gun
Fill the paint gun with automotive primer. Apply the primer in thin, even coats, allowing each layer to dry for about 10 minutes before applying the next one. - Mix and Add Paint
Mix the automotive paint according to the manufacturer’s instructions and fill the paint gun. Test the spray on a piece of cardboard before painting the bumper to ensure the settings are correct. - Apply the Paint
Spray the bumper evenly, using a side-to-side sweeping motion. Apply multiple light coats rather than one heavy coat. Aim for 3-4 coats, allowing each to dry for 10-15 minutes. - Apply Clear Coat
Once the paint has dried, switch to the clear coat. Apply 2-3 coats of clear to protect the paint and add a glossy finish.
Pros:
- Provides a smooth, professional-grade finish.
- Better control over paint application.
Cons:
- Requires expensive equipment and setup.
- More challenging for beginners.
Method 3: Brush and Roller Method (For Textured Finish)
For those who want to add texture or are working on an older vehicle, using a brush and roller can be a unique method to paint a bumper. This method is not recommended for modern vehicles as it can result in a rough finish but works for certain aesthetic preferences.
Step-by-Step Instructions
- Use a Small Brush for Detailed Areas
For hard-to-reach areas or intricate details, use a small brush to apply the paint. Work slowly to avoid leaving brush marks. - Apply Paint with a Foam Roller
Use a small foam roller for larger, flat areas. This method applies the paint evenly and helps avoid visible brush strokes. - Sand Between Coats
Lightly sand between each coat of paint with 600-grit sandpaper to ensure a smooth finish. Apply 2-3 coats of paint and clear coat as usual.
Pros:
- Simple tools; no expensive equipment needed.
- Can create a unique, textured finish.
Cons:
- Brush strokes can be visible.
- Not suitable for newer vehicles requiring a smooth finish.
Method 4: Plasti Dip (For Temporary Results)
Plasti Dip is a rubberized coating that can be sprayed onto a bumper and easily peeled off when you’re ready to remove it. This method is ideal if you want a temporary color change or added protection.
Step-by-Step Instructions
- Apply Plasti Dip in Thin Layers
Spray the Plasti Dip in thin, even coats, just like spray paint. It dries quickly, so you can apply several coats within a short period. - Peel Off Later
When you’re ready to remove it, the Plasti Dip can be peeled off easily without damaging the paint underneath.
Pros:
- Temporary and easy to remove.
- Protects the original paint.
Cons:
- Less durable than regular paint.
- May not last long under extreme weather conditions.
Post-Painting Tips
1. Wait Before Reattaching the Bumper
After painting, allow the bumper to cure for at least 48 hours before reattaching it to your car. This prevents smudging or peeling during the reinstallation process.
2. Buff and Polish
Once the paint is fully dry, consider buffing the bumper with a polishing compound to achieve a high-gloss finish. This will remove any imperfections in the paint and make the surface shine.
3. Apply Wax for Extra Protection
After the paint has cured for about a month, apply automotive wax to protect the finish from UV rays and environmental damage.
Common Mistakes to Avoid
1. Skipping Sanding
Skipping the sanding process can result in a poor bond between the paint and bumper, leading to peeling or uneven coverage.
2. Rushing the Process
Allow proper drying time between coats. Applying paint too quickly can cause runs or uneven coverage.
3. Not Cleaning the Surface Properly
Ensure the bumper is clean and free of dirt or oils. Contaminants can prevent the paint from adhering properly.
Conclusion
Painting a bumper is a task that can greatly improve the appearance of your car when done properly. Whether you choose to spray paint, use a paint gun, or even experiment with Plasti Dip, there are various methods to suit different needs and skill levels. The key to success is preparation, patience, and the right tools.
By following the steps outlined in this guide, you’ll be able to achieve a professional-looking finish and breathe new life into your car’s bumper.