To make contrast paint, mix equal parts of acrylic paint and water in a container. Stir well until the mixture is smooth and consistent.
Contents
- Introduction To Contrast Paints
- Essential Ingredients For Making Contrast Paints
- Tools And Equipment You’ll Need
- The Science Of Color Theory
- Mixing Your Own Vibrant Colors
- Creating Consistency And Texture
- Preservation And Storage Of Homemade Paints
- Real-world Application: Tips And Tricks
- Troubleshooting Common Issues
- Conclusion: Unleashing Creativity With Homemade Paints
- Frequently Asked Questions
- Conclusion
Introduction To Contrast Paints
What Are Contrast Paints?
Contrast paints are a type of paint designed to create depth and definition with minimal effort. They are formulated to flow into the recesses and crevices of a miniature, creating natural-looking shadows and highlights. These paints are highly pigmented and have a unique consistency that allows for easy application, making them ideal for both beginners and experienced painters.
Benefits Of Using Contrast Paints In Artwork
- Time-saving: Contrast paints reduce the need for multiple layers, as they provide shading and highlighting in a single application.
- Enhanced details: They accentuate fine details on miniatures, bringing out intricate features with minimal effort.
- Versatility: These paints can be used on various surfaces, such as plastic, metal, and resin, making them suitable for a wide range of projects.
- Beginner-friendly: Their forgiving nature makes them ideal for those new to miniature painting, allowing for impressive results with minimal skill.
- Efficiency: Contrast paints streamline the painting process, enabling artists to complete projects more efficiently without compromising quality.

Credit: m.youtube.com
Essential Ingredients For Making Contrast Paints
Crafting high-quality contrast paints requires essential ingredients such as acrylic medium, flow improver, and pigment. By carefully combining these elements, you can achieve the perfect consistency and color intensity for your painting projects. Mastering the art of making contrast paints empowers artists to enhance their work with striking depth and definition.
Pigments And Their Role
The pigments you select will determine the color and opacity of your contrast paint. There are many different pigments available, ranging from natural earth tones to bright synthetic colors. Some pigments are transparent, while others are opaque. Transparent pigments are ideal for glazes, while opaque pigments work well for base coats and highlights. To ensure the best results, it’s essential to select high-quality pigments from a reputable supplier. Here are some popular pigments and their role in contrast paint making:| Pigment | Role |
|---|---|
| Cadmium Red | Opaque red pigment |
| Ultramarine Blue | Semi-opaque blue pigment |
| Burnt Umber | Opaque brown pigment |
Choosing A Medium For Paint Making
The medium is the liquid that suspends the pigment and allows it to be applied to a surface. Different mediums have different properties, and selecting the right one for your project is crucial. The most commonly used mediums for contrast paint making are water, acrylic, and oil. Water is the easiest and most affordable medium to work with, but it can be challenging to control the consistency and opacity of the paint. Acrylic medium is versatile, dries quickly, and can be used on a variety of surfaces. Oil medium is excellent for blending and glazing, but it takes a long time to dry. Here are some factors to consider when selecting a medium:- Surface type
- Drying time
- Opacity
- Consistency
Tools And Equipment You’ll Need
When it comes to making contrast paint, having the right tools and equipment is essential for achieving the desired results. Whether you’re a beginner or an experienced DIY enthusiast, here is a list of the key items you’ll need:
Mixing Tools And Surfaces
To create your own contrast paint, you’ll need a few mixing tools and surfaces. These include:
- A clean mixing container, such as a plastic or glass jar with a tight-fitting lid.
- A stirring stick or a small whisk for thorough mixing.
- A palette or a paint tray to hold and mix the paint.
- A measuring tool, like a syringe or a measuring cup, to ensure accurate proportions of ingredients.
Safety Gear For Paint Making
When working with any type of paint, it’s important to prioritize safety. Here are some essential safety gear items you should have:
- Protective gloves to keep your hands safe from chemicals and stains.
- A respirator or a dust mask to protect your lungs from inhaling any harmful particles.
- Protective eyewear, such as safety goggles, to shield your eyes from potential splatters or fumes.
- An apron or old clothes to protect your clothing from accidental spills.
Remember, safety should always be a priority when handling any chemicals or working with paints. By having the right tools and safety gear, you can ensure a smooth and successful process of making your own contrast paint.

Credit: crazmadsci.com
The Science Of Color Theory
Understanding color theory is essential when it comes to creating contrast paint. The right combination of colors can make your artwork pop and bring it to life. By delving into the science behind color theory, you can unlock the secrets to achieving maximum contrast in your paintings. Let’s explore two key concepts: understanding color harmony and utilizing complementary colors.
Understanding Color Harmony
Color harmony refers to the pleasing arrangement of colors in a painting that creates a sense of balance and unity. It involves understanding how different colors interact with each other and how they can be combined to produce visually appealing results. There are various color harmonies, such as analogous, monochromatic, and triadic, each offering a unique way to create contrast.
Here’s a breakdown of different color harmonies:
- Analogous Colors: These are colors that sit side by side on the color wheel, such as red, orange, and yellow. Using analogous colors in your contrast paint can create a harmonious and unified look.
- Monochromatic Colors: This harmony involves using different shades, tints, and tones of a single color. It can create a subtle contrast while maintaining a sense of cohesion.
- Triadic Colors: Triadic color harmonies involve selecting three colors that are evenly spaced around the color wheel. For example, red, blue, and yellow. This combination creates a vibrant and dynamic contrast.
Complementary Colors For Maximum Contrast
To achieve maximum contrast in your contrast paint, you need to explore the concept of complementary colors. Complementary colors are pairs of colors that are directly opposite each other on the color wheel. When placed side by side, complementary colors intensify each other, creating a striking and eye-catching effect.
Here are some examples of complementary color pairs:
| Complementary Color Pairs |
|---|
| Red and Green |
| Blue and Orange |
| Yellow and Purple |
By incorporating complementary colors into your contrast paint, you can achieve a visually appealing and attention-grabbing result. Experimenting with different combinations and ratios of complementary colors will allow you to find the perfect balance of contrast for your artwork.
Understanding color harmony and utilizing complementary colors are two fundamental aspects of creating contrast paint. By applying these principles, you can enhance the visual impact of your artwork and create stunning compositions that captivate the viewer’s attention.
Mixing Your Own Vibrant Colors
Contrast paint is a popular choice among hobbyists and miniature painters because of its ability to create depth and details in a simple way. While there are plenty of pre-made contrast paints available in the market, mixing your own vibrant colors can be an exciting and cost-effective way to achieve unique shades for your miniatures. In this post, we’ll provide you with a step-by-step guide to mixing your own contrast paint and some tips for achieving high-contrast effects.
Step-by-step Guide To Mixing
Mixing your own contrast paint is simple and requires only a few materials, such as a palette, a dropper, and a mixing tool. Here’s a step-by-step guide to help you create your own vibrant colors:
- Choose your base color: Start by selecting a base color that suits your project. It can be a primary color or a mix of colors.
- Add Contrast Medium: Add a few drops of Contrast Medium to your palette. The Contrast Medium helps create the contrast effect and should be added to every mix.
- Add your pigment: Add a small amount of pigment to the Contrast Medium. You can add more or less pigment, depending on how dark or light you want your color to be.
- Mix the colors: Mix the pigment and Contrast Medium together until they are fully combined. You can use a toothpick, a brush, or any other mixing tool to do this.
- Test your mix: Once you’ve mixed your colors, test it on a scrap piece of paper or miniature to see how it looks. You can adjust the color by adding more Contrast Medium or pigment, depending on the desired effect.
Tips For Achieving High-contrast Effects
While mixing your own contrast paint is easy, achieving high-contrast effects can be a bit tricky. Here are some tips to help you create vibrant, eye-catching colors:
- Use complementary colors: Complementary colors, such as blue and orange or red and green, create high-contrast effects when mixed together.
- Experiment with different pigments: Different pigments have different properties and can create unique effects when mixed with Contrast Medium. Experiment with different pigments to find the perfect mix for your project.
- Don’t be afraid to mix light and dark colors: Mixing light and dark colors can create interesting effects and add depth to your miniatures.
- Use a light hand: When applying your mix to your miniature, use a light hand to create a subtle contrast effect. You can always add more layers for a more dramatic effect.
With these tips and a little creativity, you can mix your own vibrant contrast paint and create unique shades for your miniature painting projects. Happy painting!
Creating Consistency And Texture
Achieving consistent and textured contrast paint is essential for creating depth and visual interest in your artwork. By layering and blending different shades, you can develop a rich and dynamic finish that enhances the overall aesthetic of your piece. Experimenting with various techniques and application methods will help you achieve the desired level of contrast and texture in your painting.
Creating Consistency and Texture are two essential factors to consider when making contrast paint. These elements can make or break your final product. In this section, we will discuss two crucial techniques to help you achieve consistency and texture in your contrast paint. Adjusting Paint Thickness: The consistency of your paint plays a significant role in the final texture of your contrast paint. Adjusting the thickness of your paint can help you achieve the desired texture. If your paint is too thin, it will not adhere well to the surface, and it will create a runny texture. On the other hand, if your paint is too thick, it will create a clumpy texture, which may not give you the desired result. To adjust the thickness of your paint, you can add water or medium to thin it out or add a little bit of pigment to thicken it up. Experimentation is key to finding the right consistency for your contrast paint. Experimenting with Additives: Additives can help you achieve texture in your contrast paint. There are several additives you can experiment with, such as matting agents, texture mediums, and flow enhancers. Matting agents can help you achieve a matte finish, while texture mediums can create a unique texture. Flow enhancers can help you achieve a smooth finish. When experimenting with additives, it is essential to follow the manufacturer’s instructions. Additives can alter the consistency of your paint, so it’s crucial to test them before adding them to your final product. In conclusion, creating consistency and texture are essential when making contrast paint. Adjusting paint thickness and experimenting with additives can help you achieve the desired texture for your final product. Remember to take your time and experiment with different techniques to find the right consistency and texture for your contrast paint.Preservation And Storage Of Homemade Paints
Learn how to make contrast paint for your DIY projects and discover effective tips for preserving and storing your homemade paints. Keep your paints fresh and ready for use with these simple techniques.
Best Practices For Longevity
Labeling And Organizing Your Paints
Preservation and storage of homemade paints are crucial to ensure their longevity and usability. By following best practices and implementing proper organization techniques, you can maximize the lifespan of your homemade paints and maintain their quality over time.Best Practices For Longevity
To ensure the longevity of your homemade paints, it is essential to adhere to a few best practices. These practices will help prevent the paints from drying out or losing their effectiveness. Here are some tips to keep in mind: 1. Seal the Containers: Properly seal the containers holding your homemade paints to prevent air from entering and drying out the paint. This can be done by tightly securing the lids or using airtight containers. 2. Store in Cool and Dry Places: Avoid exposing your paints to extreme heat or cold, as this can affect their consistency and quality. Find a cool and dry place to store them, such as a cupboard or a dedicated storage box. 3. Avoid Direct Sunlight: Sunlight can cause the paints to fade or degrade over time. Keep them away from direct sunlight by storing them in a shaded area or using opaque containers. 4. Use Desiccants: To prevent moisture buildup and mold growth, consider adding desiccants, such as silica gel packets, to the containers. These will help absorb any excess moisture and keep the paints in optimal condition.Labeling And Organizing Your Paints
Properly labeling and organizing your homemade paints is essential for easy identification and efficient usage. Here are some tips to help you keep your paints well-organized: 1. Label the Containers: Clearly label each container with the type of paint, color, and date of creation. This will make it easier to find the paint you need and keep track of its age. 2. Color Code: Consider using a color-coding system to further organize your paints. Assign specific colors or symbols to different types of paints or projects. This will help you quickly locate the desired paint without having to read through labels. 3. Arrange in Order: Arrange your paints in a logical order, such as by color spectrum or by type (e.g., metallic, matte, gloss). This will make it easier to find the exact paint you need for your projects. 4. Separate Brushes and Tools: Keep your brushes and tools separate from the paints to avoid cross-contamination. Store them in a separate container or compartment to maintain cleanliness and prevent damage to the paints. By following these best practices and implementing proper labeling and organizing techniques, you can ensure the longevity and usability of your homemade paints. Taking these extra steps will save you time and effort in the long run, allowing you to enjoy your paints for a more extended period.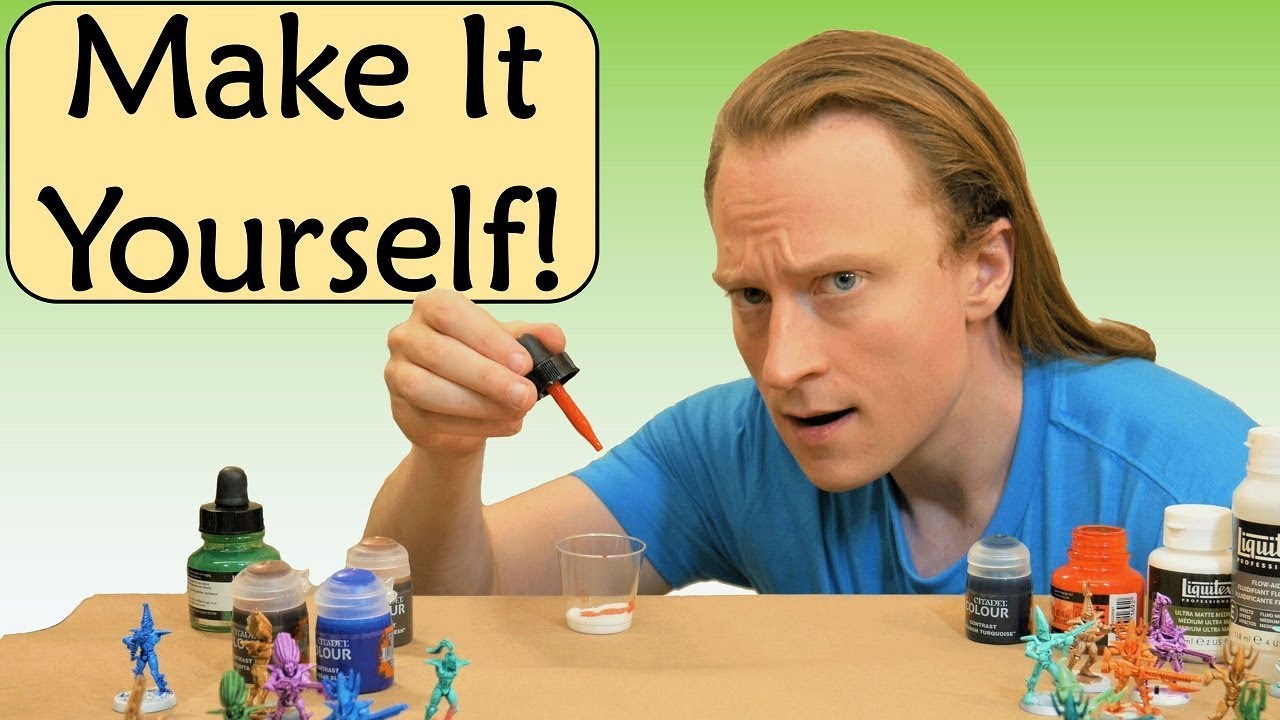
Credit: m.youtube.com
Real-world Application: Tips And Tricks
Discover practical tips and tricks for creating contrast paint in real-world applications. Learn how to make your colors pop with expert advice and step-by-step instructions. Enhance your painting skills and achieve stunning results with these valuable insights.
When it comes to using contrast paint, there are various techniques that can help you achieve stunning results. In this section, we will explore some tips and tricks for applying contrast paint and showcasing finished artworks.
Techniques For Applying Contrast Paint
Applying contrast paint requires a slightly different approach compared to traditional painting techniques. Here are some techniques to keep in mind:
- Thin Layers: To achieve the best results, apply contrast paint in thin layers. This allows the paint to settle into the recesses and create natural shading.
- Use a Contrast Medium: Mixing contrast paint with a contrast medium can help you control the consistency and transparency of the paint. This allows for smoother application and better blending.
- Highlighting: After applying contrast paint, it’s important to highlight certain areas to create depth and definition. Use a lighter shade of paint or a dry brush technique to bring out the details.
- Experiment with Colors: Don’t be afraid to mix and match different contrast paint colors. This can add interest and dimension to your artwork. Try experimenting with different combinations to find the perfect color scheme.
- Practice on Test Models: Before applying contrast paint to your final project, it’s always a good idea to practice on test models or spare parts. This allows you to familiarize yourself with the paint and techniques before committing to your main artwork.
Showcasing Finished Artworks
Once you have applied contrast paint to your models, it’s time to showcase your finished artworks. Here are some tips to make your creations stand out:
- Photography: Capture your artwork in high-quality photographs to showcase the details and colors. Use proper lighting and angles to highlight the best features of your models.
- Display Base: Consider creating a display base to enhance the overall presentation of your models. This can add context and create a visually appealing composition.
- Online Communities: Share your finished artworks with online communities and forums dedicated to miniature painting. This allows you to connect with fellow artists, receive feedback, and gain inspiration.
- Participate in Contests: Enter your finished artworks into painting contests or competitions. This not only gives you the chance to win prizes but also helps you gain recognition and exposure in the miniature painting community.
By following these tips and tricks, you can take your contrast paint skills to the next level and create stunning artworks that showcase your creativity and talent.
Troubleshooting Common Issues
When making contrast paint, common issues like uneven coverage and streaking can arise. To troubleshoot, ensure proper mixing of the paint and apply thin layers to avoid buildup. Additionally, using a primer can improve adhesion and overall finish. Regularly shaking the paint and testing on a spare surface can also help identify and address any issues.
Making your own contrast paint can be an affordable and fun way to take your miniature painting to the next level. However, like any DIY project, there can be some common issues that arise. Here are some tips for troubleshooting muddy colors and texture problems.Fixing Muddy Colors
If you find that your contrast paint has turned out muddy, or the colors have blended together to create a dull, lifeless finish, there are a few things you can do to fix the issue.- First, try adding a bit more pigment to the mix. This can help to brighten up the colors and create more contrast.
- Alternatively, you could try adding a bit more medium to the mix. This can help to thin out the paint and create a more transparent finish.
- If all else fails, you may need to start over and adjust your ratios of pigment, medium, and water to get the desired effect.
Resolving Texture Problems
Texture problems can be another common issue when making contrast paint. If you find that your paint is too thick, thin, or lumpy, here are some tips for resolving the issue.| Problem | Solution |
|---|---|
| The paint is too thick | Try adding a bit more medium or water to the mix to thin it out. |
| The paint is too thin | Try adding a bit more pigment to the mix to thicken it up. |
| The paint is lumpy | Strain the paint through a fine mesh strainer or cheesecloth to remove any lumps or clumps. |
Conclusion: Unleashing Creativity With Homemade Paints
Making your own contrast paint offers a range of benefits, from cost-effectiveness to the ability to customize colors to your liking. By creating your own paints, you can experiment with different pigments and textures, resulting in unique and personalized creations. Additionally, the satisfaction of crafting your own paint can enhance your artistic experience and deepen your connection to your work.
Homemade paints can inspire a new wave of creativity in your art projects. The process of making your own paint encourages exploration and innovation, allowing you to break free from the constraints of store-bought options. With a palette of custom-made colors at your disposal, you can infuse your artwork with a sense of individuality and originality, elevating your creative expression to new heights.
Frequently Asked Questions
Can You Turn Base Paint Into Contrast Paint?
No, base paint can’t be turned into contrast paint. They are formulated differently for specific purposes.
How To Make Contrast Color?
To make contrast colors, pair light with dark or warm with cool tones. Use the color wheel to choose complementary or opposite shades for a striking effect. Experiment with different combinations to find the perfect contrast for your design.
Is Contrast Paint Just A Wash?
Contrast paint is not just a wash. Although it shares some similarities with washes, contrast paint is designed to be more opaque and provide greater coverage. It also creates a shaded effect without requiring a separate wash step.
Can You Use Contrast Medium To Make Contrast Paint?
Contrast medium is not used to make contrast paint. Contrast medium is used in medical imaging to enhance the visibility of certain structures. Contrast paint, on the other hand, is a type of paint that has a high contrast ratio, allowing for clear differentiation between different colors or shades.
Conclusion
To sum up, creating contrast paint is an accessible and cost-effective way to enhance your artwork. By following the simple steps and experimenting with different color combinations, you can achieve stunning results. Incorporating contrast paint into your projects will add depth and visual interest, elevating the overall impact of your work.