To clean walls before painting, first, remove any dust or dirt by wiping them down with a damp cloth or sponge. Then, use a mild detergent mixed with water to scrub away any stains or marks.
Rinse the walls thoroughly and allow them to dry completely before proceeding with the painting process. Properly preparing your walls before painting is essential to achieving a smooth and long-lasting finish. Cleaning the walls not only helps to remove dirt and grime but also ensures that the paint adheres properly.
By following a few simple steps, you can effectively clean your walls and create an optimal surface for painting. We will discuss the step-by-step process of cleaning walls before painting, including the necessary materials and techniques to achieve a pristine result. So, let’s dive in and learn how to clean your walls like a pro before embarking on your painting project.

Credit: thediydreamer.com
Contents
- Introduction To Pre-paint Wall Cleaning
- Materials And Tools Needed
- Identifying Wall Stains And Marks
- Dust And Cobweb Removal Techniques
- Washing Walls Step By Step
- Treating Stubborn Stains And Marks
- Drying And Final Inspection
- Prepping For The Painting Process
- Additional Tips And Tricks
- Conclusion: Ready For A Fresh Coat
- Frequently Asked Questions
- Conclusion
Introduction To Pre-paint Wall Cleaning
Pre-paint wall cleaning is an essential step before painting to ensure a smooth and even application of paint. This process involves removing any dirt, dust, and debris from the walls, repairing any damage, and allowing the surface to dry completely.
Proper pre-paint wall cleaning can help the paint adhere better and last longer, resulting in a more professional and polished finish.
Before embarking on a painting project, it’s crucial to ensure that your walls are thoroughly cleaned and prepped. Proper wall cleaning not only enhances the overall appearance of the paint job but also plays a significant role in its longevity. In this article, we will explore the importance of a clean canvas and how it impacts paint adherence and finish.
Importance Of A Clean Canvas
When it comes to painting walls, starting with a clean canvas is essential. A clean surface ensures that the paint adheres properly and evenly, resulting in a smooth and professional finish. By removing dirt, dust, grease, and any other contaminants, you create an ideal environment for the paint to bond effectively with the wall.
Moreover, cleaning the walls eliminates any imperfections, such as stains, smudges, or old paint residue, that might negatively impact the final appearance. It provides a fresh start, allowing the new paint to showcase its true color and vibrancy.
Impact On Paint Adherence And Finish
The cleanliness of the walls directly affects the adherence of paint and the overall finish of your painting project. If the surface is dirty or dusty, the paint may not adhere properly, resulting in uneven coverage or even peeling in the long run.
Additionally, a dirty surface can cause the paint to appear blotchy or discolored. The presence of dust particles or grime can create an uneven texture, making the paint job look unprofessional and inconsistent. By cleaning the walls thoroughly, you ensure a smooth and even surface for the paint to be applied, resulting in a flawless finish.
Furthermore, cleaning the walls allows you to identify any underlying issues that may require attention before painting. It enables you to spot cracks, holes, or other damages that need to be repaired for a seamless paint application.
In conclusion, pre-paint wall cleaning is a crucial step in achieving a professional and long-lasting paint job. By starting with a clean canvas, you enhance paint adherence, eliminate imperfections, and ensure a smooth and flawless finish. So, before you pick up that paintbrush, make sure to invest time in thoroughly cleaning your walls. The results will be worth it.
Materials And Tools Needed
Before starting the wall-cleaning process, ensure you have all the necessary materials and tools ready. This will make the task more efficient and help achieve better results. Below are the essential cleaning supplies and safety gear you’ll need for the task:
Essential Cleaning Supplies
- Bucket: A large bucket for mixing the cleaning solution.
- Cleaning Solution: Choose a mild detergent or a specially formulated wall cleaner.
- Sponge or Soft Cloth: Used for applying the cleaning solution to the walls.
- Rubber Gloves: Protect your hands from the cleaning solution.
- Clean Water: For rinsing the walls after cleaning.
- Dry Towels: Used for drying the walls after cleaning.
Safety Gear For The Task
- Protective Eyewear: Safeguard your eyes from splashes of cleaning solution.
- Respirator Mask: Helpful when working with strong cleaning solutions in poorly ventilated areas.
- Old Clothing: Wear old clothes that you don’t mind getting dirty or damaged during the cleaning process.
Identifying Wall Stains And Marks
Common Types Of Wall Stains
Before painting, it’s crucial to identify the types of stains present on your walls. Common wall stains include watermarks, grease, ink, mold, and smoke residue. Each type requires specific cleaning methods to ensure a smooth painting surface.
Assessing Stain Severity
Once you’ve identified the stains, it’s essential to assess their severity. Check if the stains are superficial or penetrating the paint. Superficial stains may only require surface cleaning, while penetrating stains might need more extensive treatment to prevent them from bleeding through the new paint.
Credit: www.homesandgardens.com
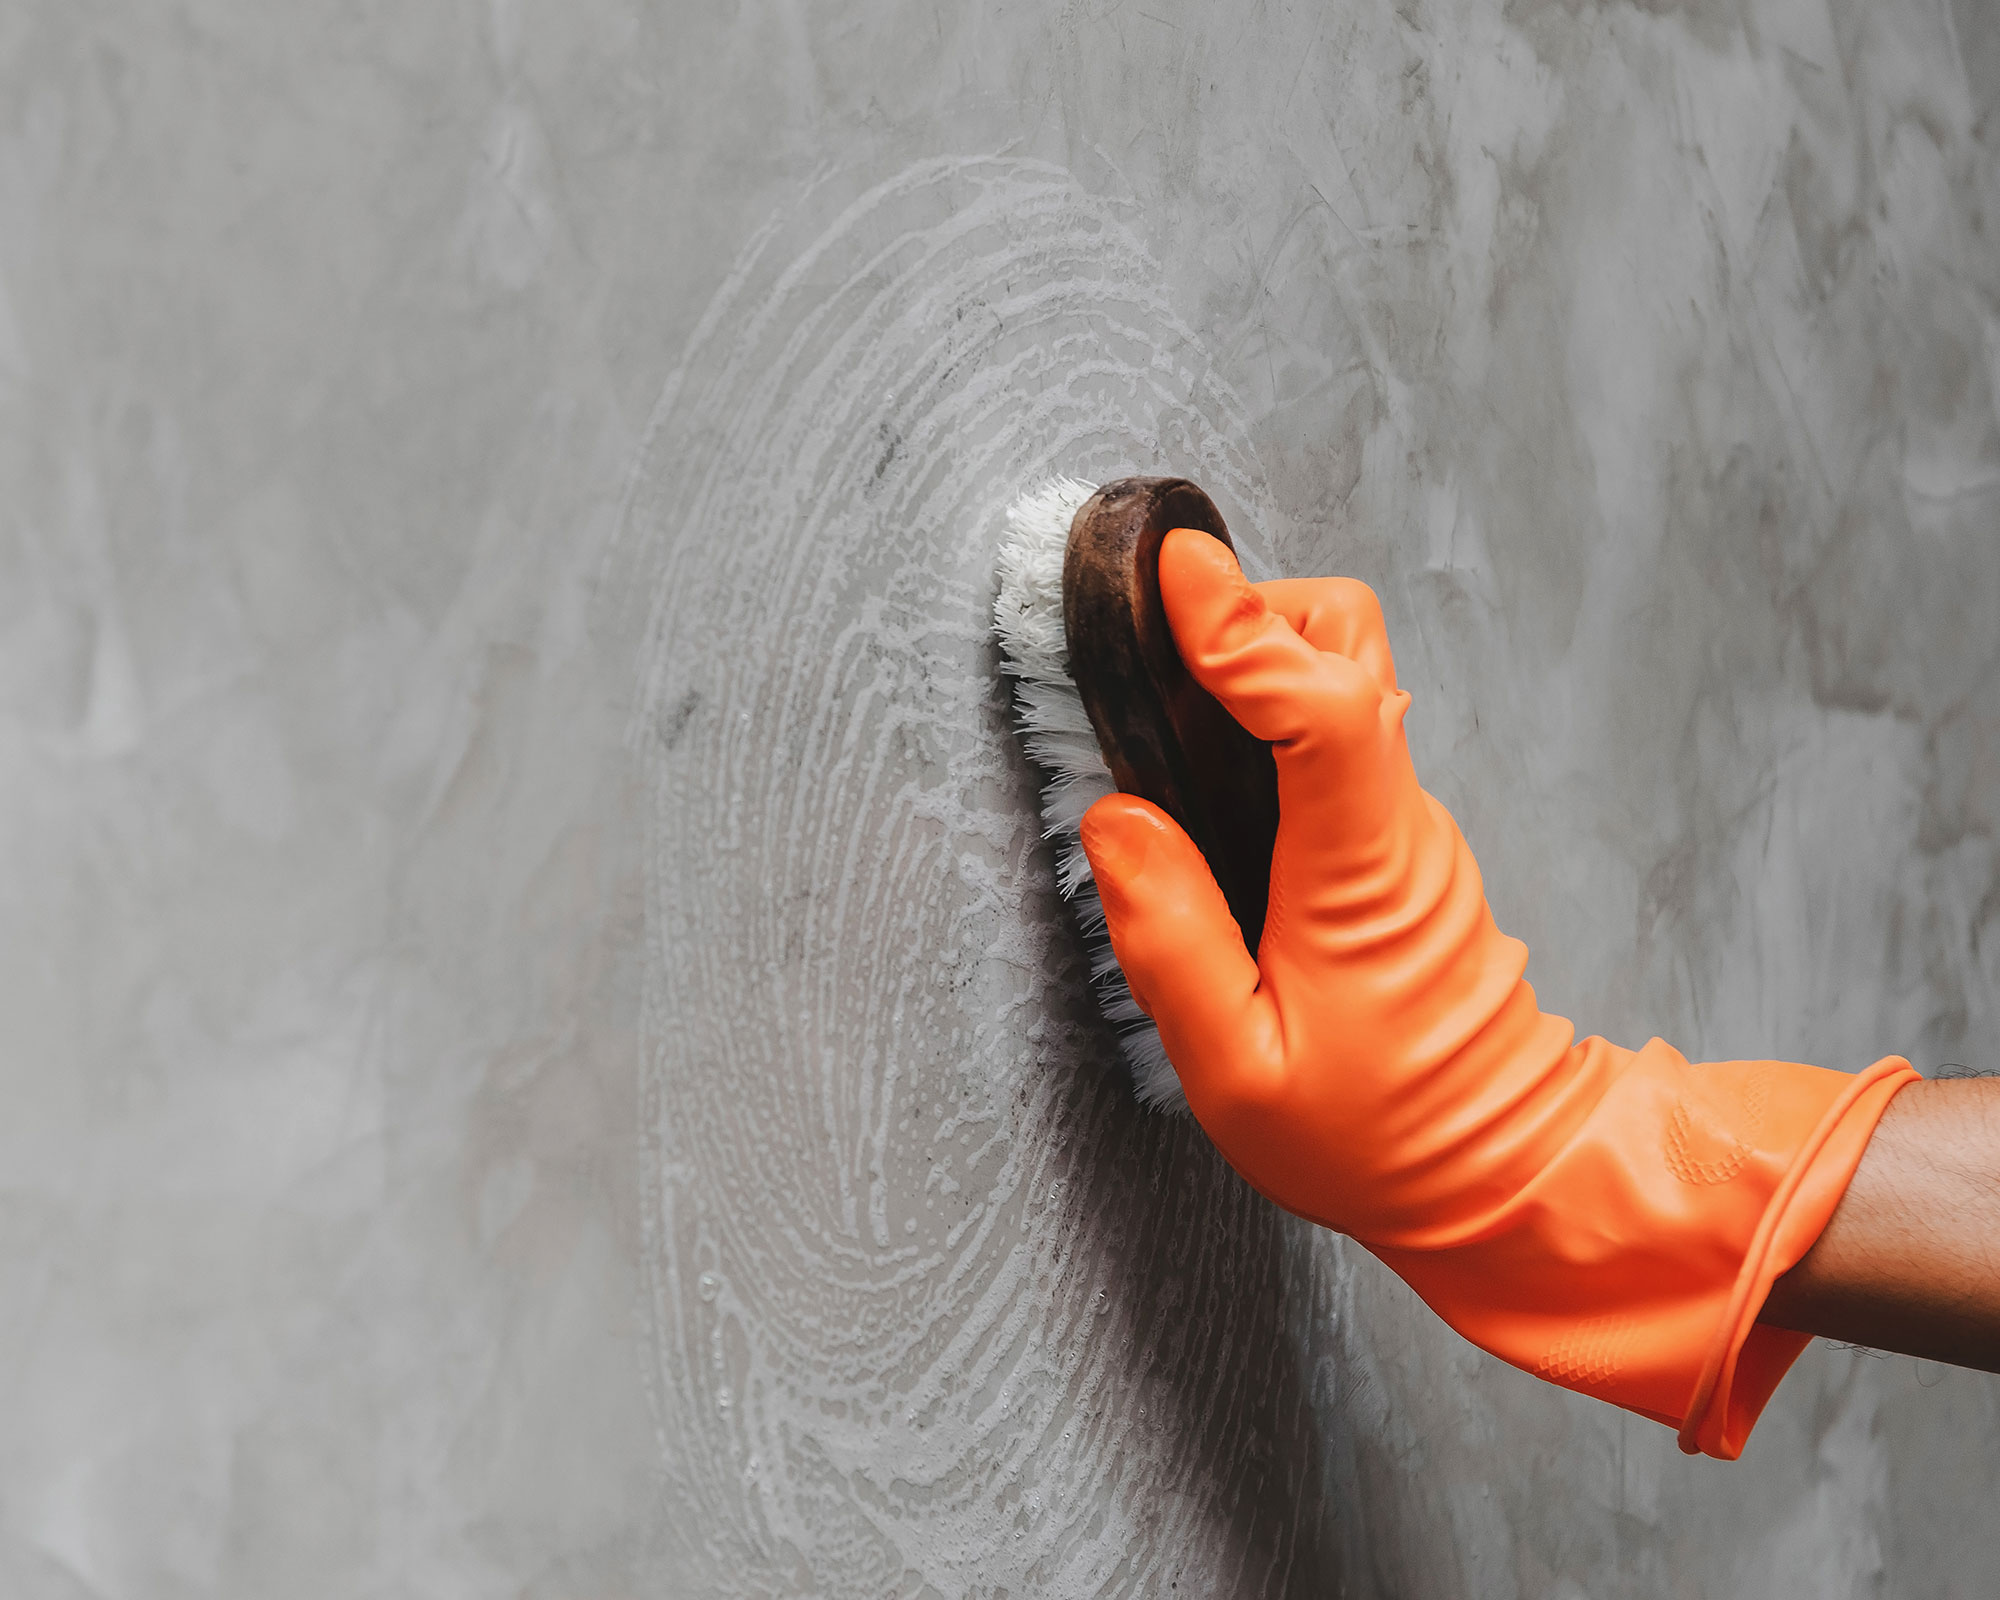
Dust And Cobweb Removal Techniques
To prepare walls for painting, start by removing dust and cobwebs using a duster or vacuum. Next, use a damp cloth to gently wipe the walls, ensuring a clean and smooth surface for painting. This process will help the paint adhere better and result in a professional finish.
Before starting any painting project, it’s crucial to prepare the walls properly. Dust and cobwebs can spoil the paint’s finish, so removing them is essential. Here are some best practices for dry dusting and tips for tackling cobwebs that will help you clean your walls before painting.Best Practices For Dry Dusting
Dry dusting is the most common way to remove dust from walls. Here are some best practices for dry dusting:- Use a soft, dry cloth or a microfiber duster to remove the dust from the walls.
- Start dusting from the top of the wall and work your way down to the bottom.
- Dust the walls in a circular motion, making sure to cover the entire surface area.
- Use a clean cloth or duster for each wall.
- Avoid using water or any cleaning solution when dusting the walls.
Tips For Tackling Cobwebs
Cobwebs can be tricky to remove, but with the right tools and techniques, it can be done easily. Here are some tips for tackling cobwebs:- Use a long-handled duster or a vacuum cleaner with an extension wand to reach high places where cobwebs can form.
- Start from the top of the wall and work your way down to avoid pushing the cobwebs onto a clean area.
- If the cobwebs are stubborn, use a soft-bristled brush to gently remove them.
- Avoid using water or any cleaning solution when removing cobwebs.
- After removing the cobwebs, use a dry cloth or duster to remove any remaining dust.
Washing Walls Step By Step
Before you pick up that paintbrush, it’s crucial to ensure your walls are clean and free from dirt, dust, and grime. Washing the walls may seem like a daunting task, but with the right technique and cleaning solution, you’ll have a fresh canvas ready for a flawless paint job. Follow these simple steps to effectively clean your walls before painting.
Mixing The Cleaning Solution
To begin, you’ll need to prepare a cleaning solution that effectively removes dirt and grease from your walls. Create a mixture by combining warm water and a mild detergent or dish soap. Be sure to use a gentle soap to avoid damaging the paint or leaving behind residue.
Here’s a simple recipe for your cleaning solution:
| Ingredients | Measurements |
|---|---|
| Warm water | 1 gallon |
| Mild detergent or dish soap | 1/4 cup |
Mix the ingredients thoroughly until the soap has dissolved completely in the water. Having the right cleaning solution will ensure effective removal of dirt and grime, leaving your walls ready for a fresh coat of paint.
The Proper Washing Technique
Now that you have your cleaning solution ready, it’s time to start washing those walls. Follow these step-by-step instructions to achieve a thorough clean:
- Gather your supplies: Before you begin, gather a soft sponge or cloth, a bucket filled with the cleaning solution, and a dry towel or cloth for drying.
- Test a small area: Before diving into the entire wall, test the cleaning solution on a small, inconspicuous area to ensure it doesn’t damage the paint. If there are no adverse effects, you can proceed.
- Start from top to bottom: Begin washing the walls from the top, working your way down. This prevents dirty water from dripping onto already cleaned areas.
- Apply the cleaning solution: Dip the sponge or cloth into the cleaning solution and gently scrub the wall in a circular motion. Focus on areas with visible dirt or stains.
- Rinse with clean water: After scrubbing, rinse the sponge or cloth with clean water and wring out any excess moisture. Use this damp cloth to wipe away the cleaning solution from the wall.
- Dry the walls: Finally, use a dry towel or cloth to pat the walls dry. Make sure there is no remaining moisture before proceeding with the painting process.
By following these steps, you’ll ensure that your walls are clean and free from any dirt or grime, providing the perfect surface for a smooth and long-lasting paint job.
Treating Stubborn Stains And Marks
Eradicate stubborn stains and marks from your walls before painting by using a mixture of water and mild detergent to gently scrub the affected areas. For tougher stains, consider using a specialized wall cleaner or a combination of baking soda and water to achieve a pristine surface for your new paint job.
Spot-cleaning Challenges
Stubborn stains and marks on walls can pose spot-cleaning challenges.Specialized Stain Removal Solutions
Use specialized solutions to target stubborn stains effectively. Scrubbing with a mix of baking soda and water can help remove tough stains. Create a paste of vinegar and baking soda for mold and mildew spots. Apply a bleach solution for persistent mold stains on walls. For grease marks, use a degreaser solution to prep the surface. Consider sugar soap for general dirt and grime removal. Utilize a magic eraser for scuff marks and crayon stains. Address nicotine stains with a trisodium phosphate solution. Tackle water stains with a stain-blocking primer before painting. Incorporate these specialized solutions to combat stubborn stains effectively.Drying And Final Inspection
Before painting, it is crucial to clean walls thoroughly. Start by removing any loose dirt and debris using a broom or vacuum cleaner. Then, wipe the walls with a damp cloth or sponge and a mild detergent solution to remove grease and stains.
Finally, ensure the walls are completely dry before proceeding with the final inspection.
Ensuring Walls Are Completely Dry
After cleaning, allow walls to air dry completely before proceeding.
Performing A Detailed Final Check
Conduct a thorough final inspection for any missed spots or imperfections.
Prepping For The Painting Process
Prepping for the Painting Process involves crucial steps to ensure a smooth and successful paint job. Properly cleaning your walls before painting is essential for achieving a flawless finish.
Applying Primer Effectively
Priming the walls is a crucial step before painting to ensure better adhesion and coverage.
Creating An Optimal Painting Environment
Setting up the right environment for painting enhances the final results.
Additional Tips And Tricks
For a thorough cleaning before painting your walls, start by dusting the walls with a microfiber cloth or vacuum cleaner, then use a mixture of warm water and mild soap to scrub away any dirt or grime. Be sure to rinse the walls with clean water and let them dry completely before applying any paint.
Additionally, consider using a primer for a smoother finish.
Time-saving Techniques
Common Mistakes To Avoid
In addition to the essential steps for cleaning walls before painting, there are some additional tips and tricks that can save you time and help you achieve a flawless finish.
Time-saving Techniques
- Use a vacuum with a brush attachment to quickly remove dust and cobwebs.
- Opt for a TSP substitute for a faster cleaning process without sacrificing effectiveness.
- Invest in a good quality primer to reduce the number of coats needed.
Common Mistakes To Avoid
- Avoid skipping the cleaning step, as paint won’t adhere well to dirty walls.
- Don’t forget to patch and repair any imperfections before painting to ensure a smooth surface.
- Avoid using harsh chemicals that can damage the wall surface or affect paint adhesion.
Conclusion: Ready For A Fresh Coat
Prep your walls for a fresh coat by thoroughly cleaning the surface. Start by removing dust and dirt with a damp cloth, then wash with a mild detergent solution. Rinse and allow to dry completely before applying a new paint job.
Recap Of Key Steps
To ensure a successful paint job, it’s crucial to clean your walls thoroughly before applying a fresh coat. Follow these key steps to prepare your walls:
- Gather the necessary supplies: drop cloths, a bucket, mild detergent, a sponge or cloth, and warm water.
- Remove any furniture or decorations from the area to protect them from splatters or spills.
- Protect your floors with drop cloths to prevent any paint drips.
- Start by dusting the walls with a dry cloth or duster to remove any loose dirt or cobwebs.
- Next, mix a small amount of mild detergent with warm water in a bucket.
- Dip a sponge or cloth into the soapy water, wring it out, and gently scrub the walls in a circular motion.
- Pay extra attention to areas with stains or marks, applying a bit more pressure if needed.
- Rinse the sponge or cloth frequently and change the water as it becomes dirty.
- Once you’ve thoroughly cleaned the walls, use a clean sponge or cloth and plain water to rinse off any remaining soap residue.
- Dry the walls with a soft towel or allow them to air dry completely before proceeding with the painting process.
The Value Of Proper Preparation
Properly cleaning your walls before painting not only enhances the final result but also ensures the longevity of your newly painted surface. By removing dirt, grime, and any existing imperfections, you create a smooth and clean canvas for your paint. This not only allows the paint to adhere better but also helps to achieve a more professional and polished finish.
Additionally, cleaning your walls removes any potential barriers that could interfere with the paint’s ability to bond properly. This means your paint will be less likely to crack, peel, or chip over time, saving you from having to redo the job sooner than anticipated.
With your walls thoroughly cleaned and prepped, you’re now ready to apply a fresh coat of paint. Following these cleaning steps ensures that your paint job will have a solid foundation, resulting in a beautiful and long-lasting finish. By investing a little extra time and effort into the preparation stage, you’ll be rewarded with walls that look professionally painted and that will withstand the test of time.
:max_bytes(150000):strip_icc()/washing-interior-walls-4-7f0658d4e2124a1a9f29507e115318ab.jpg)
Credit: www.thespruce.com
Frequently Asked Questions
What Is The Best Thing To Wash Walls With Before Painting?
The best thing to wash walls with before painting is a mixture of warm water and mild detergent. This solution effectively removes dirt, grease, and stains from the walls, creating a clean surface for paint to adhere to.
Do Professional Painters Wash Interior Walls Before Painting?
Yes, professional painters typically wash interior walls before painting. This helps remove dirt, grease, and other contaminants that could affect the paint’s adhesion. Cleaning ensures a smooth surface for better paint coverage and longevity.
What Is A Good Cleaner Before Painting?
A good cleaner before painting is a degreaser or TSP solution. It helps remove dirt and grease, ensuring better paint adhesion.
What Is The Easiest Way To Wash Walls?
The easiest way to wash walls is to mix a small amount of mild soap with warm water in a bucket. Dip a soft sponge or cloth into the soapy water and gently rub the walls in a circular motion.
Rinse with clean water and dry with a clean towel.
Conclusion
Cleaning your walls before painting is crucial for achieving a smooth and professional finish. By following the steps outlined in this guide, you can ensure that your paint adheres properly and lasts longer. Taking the time to prepare your walls will result in a stunning and long-lasting paint job.