Christmas trees are one of the most iconic symbols of the holiday season. Whether you are creating holiday cards, decorations, or just enjoying the festive atmosphere, learning how to draw a Christmas tree is a fun and simple way to spread holiday cheer.
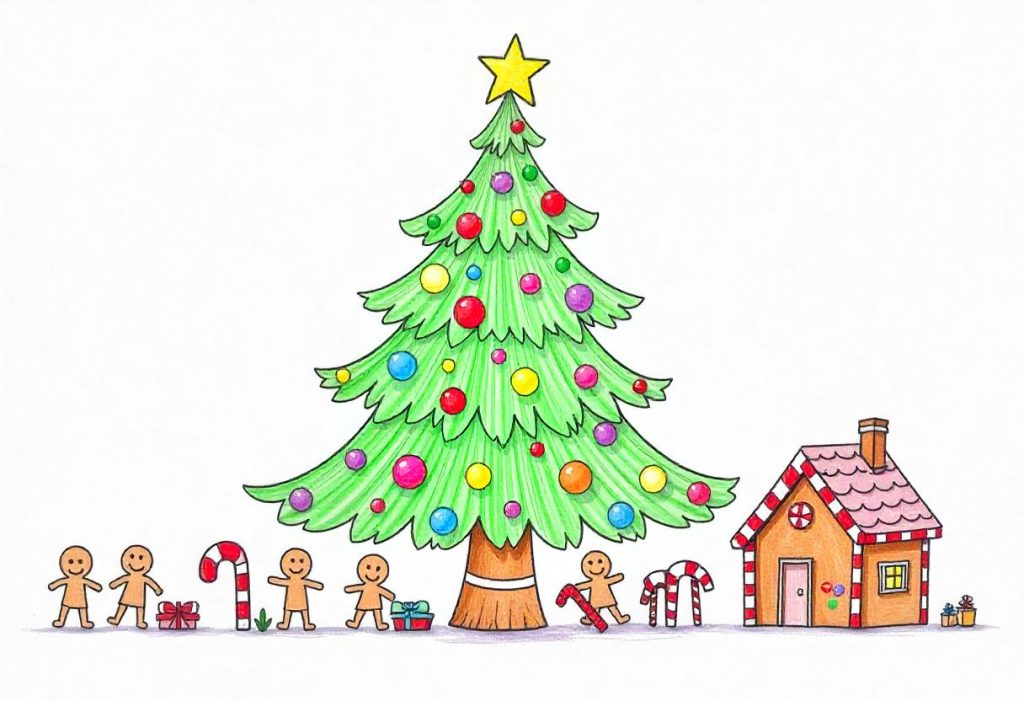
This guide will walk you through the process of drawing a beautiful and detailed Christmas tree from start to finish. With easy-to-follow instructions, you will be able to create a stunning Christmas tree that captures the magic of the season.
Contents
The Basics of Drawing a Christmas Tree
Before diving into the step-by-step process, it’s essential to understand the general shape and components of a Christmas tree. The typical Christmas tree has a triangular shape, representing the tree’s layered branches. The tree is often decorated with lights, ornaments, and a star or angel on top. The base of the tree may have a trunk, and there is often a tree skirt or presents surrounding it.
Having a basic understanding of the tree’s shape and components will make the drawing process much easier and enjoyable.
Materials You Will Need
Before you begin drawing, gather your materials. Here’s a list of what you’ll need to get started:
- Pencil: A standard pencil (HB or 2B) works well for sketching.
- Eraser: A good eraser is essential for correcting mistakes and adjusting your drawing.
- Colored Pencils, Markers, or Paint: These will be used for adding color to your Christmas tree.
- Paper: A regular sketchpad or printer paper will work, but thicker paper is better if you plan on using markers or paint.
- Sharpener: Ensure your pencils are sharp for precision.
- Ruler (optional): For ensuring straight lines when drawing the trunk and tree layers.
Step 1: Draw the Tree’s Outline
The first step in drawing a Christmas tree is to outline its basic shape. Start by sketching the overall structure of the tree.
Draw the Trunk
- Sketch the Tree Trunk: Begin by drawing a straight line down the center of your paper for the tree trunk. The trunk should be slightly wider at the bottom and taper upward as it gets closer to the tree’s foliage.
- Outline the Base: Make the trunk about one-fourth of the total height of the tree, depending on how you want to proportion your tree.
Draw the Tree’s Layers
- Create the Triangle Shape: Christmas trees are often drawn as triangles. Draw three to four layers of triangles stacked on top of each other. The bottom layer should be the widest, with each subsequent layer getting smaller.
- Use Curved Lines: Instead of sharp points, make the edges of each triangle slightly curved. This will give your tree a more natural look.
- Shape the Layers: The layers of branches should taper slightly toward the top of the tree. Make sure the layers overlap slightly for a full effect.
Step 2: Add Details to the Tree Trunk
Once the basic shape of the tree is established, it’s time to add details to the trunk and branches.
Add Texture to the Trunk
- Draw Bark Lines: Using your pencil, add some vertical lines or rough textures along the trunk. This will create the appearance of bark on the tree. You can also add a few horizontal lines to break up the texture and make it look more natural.
- Darken the Bottom: Make the bottom of the trunk slightly darker to add depth and create the illusion of shadows.
Add the Tree’s Branches
- Sketch the Branches: On each layer of the tree, draw small, curved lines extending outward to represent branches. These branches should start at the center of each layer and spread outwards toward the edges.
- Layer the Branches: Make sure that the branches on each layer overlap with the branches of the layers above and below. This will make the tree appear full and well-structured.
Step 3: Add Decorations to the Tree
No Christmas tree is complete without decorations. Now, let’s add some fun and festive details to your tree.
Add Christmas Lights
- Sketch the Lights: Start by drawing curved lines around the tree to represent the strands of Christmas lights. These lines should zigzag around the tree’s layers.
- Add Light Bulbs: On the light strands, draw small circles or ovals to represent the light bulbs. You can add a variety of sizes for a more whimsical look.
Draw Ornaments
- Place the Ornaments: Draw small circles, ovals, or stars on the tree’s branches to represent ornaments. You can vary the size and shape of the ornaments, placing some close together and others further apart.
- Add Detail: For each ornament, you can add small details like lines, dots, or patterns to make them more interesting.
Draw a Tree Topper
- Choose a Topper: The tree topper is typically a star or an angel. For a star, draw a five-pointed star at the top of the tree. For an angel, sketch a small figure with wings at the top.
- Add Detail to the Topper: Whether it’s a star or an angel, make sure to add intricate details to the topper. For a star, you can add rays or glitter-like effects around the star. For an angel, you can sketch a small robe and halo.
Step 4: Add Gifts and a Tree Skirt
The base of the Christmas tree is often surrounded by gifts and a tree skirt. This final touch will complete your holiday drawing.
Draw a Tree Skirt
- Sketch the Skirt: Below the tree’s trunk, draw a wide, circular shape to represent the tree skirt. You can make it a simple pattern or add a decorative edge to the skirt.
- Add Texture: Use light pencil strokes to add folds and texture to the tree skirt.
Draw Gifts
- Place the Gifts: Draw small rectangular or square shapes at the base of the tree to represent gifts. Make them varying sizes to add depth.
- Wrap the Gifts: Add ribbons and bows on top of the gifts. You can also draw some gift tags for an extra touch of detail.
Step 5: Add Final Details
Now that your tree is mostly sketched out, it’s time to add some final touches that will bring your drawing to life.
Add Shadows and Depth
- Shade the Tree: Use a pencil to lightly shade the areas that would be in shadow. The bottom of the tree, the trunk, and the underside of the branches should be shaded.
- Blend the Shading: Use a blending stump or your finger to blend the shading, creating soft transitions between light and dark areas.
Refine the Decorations
- Enhance the Lights: Darken the areas around the Christmas lights to create a glowing effect.
- Add Details to the Ornaments: Use your pencil to add additional patterns and textures to the ornaments for a more polished look.
Step 6: Color Your Christmas Tree
Now that your tree is fully sketched and detailed, it’s time to add color. You can use colored pencils, markers, or watercolors depending on your preference.
Color the Tree
- Choose the Green: Select a variety of green shades for the tree’s foliage. Use lighter greens for the outer edges of the branches and darker greens for the inner sections of the branches.
- Add Depth with Shading: Use darker green shades along the edges and shadows to add depth to the tree. Blend the colors for a natural look.
Color the Decorations
- Lights: Use bright colors for the Christmas lights, such as red, yellow, blue, and green. Make the bulbs vibrant to give them a glowing effect.
- Ornaments: Choose a variety of colors for the ornaments. Use metallic colors like gold and silver for an elegant touch or bright, festive colors for a more playful look.
- Star or Angel: Color the star with gold or yellow to make it stand out. If you drew an angel, use soft colors like white or pale yellow for the robe.
Color the Gifts
- Wrap the Gifts: Color the gift boxes in festive colors like red, green, and gold. Add different patterns like stripes, polka dots, or solid colors.
- Ribbons and Bows: Color the ribbons and bows with contrasting colors, such as gold, silver, or bright red.
Final Thoughts
Drawing a Christmas tree is a fun and creative activity that helps you get into the holiday spirit. Whether you’re drawing for a card, a decoration, or just for fun, this step-by-step guide provides everything you need to create a beautiful, festive tree. By following the steps carefully, adding detailed decorations, and experimenting with color, you’ll have a Christmas tree drawing that’s both beautiful and memorable.
Remember, practice makes perfect. The more you draw, the more skilled you’ll become at capturing the magic of the season. Happy drawing and Merry Christmas!