Yes, you can skim coat over paint, but the surface must be prepared properly first. Skim coating over paint can refresh walls without complete repainting.
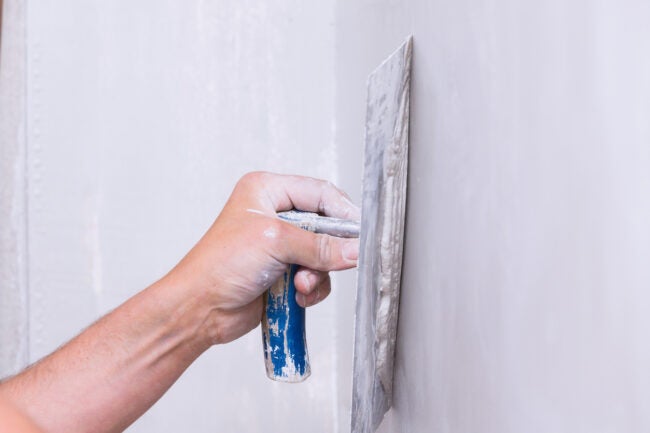
Skim coating is a texturing technique used to make a wall smooth or to repair damaged drywall. It involves applying a thin layer of joint compound over the surface to create a flat, smooth finish. This process is especially useful when you want to achieve a level 5 drywall finish, the highest level of smoothness recognized in the industry.
Before starting the skim coat process over painted walls, you must ensure the surface is clean, dull, and free from any glossy finishes or loose paint. This preparation is crucial for the compound to adhere properly and for achieving a professional-looking result. Skim coating can cover a multitude of sins on your walls, from uneven patches to hairline cracks, and can even be used as a base for further texturing techniques.
Contents
Introduction To Skim Coating Over Paint
Skim coating over paint can rejuvenate old walls. It’s a technique to create a smooth surface. You may wonder if it’s possible to skim coat over painted walls. Yes, with the right preparation and materials, you can.
The Basics Of Skim Coating
Skim coating is applying a thin plaster layer over a wall. It’s often used to smooth out uneven surfaces. Here’s what you need to know:
- Use a special drywall compound or plaster.
- Apply with a trowel or drywall knife.
- Requires a primer before painting.
Pros And Cons Of Skim Coating Over Paint
| Pros | Cons |
|---|---|
| Creates a smooth finish | Prep work is necessary |
| Hides imperfections | May require multiple coats |
| Can apply over paint | Not suitable for high-moisture areas |
Preparation For Skim Coating
Skim coating over paint transforms walls. Smooth and even walls are a decorator’s canvas. A good foundation ensures the best results.
Surface Cleaning Essentials
Clean walls are crucial. Dust and grime affect adhesion. Use a damp cloth to wipe the surface. Allow it to dry completely.
- Damp cloth or sponge
- Mild detergent
- Bucket of water
- Towels for drying
Paint Condition Assessment
Check the paint before you start. Look for peeling or chipping. These areas need attention. Use a putty knife to remove loose paint.
Tools And Materials Needed
Right tools make the job easier. Gather everything before you begin.
| Tool/Material | Use |
|---|---|
| Putty knife | Scrape and apply compound |
| Joint compound | For skim coating |
| Sandpaper | Smooth the surface |
| Paint roller | Apply the compound evenly |
| Mixing paddle | Mix joint compound |
Skim Coat Compatibility With Paint
Ever wondered if you can give your painted walls a smooth finish without starting from scratch? Skim coating over paint is a smart way to achieve a new surface without complete paint removal. Let’s explore which types of paint are best suited for skim coating.
Types Of Paint That Can Be Skim Coated
Not all paints are equal when it comes to skim coating. The right type of paint ensures a successful bond between the new layer and the old surface. Consider the following paint types:
- Flat Paint: Ideal for skim coating due to its lack of sheen.
- Eggshell Finish: Can be skim coated with proper surface preparation.
- Satin Finish: Requires sanding for better adhesion.
Glossy paints, however, are often too slick for skim coating without extensive preparation. Always ensure the paint is clean and stable before beginning your project.
When To Avoid Skim Coating Over Paint
Sometimes skim coating over paint is not recommended. Here are key situations to avoid:
| Condition | Action Required |
|---|---|
| Peeling Paint | Remove loose paint first. |
| High-Gloss Surfaces | Sand for better adhesion. |
| Damp Walls | Address moisture issues. |
Skim coating over unstable surfaces can lead to poor results. Always assess the paint condition before proceeding.
Credit: pristinepaintersnyc.com
Step-by-step Skim Coating Process
Transforming your walls with a fresh skim coat can be a game-changer. It can cover imperfections and give a smooth finish. But what if the walls are already painted? Can you apply a skim coat over paint? The answer is yes, with the right preparation and technique. Let’s dive into the step-by-step skim coating process to ensure a successful application.
Applying The First Layer
Preparing the painted surface is crucial before you begin. Clean the wall thoroughly. Ensure it’s dry and free of loose paint. Mix the joint compound until smooth. Use a wide drywall knife to apply the compound. Spread it thinly over the surface. Cover the wall with a thin layer. This will help the compound stick better.
Sanding For Smoothness
Once the first layer dries, it’s time to sand. Use a fine-grit sanding block for best results. Sand gently to avoid damaging the wall. Your goal is to create a smooth surface for the next layer. Wipe the wall with a damp cloth after sanding to remove dust.
Final Layer Application Techniques
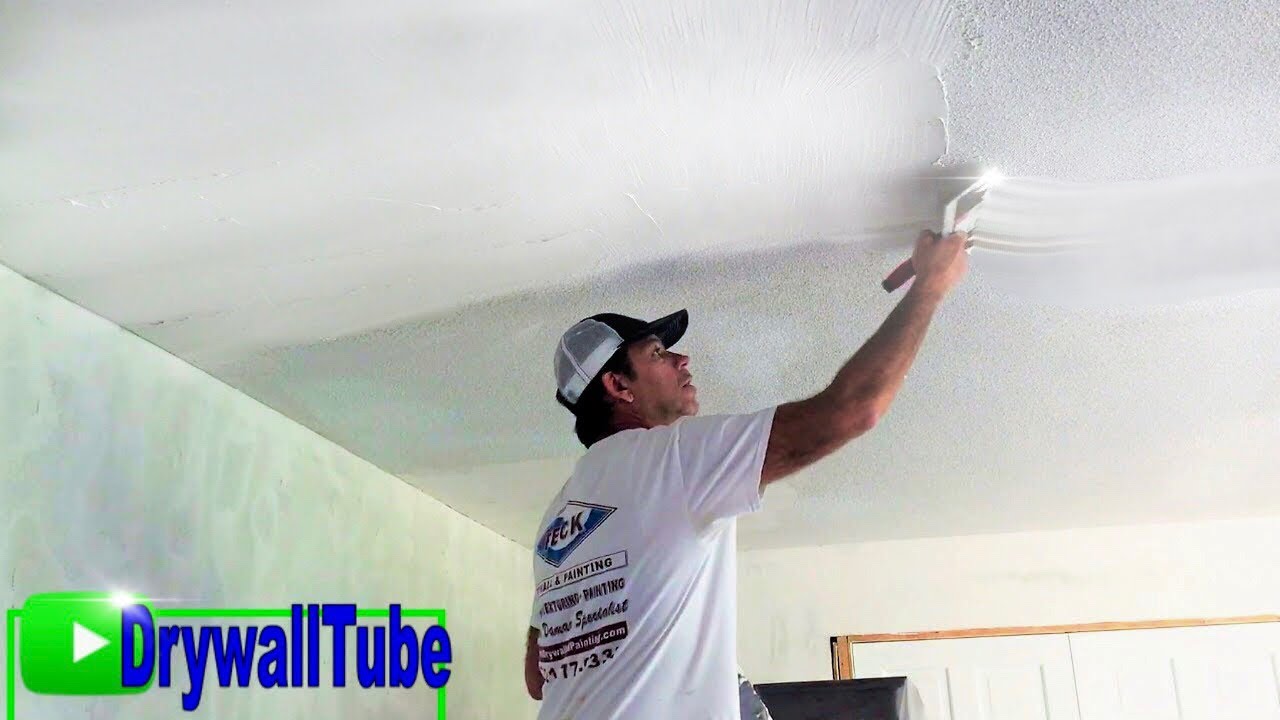
The final layer is all about perfection. Mix a fresh batch of joint compound. Apply it smoothly with a clean drywall knife. Hold the knife at an angle for a smooth finish. Be patient and cover the entire surface. This layer will give your wall a flawless look. Allow it to dry completely before a final sanding.
Drying Time And Environmental Factors
Understanding the drying time and environmental factors is crucial when skim coating over paint. These elements affect the finish and adherence of the new skim coat. Let’s explore how to ensure optimal drying.
Ideal Conditions For Drying
For a skim coat to dry effectively, certain conditions must be met. The ideal temperature is between 68-72°F (20-22°C). Adequate air circulation is necessary to support even drying. It’s important to maintain low humidity levels; ideally, humidity should stay below 50%. These conditions help the skim coat dry uniformly, preventing cracks or uneven textures.
Managing Humidity And Temperature
Controlling the environment can be challenging, but it’s important for a successful skim coat. Use dehumidifiers to reduce moisture in the air. Heaters or air conditioners can maintain the temperature within the ideal range. Keep windows closed to avoid sudden changes in temperature or humidity caused by outside weather. Always ensure good ventilation to aid in drying.
| Factor | Target Range | Tools for Control |
|---|---|---|
| Temperature | 68-72°F (20-22°C) | Heaters, Air Conditioners |
| Humidity | Below 50% | Dehumidifiers |
| Air Circulation | Good Flow | Fans, Open Windows (if weather permits) |
- Check temperature with a thermometer.
- Use a hygrometer to monitor humidity levels.
- Place fans strategically for optimal air flow.
Remember, drying times can vary based on the thickness of the skim coat and specific product used. Always follow the manufacturer’s recommendations for drying times and conditions.

Credit: m.youtube.com
Finishing Touches After Skim Coating
The journey from a rough surface to a perfectly smooth wall doesn’t end with skim coating, especially over paint. It’s the finishing touches that transform a room. A well-executed final finish is crucial for durability and aesthetics. Let’s explore the final stages: priming and painting, and the decorative options available.
Priming And Painting
Once the skim coat dries, the next essential step is priming. Priming ensures that your paint adheres properly and looks even. Use a high-quality primer suited for your wall. Apply it with smooth, long strokes for best coverage. After the primer dries, inspect the wall for any imperfections. Fix them before moving on to painting.
Choosing the right paint is important. Go for a paint that complements your room’s decor. Apply it in multiple, thin layers. Between layers, allow the paint to dry completely. This will result in a flawless finish that lasts for years.
Decorative Options
After priming and painting, consider adding some flair. There are many decorative techniques to choose from:
- Faux finishes can mimic textures like marble, wood, or stone.
- Stenciling adds patterns or designs to your wall.
- Wall decals are a simple way to personalize your space.
These techniques can add depth and character to your room. Remember to use quality materials and tools for the best outcome. Take your time to perfect your technique or hire a professional if needed.
Maintenance And Care
Skim coating over paint means a fresh start for walls. But good care keeps them looking great. Here’s how to maintain your newly skim-coated surfaces.
Routine Cleaning
Clean walls gently to keep them looking sharp. Dust and dirt can dull the surface. Use soft cloths and mild detergents. Dry walls after cleaning to avoid water marks. This keeps your walls fresh.
- Dust with microfiber cloths weekly.
- Spot clean stains quickly with gentle cleaners.
- Avoid harsh chemicals that can damage the finish.
Repairing Damages
Even well-cared-for walls can get dings or scratches. Fix these fast to keep walls looking new.
- Fill small holes with spackle.
- Sand the area smooth once dry.
- Touch up paint to match the rest of the wall.
For larger repairs, consider re-skim coating the area. Match textures for a seamless look. Regular upkeep prevents bigger problems later.
Credit: m.youtube.com
Expert Tips For Flawless Results
Seeking a perfect finish on your walls? Skim coating over paint is a debated topic among DIY enthusiasts and professionals alike. However, with the right technique, it’s possible to achieve smooth, flawless walls. Let’s dive into expert tips that ensure top-notch results.
Common Mistakes To Avoid
- Skipping Surface Prep: Always clean and sand the painted surface before starting.
- Using the Wrong Tools: Invest in quality trowels and blades for an even coat.
- Applying Too Thick: A thin, even layer is key. Thick coats can lead to cracking.
- Ignoring Drying Times: Allow proper drying between coats to avoid complications.
Professional Advice For Longevity
Ensure your skim-coated surfaces stand the test of time with this professional guidance:
- Prime Before Painting: Use a high-quality primer to seal the new surface.
- Maintain Consistent Conditions: Keep the room temperature and humidity stable during and after application.
- Choose the Right Compound: Opt for a setting-type joint compound for durable results.
- Inspect and Repair: Regularly check for and fix any hairline cracks or imperfections.
Frequently Asked Questions
Can You Skim On Top Of Paint?
Yes, you can skim coat over paint, but ensure the surface is clean, dull, and in good condition. Prime the painted surface before applying the skim coat for best adhesion.
How Do You Prep A Painted Wall For Skim Coat?
Clean the wall thoroughly, removing dirt and grease. Sand glossy surfaces for better adhesion. Patch any holes or cracks. Apply a primer if necessary for a uniform substrate. Ensure the wall is dry before applying the skim coat.
Should I Remove Paint Before Skimming?
Yes, you should remove loose or flaking paint before skimming to ensure proper adhesion and a smooth finish.
Should I Skim Coat Painted Walls?
Skim coating painted walls can create a smooth, flawless surface for new paint or wallpaper. It’s ideal for covering imperfections before redecorating.
Conclusion
Wrapping up, skimming over paint is definitely possible with the right preparation. Remember, a smooth finish begins with a clean surface and the proper primer. Whether refreshing a room or fixing imperfections, your walls can look as good as new.
Ready, set, skim coat!