Yes, you can paint a ceiling fan. It is important to use the right type of paint and to follow proper safety precautions when painting a ceiling fan.
Ceiling fans are a popular home accessory that can add both style and function to a room. However, sometimes the color of the fan may not match the decor of the room. In such cases, painting the ceiling fan can be a cost-effective way to update its look.
Before painting the ceiling fan, it is important to clean it thoroughly and remove any existing paint or finish. It is also important to use the right type of paint that is suitable for the ceiling fan material and to follow proper safety precautions, such as turning off the power and wearing protective gear. With proper preparation and care, painting a ceiling fan can be a simple and satisfying DIY project.
Contents
- Introduction To Ceiling Fan Makeovers
- Assessing Your Ceiling Fan’s Condition
- Choosing The Right Paint
- Preparation Steps
- Priming The Surface
- Painting Techniques
- Reassembling And Testing The Fan
- Maintenance Tips For Painted Fans
- Before And After: Showcasing The Transformation
- Common Mistakes To Avoid
- Additional Creative Ideas
- Frequently Asked Questions
- Conclusion
Introduction To Ceiling Fan Makeovers
The Impact Of A Fresh Look
Refreshing the appearance of a ceiling fan can have a transformative effect on the overall ambiance of a room. With a simple coat of paint, a dated or worn-out ceiling fan can be revitalized, instantly elevating the aesthetic appeal of the space.
Potential Value Addition
Enhancing a ceiling fan’s appearance through painting can add value to your home or space. It offers a cost-effective way to update the look of a room, making it more appealing to potential buyers or visitors. This simple makeover has the potential to significantly enhance the overall impression of the space, making it a worthwhile investment.
Assessing Your Ceiling Fan’s Condition
A ceiling fan can be a stylish and functional addition to any room, but over time, it may start to look worn or outdated. Before deciding to paint your ceiling fan, it’s essential to assess its condition to ensure that it’s safe and suitable for painting. Here’s how you can evaluate the state of your ceiling fan before beginning the painting process:
Materials And Tools Needed
Before you begin assessing your ceiling fan, gather the necessary materials and tools. Here’s a list of what you’ll need:
- Step ladder
- Clean cloth
- All-purpose cleaner
- Painter’s tape
- Sandpaper
- Primer
- Paintbrushes
- Paint in your desired color
- Protective gear (gloves, goggles, mask)
Safety Precautions Before Starting
Prior to assessing your ceiling fan, it’s crucial to take the necessary safety precautions to protect yourself and ensure a smooth painting process. Here are some safety measures to consider:
- Turn off the power to the ceiling fan at the circuit breaker.
- Use a stable step ladder to access the fan, and ensure it is on a level surface.
- Wear protective gear, including gloves, goggles, and a mask, to shield yourself from dust and paint fumes.
- Work in a well-ventilated area to prevent inhaling fumes and to aid in the drying process.
- Secure any loose components of the fan to prevent accidents during the assessment and painting.
Choosing The Right Paint
Painting a ceiling fan can be a great way to update its look and match your decor. However, it’s important to choose the right paint that is specifically designed for metal surfaces to ensure a long-lasting and professional finish. Consider using a high-quality paint with good adhesion and durability for the best results.
Comparing Paint Types
When it comes to painting a ceiling fan, choosing the right paint is crucial for achieving a professional and long-lasting finish. There are a few different types of paint that you can use, each with its own unique characteristics and benefits.
| Paint Type | Benefits |
|---|---|
| Latex Paint | Easy to clean, dries quickly, low odor |
| Oil-based Paint | Durable, excellent coverage, smooth finish |
| Spray Paint | Even application, ideal for intricate designs |
Latex paint is a popular choice for ceiling fans due to its ease of use and versatility. It is water-based, which means it is easy to clean up with soap and water. Latex paint also dries quickly, allowing you to complete your painting project in less time. Additionally, it has a low odor, making it a more pleasant option for indoor use.
On the other hand, oil-based paint is known for its durability and excellent coverage. It provides a smooth and long-lasting finish, which is especially important for ceiling fans that are exposed to constant movement and airflow. While oil-based paint takes longer to dry and has a stronger odor, it can be an excellent choice for achieving a professional look.
If you prefer a more even application or plan to paint intricate designs on your ceiling fan, spray paint might be the best option for you. Spray paint allows for a fine mist of paint to be evenly distributed, resulting in a smooth and flawless finish. However, it is important to use spray paint in a well-ventilated area and follow safety precautions.
Selecting Colors And Finishes
When selecting the colors and finishes for your ceiling fan, there are a few factors to consider. Firstly, you’ll want to choose a color that complements the overall aesthetics of your room. Whether you prefer a classic white, a bold pop of color, or a metallic finish, the choice is yours.
Additionally, consider the finish of the paint. A glossy finish can add a touch of elegance and reflect more light, while a matte finish provides a more subtle and modern look. It’s important to note that a glossy finish may highlight imperfections on the fan’s surface, so proper preparation and priming are essential for achieving a smooth result.
Remember to take into account the existing colors in your room and the overall design scheme. A well-chosen paint color and finish can enhance the visual appeal of your ceiling fan and elevate the overall ambiance of your space.
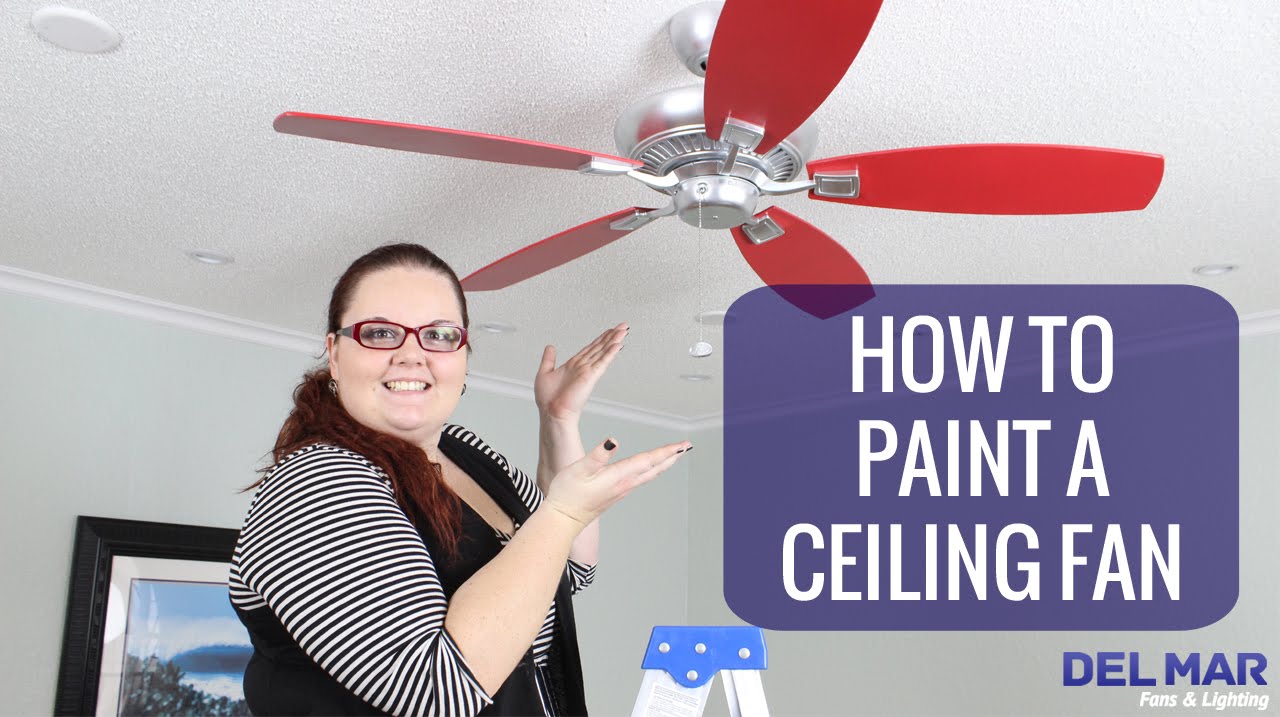
Credit: m.youtube.com
Preparation Steps
Before you start painting your ceiling fan, it’s crucial to properly prepare the fan for the painting process. Taking the time to clean the fan and dismantle it can make the painting process much easier and ensure a smoother finish. Follow these preparation steps to achieve the best results:
Cleaning The Fan
Start by thoroughly cleaning the ceiling fan to remove any dust, dirt, or grease that may have accumulated on the surface. Use a soft cloth or a feather duster to wipe down the blades, motor housing, and other parts of the fan. Additionally, you can use a mild detergent mixed with water to gently clean any stubborn stains. Make sure to dry the fan completely before proceeding to the next step.
Dismantling For Easier Painting
Next, consider dismantling the ceiling fan to make the painting process easier and more efficient. Begin by turning off the fan and disconnecting the power source. Carefully remove any light fixtures or other accessories attached to the fan. Take note of how the fan is assembled and document the steps if necessary, to ensure easy reassembly later. It’s also a good idea to take pictures of the fan before disassembling it to help you remember how it all fits together.
Once the fan is completely dismantled, you can lay the individual parts on a clean and protected surface for painting. This will allow you to have better access to each part, ensuring an even coat of paint and minimizing the risk of drips or uneven coverage.
Remember to label or keep track of the parts to avoid confusion during reassembly. Keeping small screws and other hardware in labeled containers or bags can help prevent any loss or mix-ups.
By following these preparation steps, you’ll be well on your way to painting your ceiling fan with ease and achieving a professional-looking finish.
Priming The Surface
Priming the surface is an essential step when painting a ceiling fan. It prepares the surface for the paint to adhere and ensures a smooth and long-lasting finish. Be sure to clean the fan thoroughly before priming to ensure the best results.
Benefits Of Priming
Priming the surface is a crucial step when painting a ceiling fan. It prepares the surface to bond with the paint and ensures a smooth, even finish. The benefits of priming include:- Improved adhesion: A primer creates a bond between the surface and the paint, ensuring it adheres better and lasts longer.
- Improved coverage: A primer helps the paint cover the surface more evenly, preventing blotchiness and streaks.
- Increased durability: A primer protects the surface from moisture, stains, and other damage, ensuring the paint job lasts longer.
- Cost-effective: Priming can save you time and money in the long run, as it reduces the amount of paint needed and ensures the paint job lasts longer.
Application Techniques
When it comes to priming a ceiling fan, there are a few application techniques to consider. These include:- Brush: Using a brush is the most common way to apply primer. It allows you to get into tight spaces and ensures an even coat.
- Spray: If you have a large fan or want to save time, using a spray primer can be a good option. It allows for quick, even coverage and is ideal for smooth surfaces.
- Roller: Using a roller is another option for applying primer. It’s best for flat surfaces and can be faster than using a brush.
Painting Techniques
When it comes to painting a ceiling fan, the right technique can make all the difference. You want to ensure that your fan looks great and functions properly, so it’s important to choose the right method. In this post, we’ll explore the two most common painting techniques for ceiling fans: brush and spray painting. We’ll also discuss how to ensure even coats for a professional-looking finish.
Brush Vs. Spray Painting
Brush painting is the traditional method of painting a ceiling fan. It involves using a paintbrush to apply the paint to the fan blades and housing. This method is best for small areas and intricate details, as it allows for greater control and precision. However, it can be time-consuming and may result in brush marks if not done carefully.
Spray painting, on the other hand, is a quicker and more efficient method. It involves using a spray gun or aerosol can to apply the paint in a fine mist. This method is best for larger areas and smooth surfaces, as it provides an even coverage without brush marks. However, it requires more preparation and protection of surrounding areas, as overspray can occur.
Ensuring Even Coats
Whether you choose to brush or spray paint your ceiling fan, it’s important to ensure even coats for a professional-looking finish. Here are some tips to help:
- Start with a clean surface: Remove any dust, dirt, or grease from the fan blades and housing before painting.
- Prime the surface: Apply a primer before painting to help the paint adhere and prevent peeling or chipping.
- Apply thin coats: It’s better to apply multiple thin coats than one thick coat, as it will dry faster and provide a smoother finish.
- Allow to dry completely: Wait for each coat to dry completely before applying the next one, to prevent smudging or streaking.
By following these techniques, you can paint your ceiling fan like a pro and give it a fresh new look. Whether you choose brush or spray painting, make sure to take your time and be patient for the best results.
Reassembling And Testing The Fan
After successfully painting your ceiling fan, it’s time to reassemble and test it to ensure it functions properly. Follow these step-by-step instructions to put everything back together:
Step-by-step Reassembly
- Start by gathering all the components you removed during the disassembly process, including the fan blades, motor housing, and any other parts.
- Carefully align the fan blades with the motor housing, making sure they are properly aligned and secure.
- Using the screws or clips provided, attach the fan blades to the motor housing. Ensure that each blade is tightly fastened to prevent any wobbling or instability.
- Next, reattach the motor housing to the ceiling bracket. Use the appropriate screws or brackets to secure it firmly in place.
- Connect the wires from the fan to the corresponding wires in the ceiling bracket. Make sure to match the colors correctly (e.g., black to black, white to white).
- Tightly secure the wire connections using wire nuts, ensuring there are no loose or exposed wires.
- Double-check all the screws and connections to ensure everything is properly tightened and secure.
Safety Checks And Function Test
Before turning on the fan, it’s crucial to perform a few safety checks and a function test to ensure its proper operation:
- Make sure the fan blades are clear of any obstructions, such as furniture or decorative objects, to prevent accidents or damage.
- Turn on the fan’s power supply and check for any unusual noises, vibrations, or wobbling. If you notice anything unusual, immediately turn off the power and investigate the issue.
- Test the fan’s speed settings and make sure they are functioning correctly. Start with the lowest setting and gradually increase it to check for smooth operation.
- Verify that the fan’s light, if applicable, is working properly. Turn it on and off to confirm its functionality.
- Finally, check the fan’s direction switch to ensure it is set to the desired rotation for either cooling or heating purposes.
By following these reassembly steps and conducting the necessary safety checks and function test, you can confidently enjoy the refreshed look and functionality of your newly painted ceiling fan. Happy fan-ing!
Maintenance Tips For Painted Fans
A painted ceiling fan can be a beautiful addition to any room, adding a pop of color and personality to the space. However, to ensure that your painted fan remains in pristine condition, regular maintenance is essential. In this section, we will discuss some important maintenance tips for painted fans, including regular cleaning routines and touch-up strategies.
Regular Cleaning Routines
Keeping your painted ceiling fan clean is crucial to maintain its appearance and prevent the build-up of dust and grime. Here are some simple cleaning routines to follow:
- Dust the blades and motor housing regularly using a soft cloth or a feather duster.
- If there are stubborn stains or dirt, mix a mild detergent with warm water and gently wipe the fan with a soft cloth.
- Avoid using abrasive cleaners or harsh chemicals, as they can damage the paint finish.
- Ensure the fan is turned off and disconnected from the power source before cleaning.
Touch-up Strategies
Over time, the painted surface of your ceiling fan may experience wear and tear. To maintain its vibrant appearance, consider these touch-up strategies:
- If you notice any chips or scratches on the painted surface, gently sand the affected area using fine-grit sandpaper.
- Remove any dust or debris from the sanded area using a soft cloth.
- Apply a small amount of paint that matches the original color of the fan, using a fine brush or a cotton swab.
- Allow the touch-up paint to dry completely before turning the fan on.
By following these maintenance tips, you can ensure that your painted ceiling fan remains in excellent condition for years to come. Regular cleaning routines and touch-up strategies will help preserve the beauty and longevity of your fan, allowing it to continue enhancing the aesthetic appeal of your space.
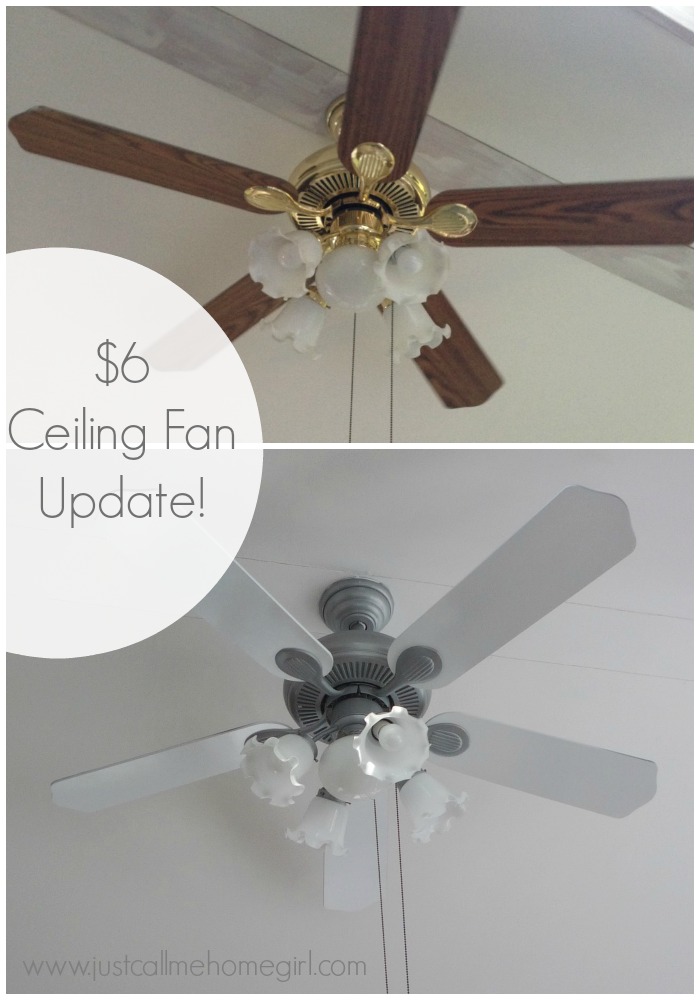
Before And After: Showcasing The Transformation
Transforming a ceiling fan with a fresh coat of paint can breathe new life into a room. Witness the dramatic impact as we showcase the stunning before and after results of a ceiling fan painting project.
Photo Tips For Your Project
Capture your ceiling fan transformation in all its glory with these photo tips:
- Use natural light to highlight the color and texture
- Take close-up shots to showcase the intricate details
- Experiment with different angles to capture the entire fan
Sharing Your Success On Social Media
Once your ceiling fan is beautifully painted, share your success on social media to inspire others. Use these tips to maximize your impact:
- Share before and after photos for a striking comparison
- Use relevant hashtags to reach a wider audience
- Encourage engagement by asking for opinions and tips

Credit: inmyownstyle.com
Common Mistakes To Avoid
When painting a ceiling fan, there are common mistakes that can lead to less-than-desirable results. By being aware of these potential pitfalls, you can ensure a successful painting project that leaves your ceiling fan looking refreshed and stylish.
Overlooking Sanding
Sanding the surface of the ceiling fan is a crucial step that should not be overlooked. Failing to sand the fan properly can result in a subpar paint finish, as the paint may not adhere well to the surface. Make sure to thoroughly sand the fan to create a smooth and even base for the paint.
Ignoring The Drying Time
One of the most common mistakes when painting a ceiling fan is ignoring the drying time between coats of paint. Rushing this process can lead to a streaky or uneven finish, as the previous coat may not have fully dried. Be patient and allow each coat of paint to dry completely before applying the next one.
Additional Creative Ideas
When it comes to additional creative ideas for painting a ceiling fan, there are numerous ways to personalize and accessorize your fan to match your home decor and style. In this section, we will explore some innovative and fun ideas to take your ceiling fan customization to the next level.
Personalizing With Stencils
Stenciling is a fantastic way to add a unique touch to your ceiling fan. You can use bold and intricate stencil designs to create patterns or images that reflect your personality and style. Consider using nature-inspired motifs, geometric patterns, or even your favorite quotes or phrases. Stenciling allows for endless creativity and can transform your ceiling fan into a true work of art.
Accessorizing Your Fan
Accessorizing your fan is another creative approach to enhancing its visual appeal. You can add decorative elements such as bold tassels, beads, or ribbons to the fan blades for a whimsical and charming look. Additionally, consider incorporating small hanging ornaments or charms that complement your overall decor theme. These accessories can bring a playful and personalized touch to your ceiling fan, making it a standout feature in any room.
Credit: justcallmehomegirl.com
Frequently Asked Questions
What Kind Of Paint Do You Use On A Ceiling Fan?
Use a high-quality paint specifically designed for use on metal surfaces, such as acrylic latex or oil-based paint. Make sure to clean the fan thoroughly before painting and apply the paint evenly with a brush or spray. Allow the paint to dry completely before using the fan.
Can I Repaint My Ceiling Fan?
Yes, you can repaint your ceiling fan. Make sure to clean it thoroughly and remove any dust or grease. Use a primer specifically designed for metal surfaces and then apply a coat of paint suitable for the material of your fan.
Let it dry completely before using it again.
Can You Change The Color Of A Ceiling Fan?
Yes, you can change the color of a ceiling fan by painting or using replacement blades.
Can You Paint A Ceiling Fan Without Taking It Down?
Yes, you can paint a ceiling fan without taking it down. Clean the fan, use a primer, and apply paint carefully.
Conclusion
Painting a ceiling fan is a simple and cost-effective way to give it a fresh new look. By following the necessary steps and using the right materials, you can transform your ceiling fan into a stylish and personalized feature in your home.
Whether you want to match it with your decor or add a pop of color, painting a ceiling fan is a DIY project that can be easily accomplished. So go ahead and unleash your creativity, and enjoy the revamped look of your ceiling fan.