Yes, you can mud over paint. It’s a common practice for creating a smooth surface.
When renovating a room, mudding over painted walls is an efficient way to achieve a flawless finish. By applying joint compound or mud over the existing paint, you can fill in any imperfections, such as dents or scratches, and create a seamless base for repainting or applying wallpaper.
This process saves time and effort compared to removing the existing paint. However, it’s essential to properly prepare the surface by cleaning and sanding the painted walls before mudding to ensure adhesion. With the right techniques, mudding over paint can result in a professional-looking outcome for your interior walls.
Credit: www.ehow.com
Contents
Introduction To Mud Over Paint
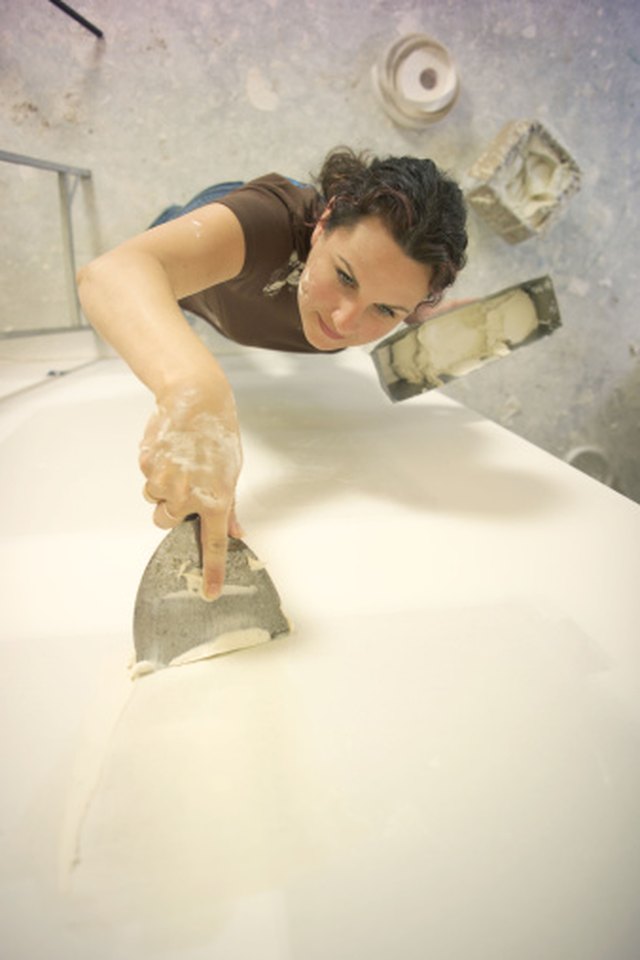
Mud over paint is a technique used to create a textured or dimensional effect on painted surfaces. This process involves applying a layer of joint compound or spackling over an existing painted surface to add depth and visual interest. It can be a cost-effective way to update walls and ceilings, and it offers a unique way to enhance the look of a room. However, there are important considerations and potential drawbacks to keep in mind before deciding to mud over paint.
Initial Considerations
Before embarking on a mud over paint project, there are several important factors to consider. First, assess the condition of the existing paint. Ensure that it is well-adhered to the surface and free from any cracks or peeling. Additionally, evaluate the texture of the surface and determine if it is suitable for the application of joint compound or spackling. Proper surface preparation is crucial for the success of the mud over paint process.
Pros And Cons
When considering mud over paint, it’s essential to weigh the advantages and disadvantages of this technique. Some of the benefits include the ability to achieve a custom, handcrafted look, as well as the opportunity to cover imperfections in the existing paint. On the other hand, potential drawbacks include the time-consuming nature of the process and the need for meticulous surface preparation. It’s important to carefully evaluate whether the benefits outweigh the challenges before proceeding with a mud over paint project.
Surface Preparation For Mudding
Surface preparation is a crucial step when it comes to mudding over paint. Properly preparing the painted surface ensures that the mud adheres well and the finished result is smooth and professional. In this guide, we’ll explore the essential surface preparation steps for mudding over paint, including cleaning the painted surface and sanding techniques.
Cleaning The Painted Surface
Before applying mud over paint, the painted surface must be thoroughly cleaned to remove any dirt, grease, or debris. This can be achieved by using a mild detergent and water solution to wash the surface, followed by rinsing with clean water. Allow the surface to dry completely before proceeding with the mudding process.
Sanding Techniques
Proper sanding of the painted surface is essential to ensure good adhesion of the mud. Start by using medium-grit sandpaper to lightly sand the entire painted surface, creating a slightly rough texture. This will help the mud to bond effectively. Next, use fine-grit sandpaper to smooth out any rough spots and create a uniform surface for mudding.
Choosing The Right Joint Compound
When it comes to mudding over paint, choosing the right joint compound is crucial for a successful and long-lasting finish. The joint compound serves as the primary material used to fill in the gaps and create a smooth surface for painting. With a variety of options available, it’s important to understand the different types of joint compounds and which ones are best suited for painted surfaces.
Types Of Joint Compound
There are two main types of joint compound: ready-mixed and setting-type compound.
| Joint Compound Type | Description |
|---|---|
| Ready-Mixed Compound | This type of joint compound is pre-mixed and ready to use straight from the container. It is convenient and easy to work with, making it a popular choice for DIYers. Ready-mixed compound is ideal for small repairs and patching jobs. |
| Setting-Type Compound | Setting-type compound, also known as dry mix or powder compound, requires water to activate it. It dries and hardens through a chemical reaction, resulting in a stronger and more durable finish. This type of compound is best for larger projects and areas that need extra strength. |
Best Picks For Painted Surfaces
When it comes to mudding over painted surfaces, it’s important to choose a joint compound that adheres well to the existing paint and provides a smooth finish. Here are some of the best picks:
- All-Purpose Joint Compound: This type of compound is versatile and suitable for most mudding projects. It can be used on both painted and unpainted surfaces, making it a convenient choice.
- Lightweight Joint Compound: If you’re working on a project that requires multiple layers of mud, lightweight joint compound is an excellent option. It is easier to sand and reduces the overall weight of the finished surface.
- Vinyl-Based Joint Compound: For areas that are prone to moisture, such as bathrooms or kitchens, vinyl-based joint compound is recommended. It has excellent water resistance and helps prevent mold and mildew growth.
Remember, before applying any joint compound over painted surfaces, it’s essential to clean and prepare the area properly. Remove any loose or flaking paint, and ensure the surface is smooth and free of dust or debris. By choosing the right joint compound and following the necessary preparation steps, you can achieve a professional-looking finish when mudding over paint.
Application Techniques For Success
Yes, you can mud over paint, but it’s important to prepare the surface properly. Start by cleaning and sanding the painted area, then apply a bonding primer before mudding. This will ensure a strong adhesion and a smooth finish for your project’s success.
When it comes to applying mud over paint, using the right techniques can make all the difference. By following the step-by-step process and using the necessary tools, you can achieve a smooth and flawless finish. In this section, we will discuss the tools required and provide a detailed breakdown of the application process.
Tools Required
Before you start applying mud over paint, it’s important to gather the necessary tools to ensure a successful outcome. Here are the tools you will need:
| Putty knife | Sanding block |
| Taping knife | Drop cloth |
| Mud pan | Painter’s tape |
| Joint compound | Primer |
Step-by-step Application Process
Follow these steps to achieve a successful mud application over paint:
- Clean the surface: Start by cleaning the painted surface using a mild detergent and water. This will remove any dirt, grease, or grime that could affect the adhesion of the mud.
- Prepare the surface: Use a putty knife to scrape off any loose or flaking paint. Sand the surface lightly to create a smooth and even base for the mud.
- Apply painter’s tape: If you want to protect certain areas from the mud, apply painter’s tape to the edges of the surfaces you don’t want to cover.
- Mix the joint compound: Follow the manufacturer’s instructions to mix the joint compound until it reaches a smooth and workable consistency.
- Apply the first coat: Using a taping knife or putty knife, spread a thin layer of joint compound over the painted surface. Smooth out any excess mud and feather the edges for a seamless blend.
- Let it dry: Allow the first coat of joint compound to dry completely before proceeding. This typically takes around 24 hours, but drying times may vary depending on the product and environmental conditions.
- Sand and repeat: Once the first coat is dry, lightly sand the surface to remove any imperfections. Apply subsequent coats of joint compound, allowing each layer to dry and sanding between coats, until you achieve the desired smoothness.
- Prime and paint: After the final coat of joint compound is dry and sanded, prime the surface to ensure proper paint adhesion. Once the primer is dry, you can proceed with painting the surface in your desired color.
By following these application techniques and using the right tools, you can successfully mud over paint and achieve a professional-looking finish. Remember to take your time, work in thin layers, and ensure each coat is dry and sanded before moving on to the next step.
Common Challenges And Solutions
When it comes to renovating your home, painting is one of the most common solutions that come to mind. But what if you want to add texture to your walls or ceilings? Can you mud over paint? The answer is yes, but there are some common challenges that you may encounter, along with solutions to help you achieve your desired result.
Adhesion Issues
One of the main challenges you may face when mudding over paint is adhesion issues. Mud needs to stick to a surface, and if the paint is glossy or has a high sheen, it can be difficult for the mud to adhere properly. To solve this issue, you can:
- Use a fine-grit sandpaper to roughen up the surface before applying the mud
- Apply a primer to the painted surface before mudding
- Use a bonding agent or an adhesive mixed with the mud to improve adhesion
Cracking And Shrinking
Another challenge that may arise when mudding over paint is cracking and shrinking. This can occur if the mud dries too quickly or if there is too much mud applied to the surface. To avoid cracking and shrinking, you can:
- Apply the mud in thin layers, allowing each layer to dry completely before applying the next
- Use a setting-type joint compound that dries more slowly and is less likely to crack or shrink
- Ensure that the surface is properly prepared and primed before applying the mud
Overall, mudding over paint is possible, but it requires proper preparation and technique to achieve a smooth and durable finish. By addressing common challenges such as adhesion issues and cracking and shrinking, you can successfully add texture to your walls or ceilings without having to remove the existing paint.
Drying And Curing Time
Mudding over paint is a common practice that can save time and money. However, it is important to understand the drying and curing time for the paint before you start mudding.
Ideal Conditions For Drying
For the paint to dry properly, it needs the right conditions. The ideal temperature for drying paint is between 50 and 90 degrees Fahrenheit. Humidity levels should be around 50% to prevent the paint from drying too quickly or too slowly. Proper ventilation is also essential to ensure that the paint dries evenly. If the room is poorly ventilated, the paint may take longer to dry and may not cure properly.
How To Speed Up The Process
If you’re in a hurry and need to speed up the drying process, there are a few things you can do. First, you can use a fan or air conditioning to circulate air and reduce humidity. This will help the paint dry faster. If you’re working on a small area, you can also use a hairdryer to speed up the drying process. However, make sure to keep the hairdryer at least 6 inches away from the painted surface to prevent the paint from blistering or cracking.
Another way to speed up the drying process is to use a paint additive. These additives are designed to accelerate drying time and can be added directly to the paint. However, make sure to follow the manufacturer’s instructions carefully to avoid over-diluting the paint.
Understanding the drying and curing time for paint is essential before you start mudding over it. Proper drying conditions and ventilation are crucial to ensure that the paint dries evenly and cures properly. If you need to speed up the drying process, you can use a fan or air conditioning, a hairdryer, or a paint additive. Remember to always follow the manufacturer’s instructions carefully to avoid damaging the painted surface.
Finishing Touches For A Smooth Surface
When it comes to achieving a flawless finish on your walls, the right techniques and materials make all the difference. After applying mud over paint to repair imperfections, it’s essential to focus on the finishing touches. This blog post will guide you through two crucial steps to ensure a smooth surface: sanding the dried mud and considering primer and paint options.
Sanding The Dried Mud
Properly sanding the dried mud is key to achieving a seamless surface. Follow these steps for the best results:
- Start by inspecting the dried mud for any bumps or uneven areas.
- Use a fine-grit sandpaper, such as 220-grit, to gently sand the surface. This will help smooth out any rough patches.
- Be careful not to over-sand, as this can damage the underlying layers of paint.
- After sanding, wipe away any dust using a clean cloth or a tack cloth.
Primer And Paint Considerations
Choosing the right primer and paint is crucial for achieving a flawless finish over the mud. Consider the following factors:
- Primer: Applying a coat of primer before painting can help improve adhesion and ensure an even finish. Look for a high-quality primer that is compatible with both the existing paint and the new paint you plan to use.
- Paint: Opt for a high-quality paint that is specifically formulated for the surface you are painting. Consider factors such as durability, washability, and sheen level. Additionally, choose a color that complements your existing paint or desired aesthetic.
By paying attention to these finishing touches, you can achieve a smooth and professional-looking surface when mudding over paint. Remember to take your time, follow the proper techniques, and use high-quality materials for the best results.
Credit: pristinepaintersnyc.com
Maintenance And Repair
When it comes to maintaining and repairing your painted surfaces, there are a few key considerations to keep in mind. Proper maintenance can help extend the life of your paint job and keep your walls looking fresh and vibrant. In this section, we will explore some long-term care tips and how to fix imperfections in your painted surfaces.
Long-term Care Tips
Maintaining your painted surfaces doesn’t have to be a daunting task. By following a few simple tips, you can keep your walls looking their best for years to come:
- Regularly dust and clean your walls using a soft cloth or sponge. This helps to remove any dirt or grime that may accumulate over time.
- Avoid using harsh cleaning agents or abrasive materials, as they can damage the paint. Stick to mild soapy water for cleaning.
- Keep an eye out for any signs of wear and tear, such as chipping or peeling paint. Promptly addressing these issues can prevent further damage and ensure the longevity of your paint job.
- Consider using touch-up paint to address minor scratches or scuffs. This can help maintain the overall appearance of your walls.
- Protect your walls from excessive moisture by using proper ventilation in areas prone to high humidity, such as bathrooms or kitchens.
Fixing Imperfections
Even with the best care, imperfections can sometimes occur in painted surfaces. Fortunately, there are several methods you can use to fix these issues:
- If you notice a small chip or crack in the paint, use a putty knife to gently scrape away any loose or peeling paint. Apply a thin layer of spackling compound to fill the imperfection, and once dry, sand it smooth.
- For larger areas of damaged paint, you may need to remove the paint entirely. Use a paint scraper or sandpaper to strip away the old paint, then apply a new coat of primer and paint to the affected area.
- When dealing with stubborn stains, try using a mild detergent or a mixture of baking soda and water. Apply the solution to the stained area, gently scrub, and rinse thoroughly.
- If you’re unsure about how to tackle a specific repair, consult a professional painter or handyman for guidance.
By following these long-term care tips and knowing how to fix imperfections, you can ensure that your painted surfaces remain in excellent condition. With a little effort, you can enjoy the beauty of your paint job for years to come.

Credit: m.youtube.com
Frequently Asked Questions
Can You Put Drywall Mud Over A Painted Surface?
Yes, you can apply drywall mud over a painted surface with proper preparation and primer.
Does Drywall Mud Soak Up Paint?
Drywall mud does not soak up paint. It is designed to create a smooth surface for painting. The mud is applied to fill in gaps and smooth out imperfections in the drywall. Once it dries, it forms a solid surface that can be painted without any issues.
Will Joint Compound Stick To Painted Wood?
Yes, joint compound can stick to painted wood, but it is important to prepare the surface properly before application. The painted wood should be clean and sanded lightly to create a rough surface for better adhesion. It is also recommended to use a primer before applying joint compound to ensure a strong bond.
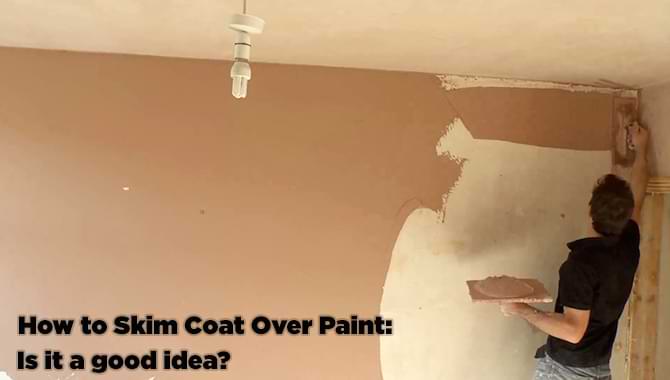
Can I Skim Coat Over Paint?
Yes, you can skim coat over paint to create a smooth surface for repainting. Sanding the paint before applying the skim coat will help the new layer adhere better. It’s important to clean and prime the surface before skimming to ensure a successful result.
Conclusion
To conclude, the question of whether you can mud over paint has a definitive answer. It is possible to mud over paint, but it requires proper preparation and technique to ensure a smooth and long-lasting finish. It is important to clean and prime the surface before applying mud, and to use the right tools and materials.
By following these guidelines, you can achieve a successful mud-over-paint project and save time and money on a full repaint. Remember to always consult with a professional if you are unsure about any aspect of the process.